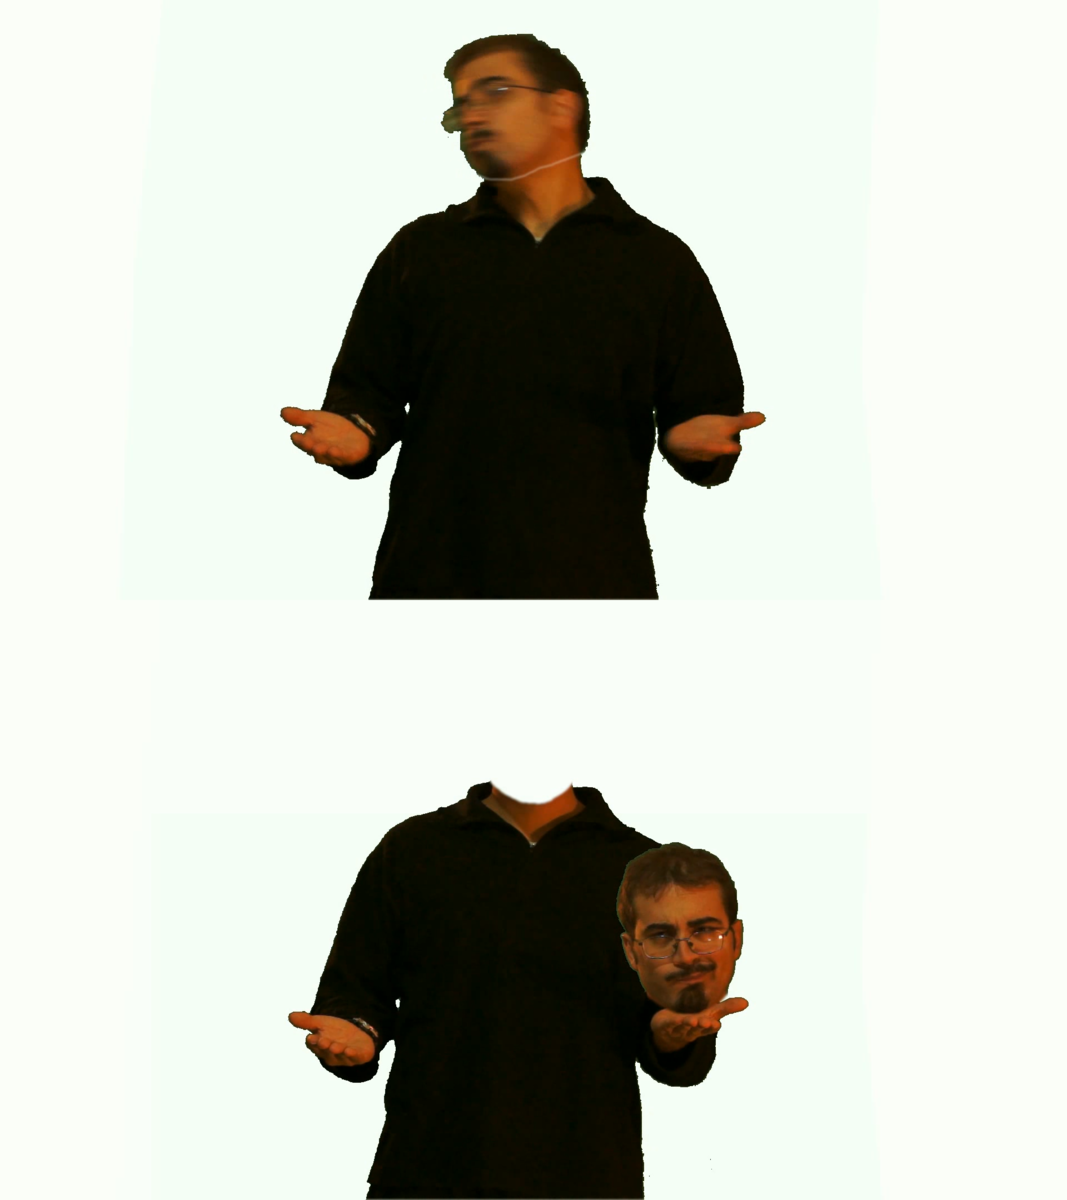
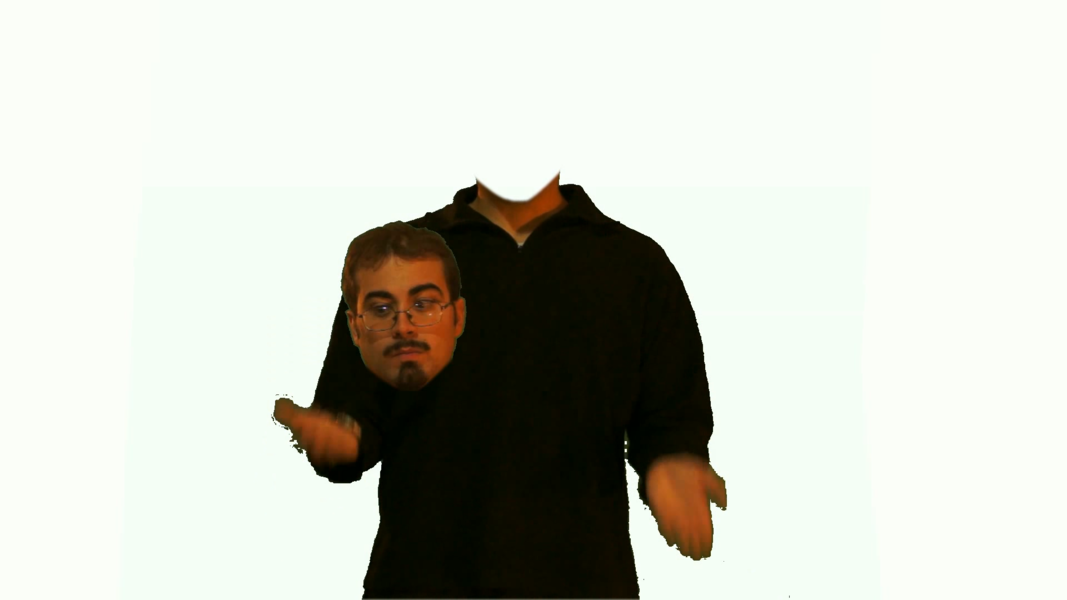
What do Julie Andrews and Piero Angela have in common? The fact of having appeared in imaginary worlds, created by designers. How? Thanks to an effect called chroma key, which allows you to delete the background. Let’s see how to make it happen in Kdenlive.
Since the beginning of the cinema, the directors have tried to create extraordinary environments in which to insert the actors. For example, make them walk inside a painting. Shooting the video with an actor pretending to be in a particular world was not difficult. The problem was to make the background disappear and replace it with a drawn one. The solution initially found for black and white films was rather ingenious: it was enough to shoot the subject on a black background, as dark as possible (which is not difficult to do considering that you always worked with very closed aperture). As we know, in fact, in negative films the black color appears transparent. This means that a black background would not have been seen automatically, and the film could have been superimposed on another containing the hand-drawn background. The advent of color complicated things a little, but the basic technique remained similar: just think of Julie Andrews dancing in a painting with Dick Van Dyke and penguins in the film Mary Poppins. Today, with digital editing and VFX, things have changed: the cameras work directly in the positive, and each color is recorded as such, therefore the background always appears in the movies. But it is possible to let the computer understand which part of the movie should be kept and which part is hidden. The trick that is used is the following: the actor is played in a monochromatic environment, usually blue or bright green in order to have a good contrast with the actor himself. Then the computer is asked to make the background color transparent: this is how Piero Angela was able to climb the vocal cords and walk in the lungs in the television broadcast “The wonderful machine”, dedicated to the human body, or float in a spaceship in “Journey into the cosmos”. Of course there is a problem: the actor must not wear clothes of the same color as the background, otherwise he would end up disappearing. This can also be a desired thing: to make an actor’s arm disappear, just cover it with a colored cloth as the background. In this article we offer you a very simple example: an actor juggles with his own head. We will use the chroma key to make the background disappear and replace it with a uniform white tint, as is done in some advertisements or in any case when you want to focus the audience on the actor. We could also have used the chroma key to make the head disappear (putting on a green hood) or the neck (with a sort of green scarf) but we preferred to use rotoscoping so we didn’t have to make two different movies, one of the headless body and one of the bodyless head, which would have been difficult to synchronize and overlap. In fact, one can think of the chroma key (or “Blue screen”, as Kdenlive calls it for a translation error) as a sort of automatic rotoscoping. In fact, the result is the same: both are used to make part of the film transparent. The fact is that rotoscoping is extremely precise, and allows you to get exactly what we want. The chroma key, on the other hand, is very fast: it takes a few seconds to perform a good chroma key, but the precision is often not excellent. You can find the example video at the following address: http://www.youtube.com/watch?v=3O7KmqT-01E
Reduce errors
As we mentioned, the chroma key by definition is not a very precise method. In fact, even in the most professional chroma keys you can always notice some pixels out of place, observing every single frame. The question is very complicated with regards to hair: not having a clean outline, they risk giving a bad result. We recommend using the three light system to illuminate the subject (a diffuse ambient light, one placed in front of the side for the subject, and a back light to detach the subject from the background): normally it makes things simpler. Kdenlive’s chroma key works pretty well, and for most things it’s fine, but if you want something more refined you can use Blender’s compositor. This is especially recommended if you want to use a resolution higher than 1080 vertical dots.
One clip, two tracks
We will use the same video clip twice
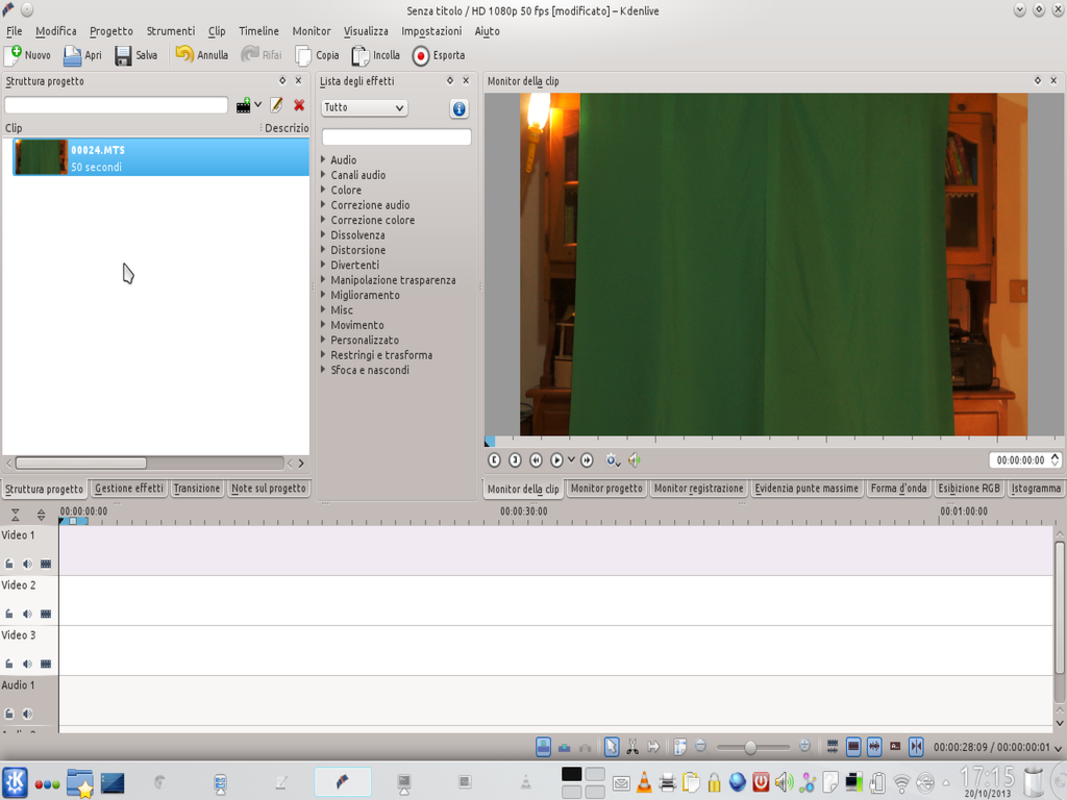 1 CE ONE IS ENOUGH – For our project, a single movie is sufficient in which the actor pretends to continuously pass a ball from one hand to another. We then load the clip into the project via the menu Project / Add clips .
 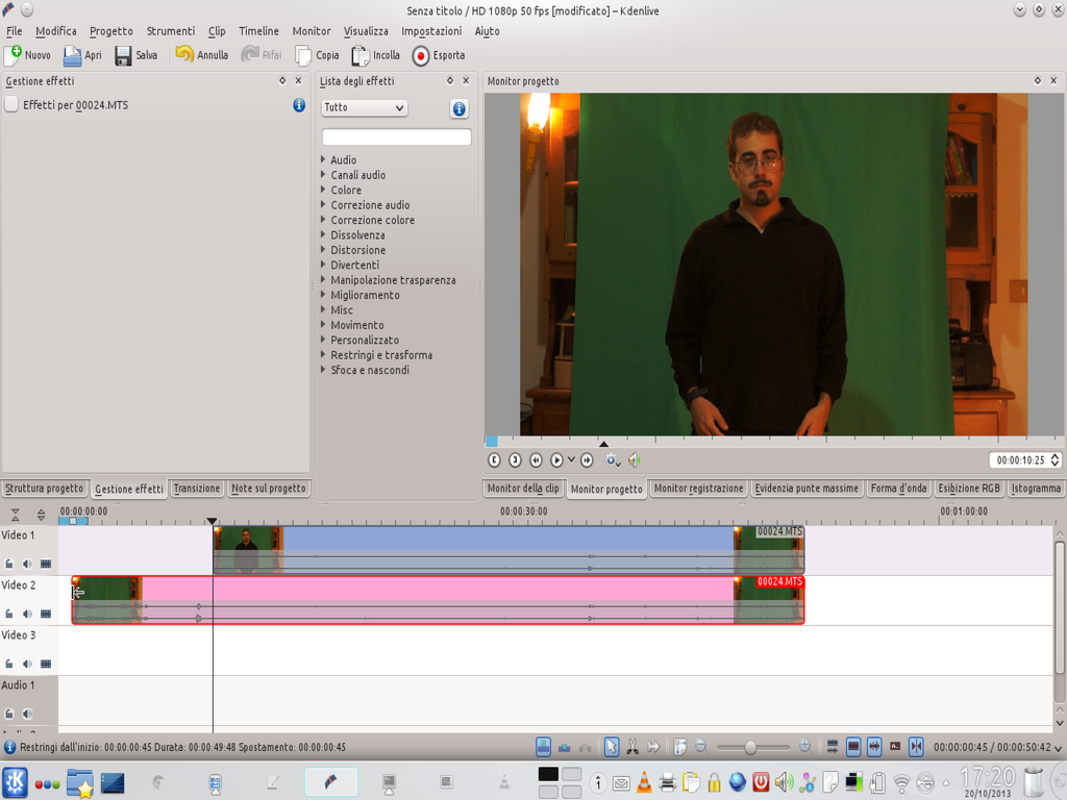 2 THE RIGHT CUT – The second step is to insert the clip into the tracks Video 1 is Video 2 by simply dragging it. The clip can be cut by dragging the left and right sides of the clip, to keep only the important part of the movie. The two clips must be identical.
 Every shade of green
We use multiple color keys until all the shades of the background are canceled
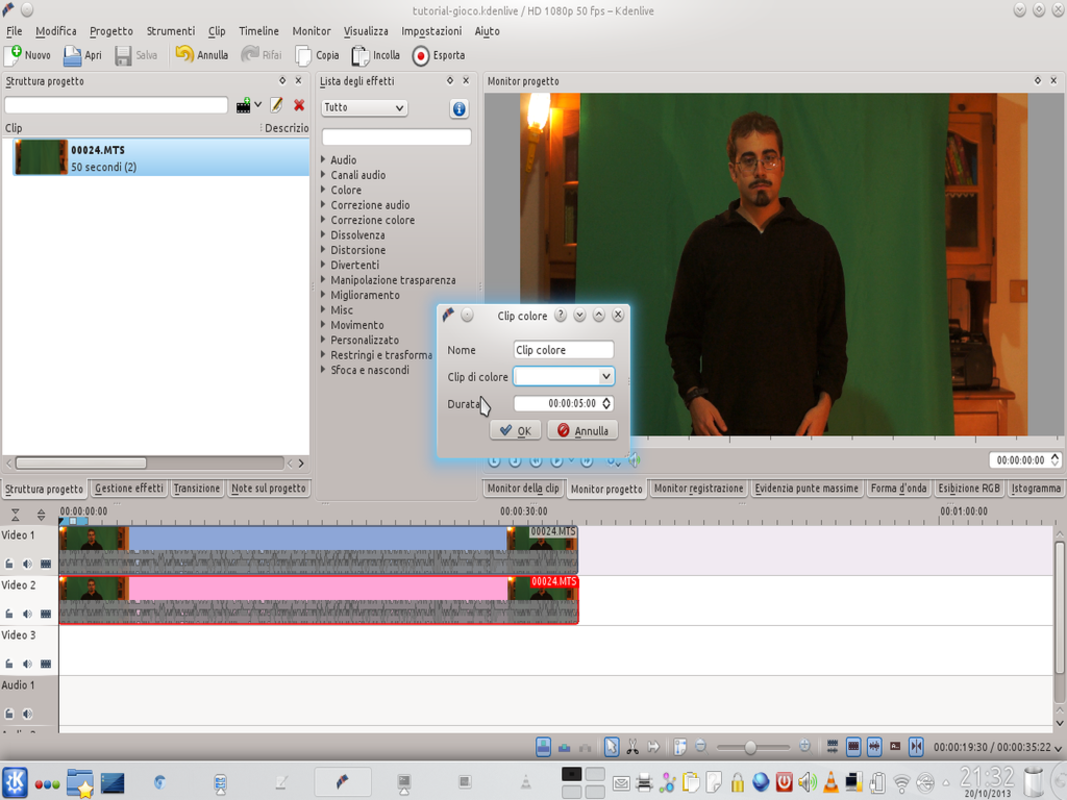 1 WHERE IS THE BACKGROUND? – We are about to make the background of our movie disappear: so we need another background that can be seen in place of the original. We can add a monochromatic one with the menu Project / Add color clip .
 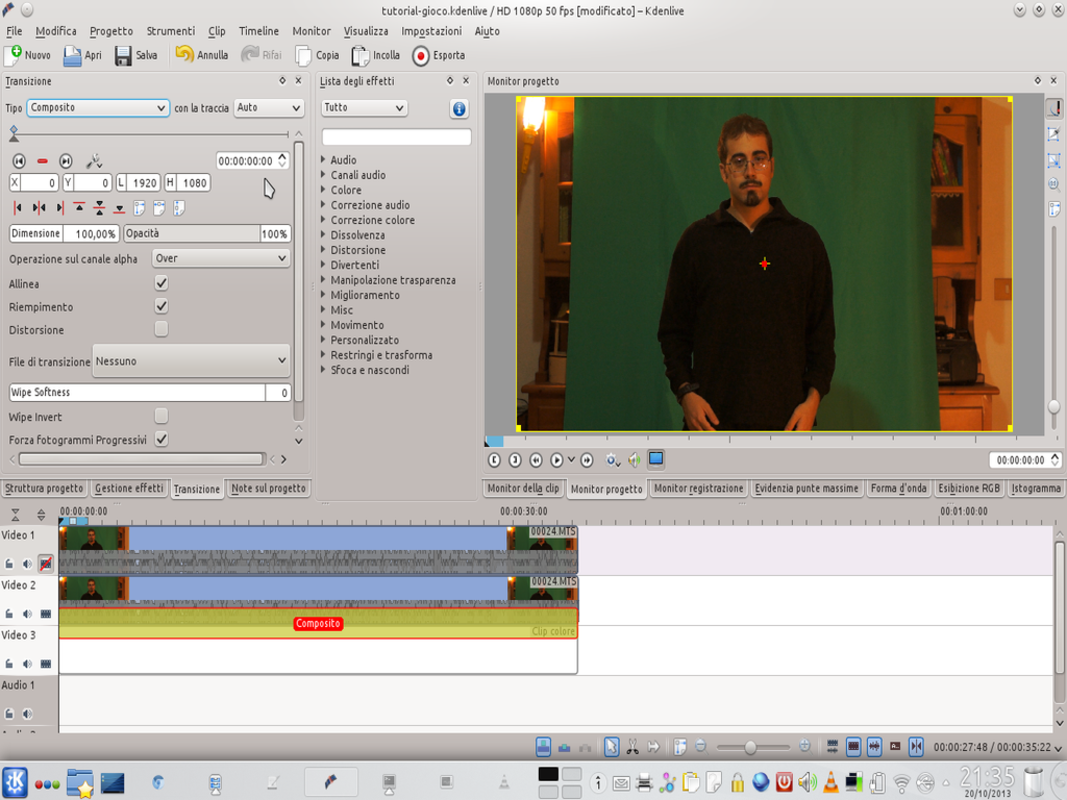 2 THE COMPOSITION – In order to see the effect of the chroma key, the clip must have a transition: we can add one by clicking on the lower left corner of the clip in the timeline. The transition must be of type composite .
 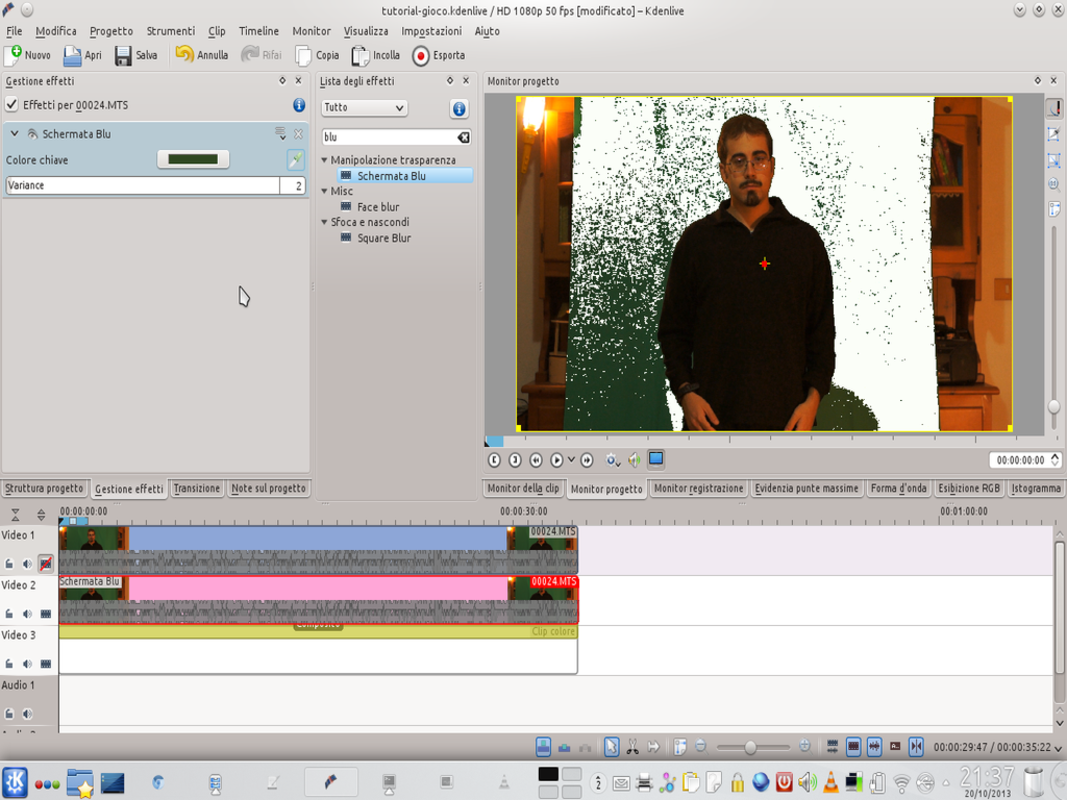 3 BLUE SCREEN – We are ready: we look for the effect in the list of effects Blue screen . We can drag it onto the track clip Video 2 and disable visibility of Video 1 . We use the dropper to choose the color to be erased, and set the Variance to a maximum of 4.
 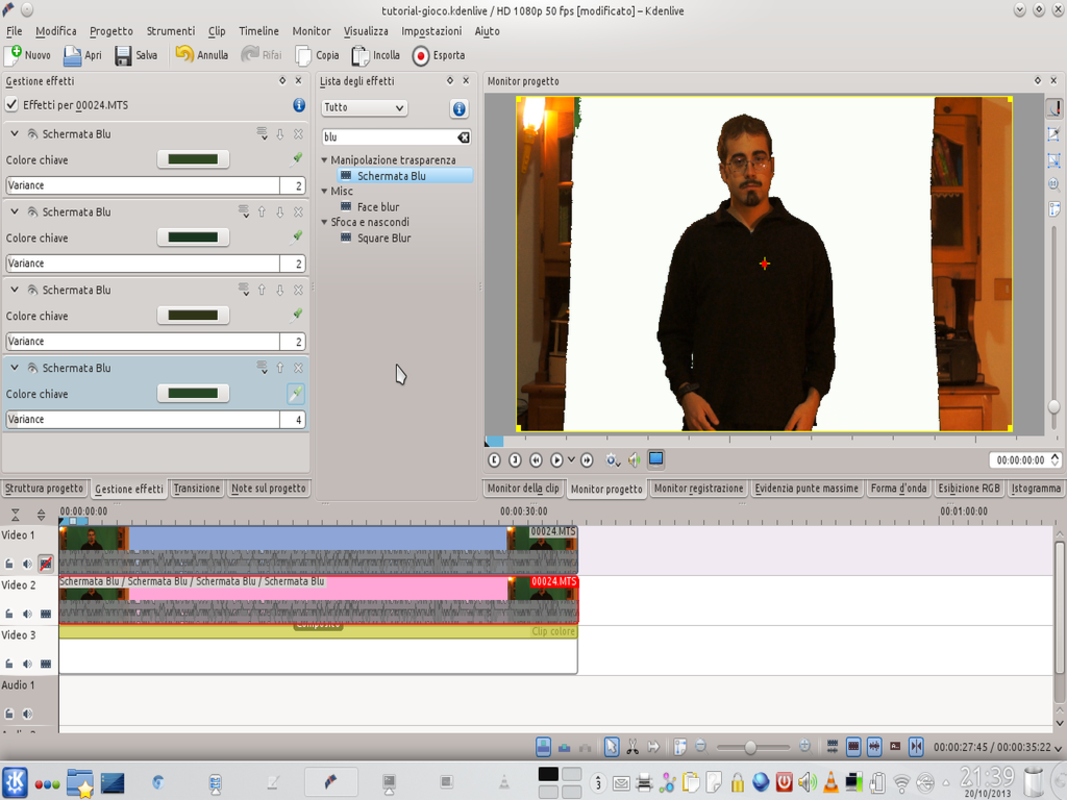 4 MORE CHROMA KEY– A single chroma key does not allow us to delete the entire background: just add another effect to the same clip Blue screen , until we have made everything necessary transparent. It is good to always keep the variance at low levels, to check the effect well.
 Let’s put our heads up
The chroma key must also be applied to the head track, together with the rotoscope
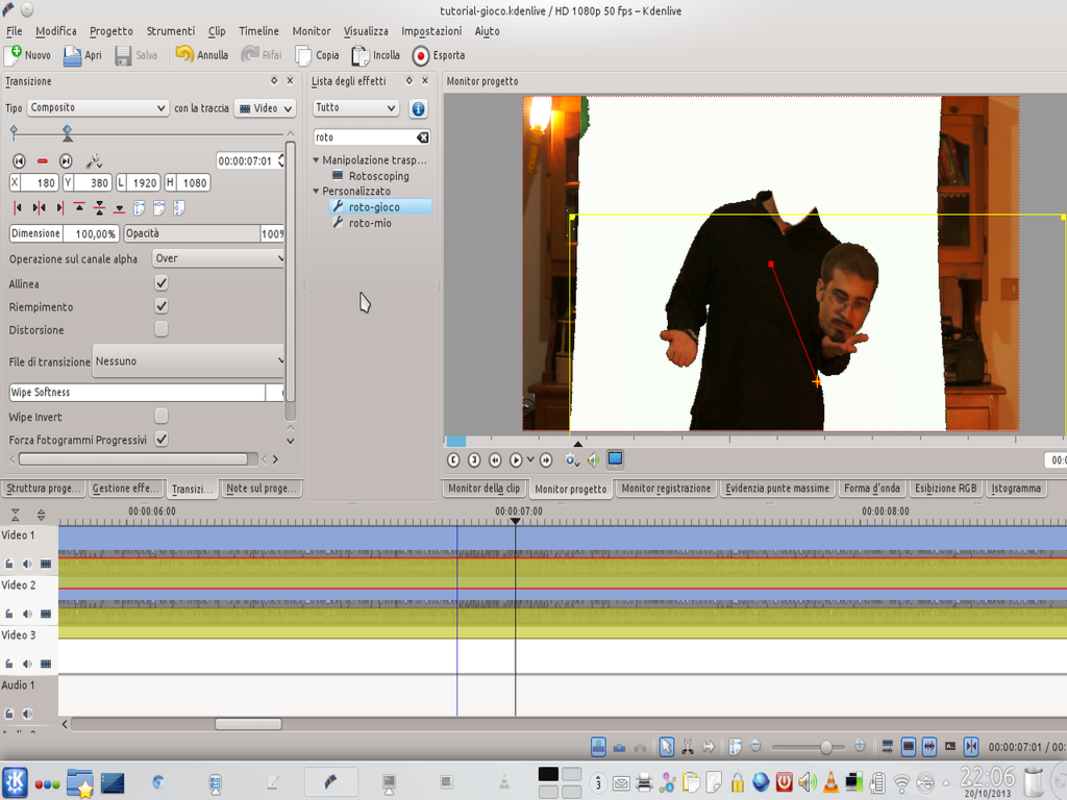
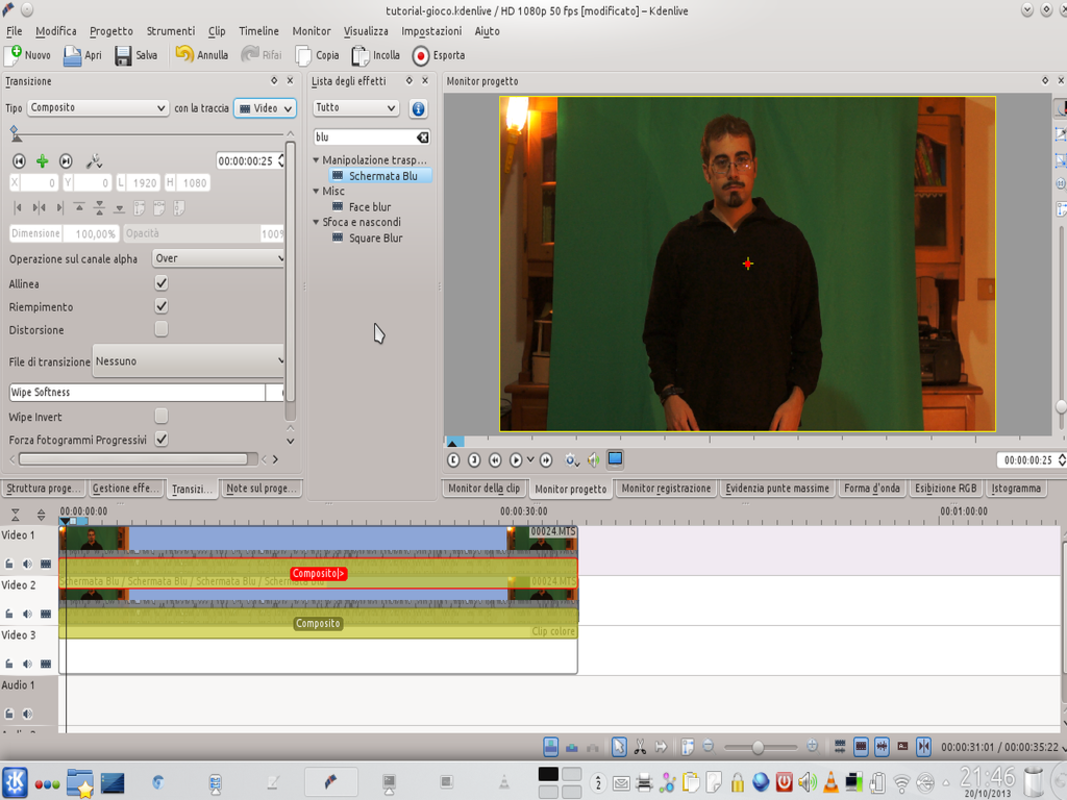 1 THE TRANSITION – Now let’s move on to the clip Video 1 . Let’s make it visible again and add a composite transition. The transition refers to the track Video 3 , that is the one in which we inserted the background.
 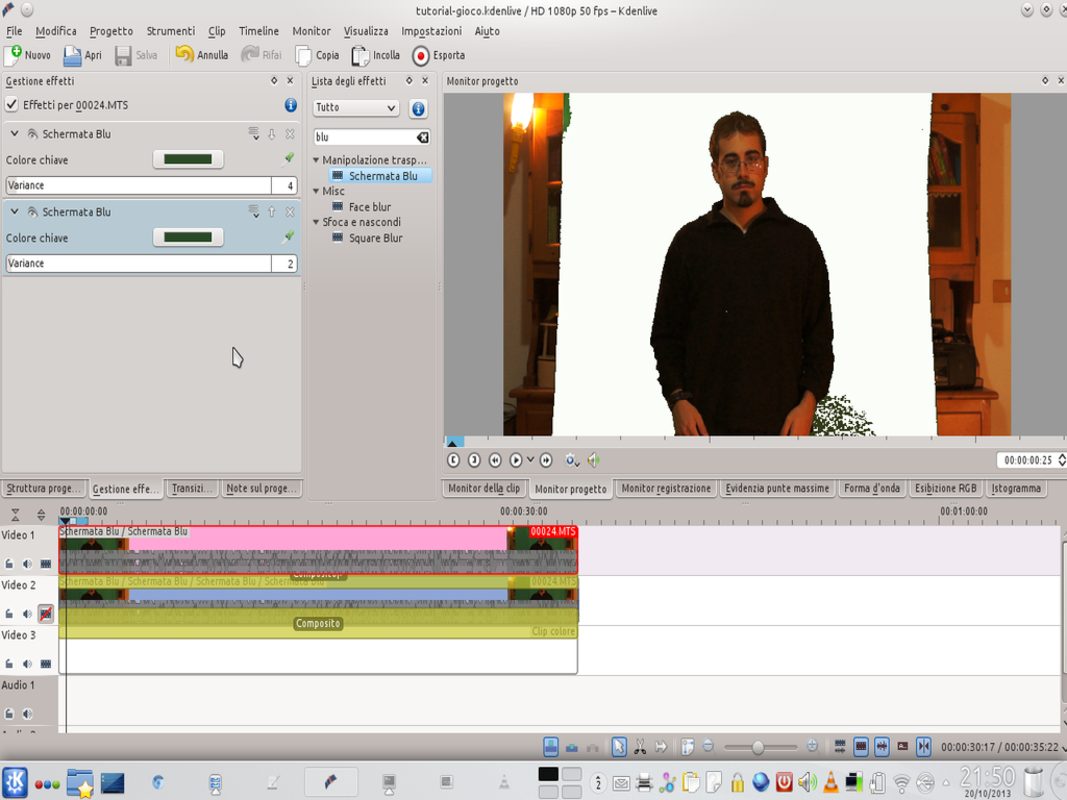 2 KEY COLOR – Also to this clip we have to apply the chroma key: this time, however, we are mainly interested in the area close to the face, so even if the rest of the image is not perfect it is not a problem. Two chroma keys should therefore suffice.
 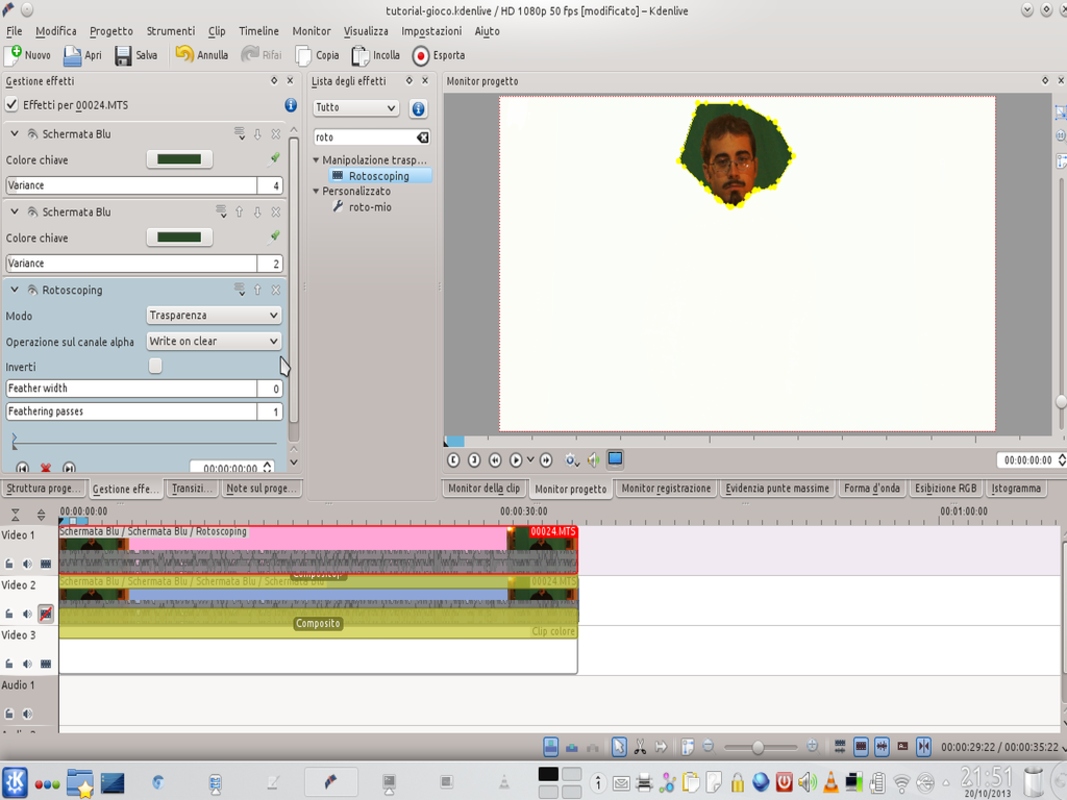 3 AND ROTOSCOPING – To trim the head, the effect is needed rotoscoping : we apply it to the clip of Video 1 and draw the outline of the head. It is important that the bottom side is traced faithfully, while the other part of the outline can be larger than necessary.
 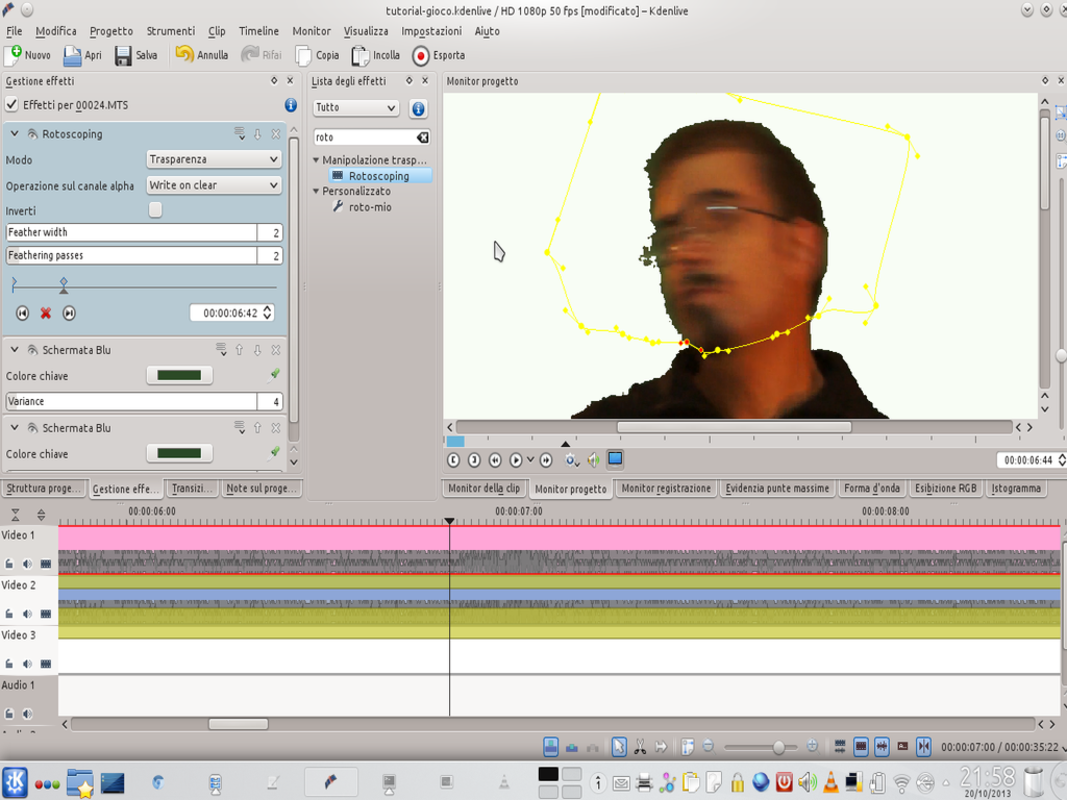 4 GOES TO ITS PLACE – Let’s move the effect rotoscoping at the top of the effects list Video 1 . In this way the chroma keys will be under it, and we will see that in this case too the background will automatically disappear. Feather width is passes must be set to 2 .
 A good juggler
We use the composite transition keyframes to make the actor’s head fly
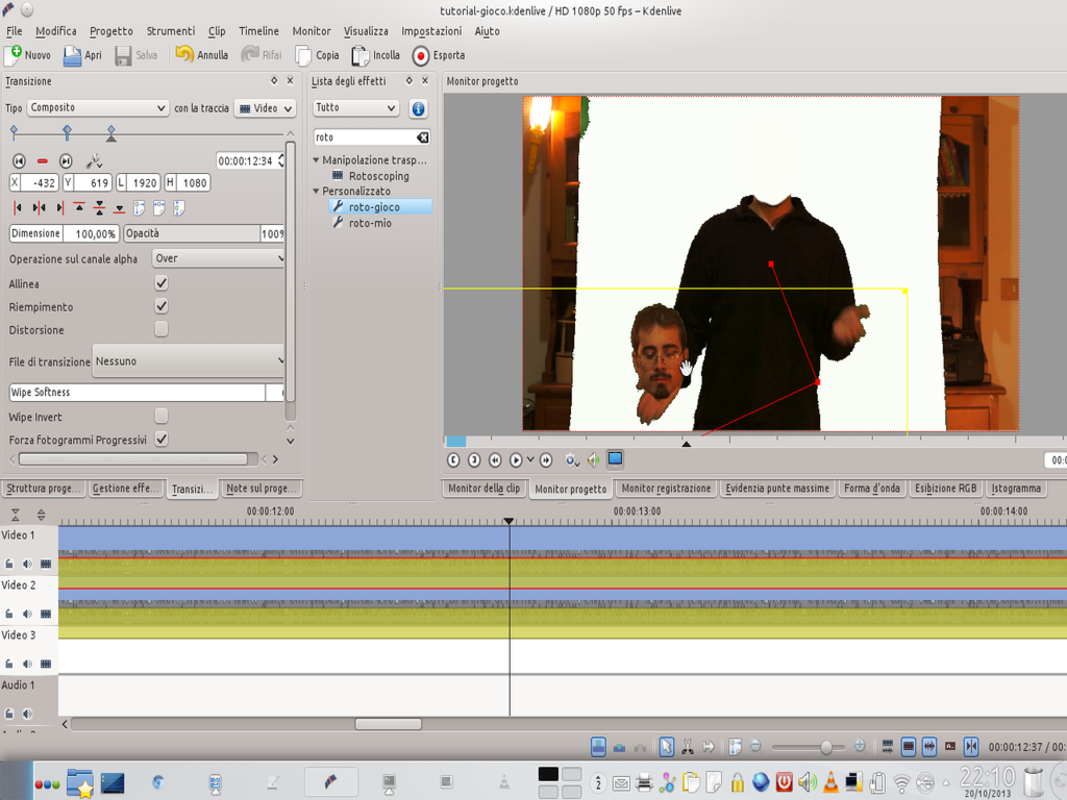
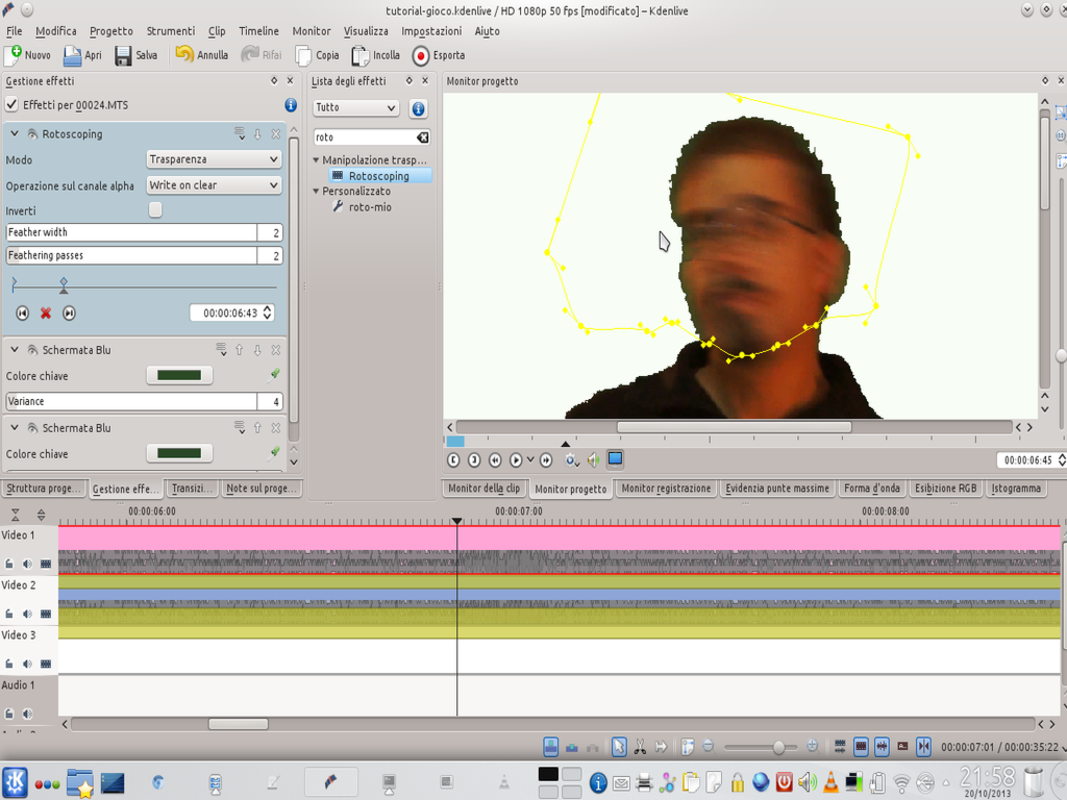 1 A KEY FRAME – After tracing the outline of the actor’s face for the first frame, it is necessary to proceed for the duration of the clip by setting new key frames where necessary. In some cases, even frame by frame.
 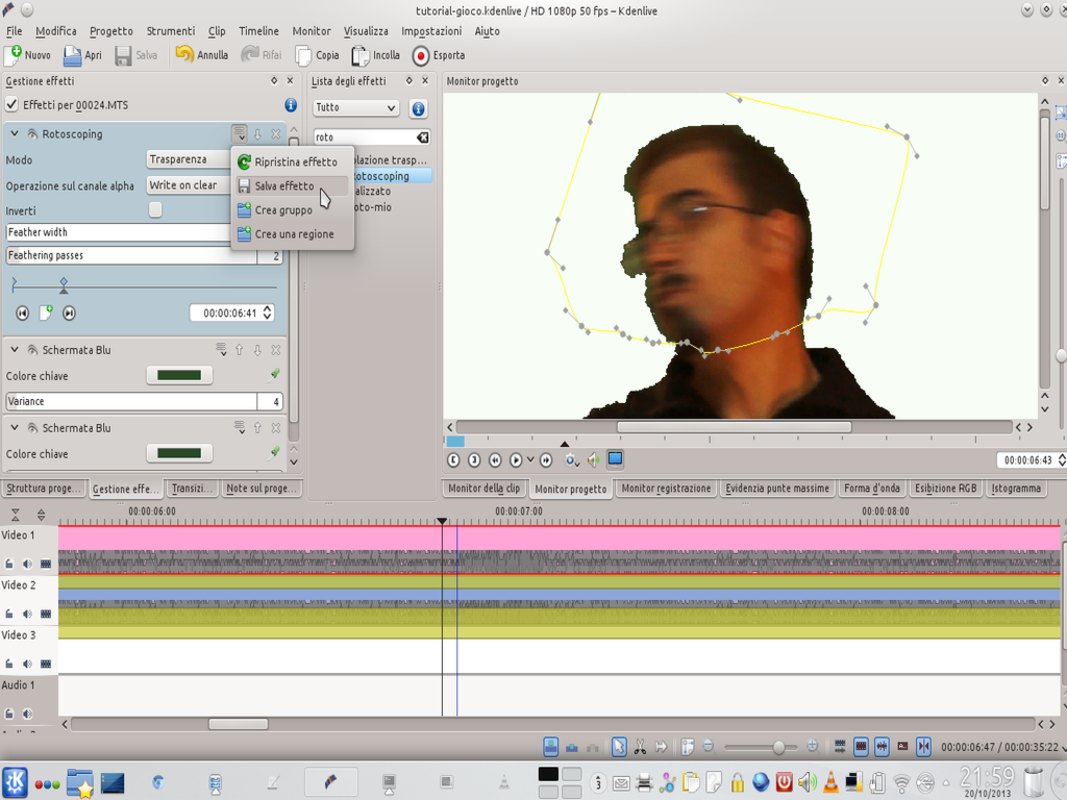 2 COPY AND PASTE – When the whole clip is correctly masked with rotoscoping, we can save the effect by clicking on the third button from the right in the rotoscope options tab and choosing Save effect . This allows us to reuse the effect.
 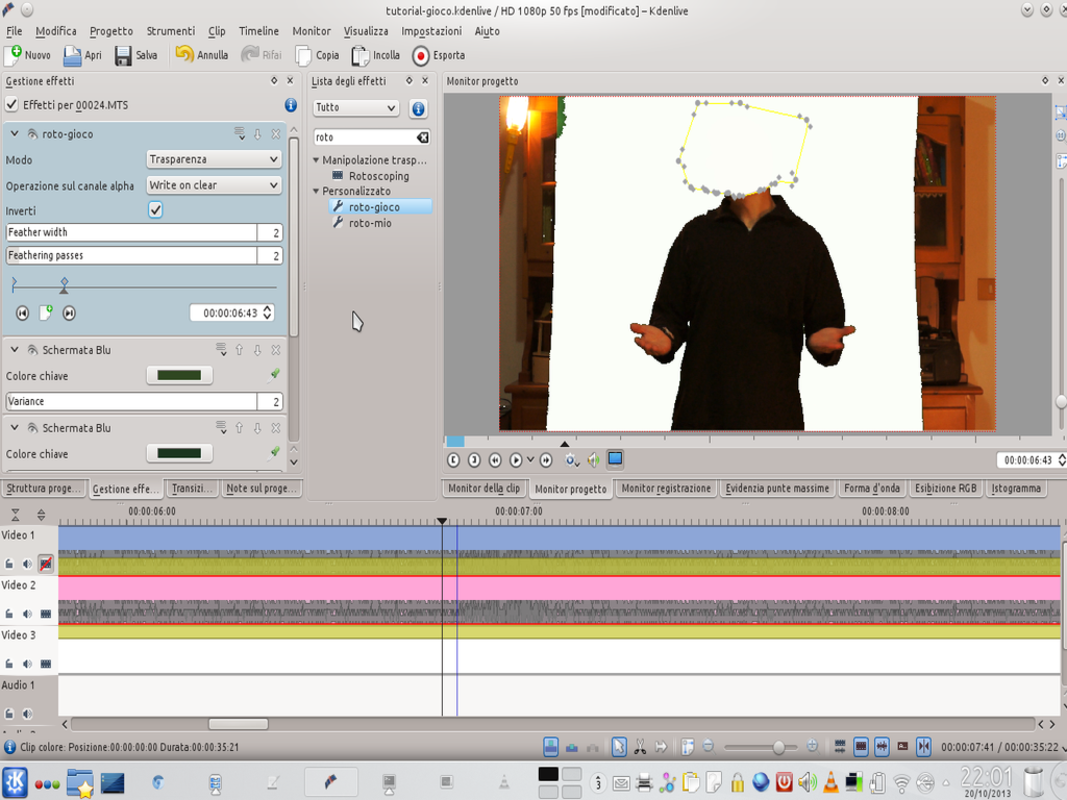 3 INVERTED EFFECT – Now let’s go to work on the clip Video 2 . Here we drag the rotoscoping effect that we saved (in our example it is called roto-game ). Let’s move the effect over to the chroma keys and tick the box reversed to make the head disappear.
 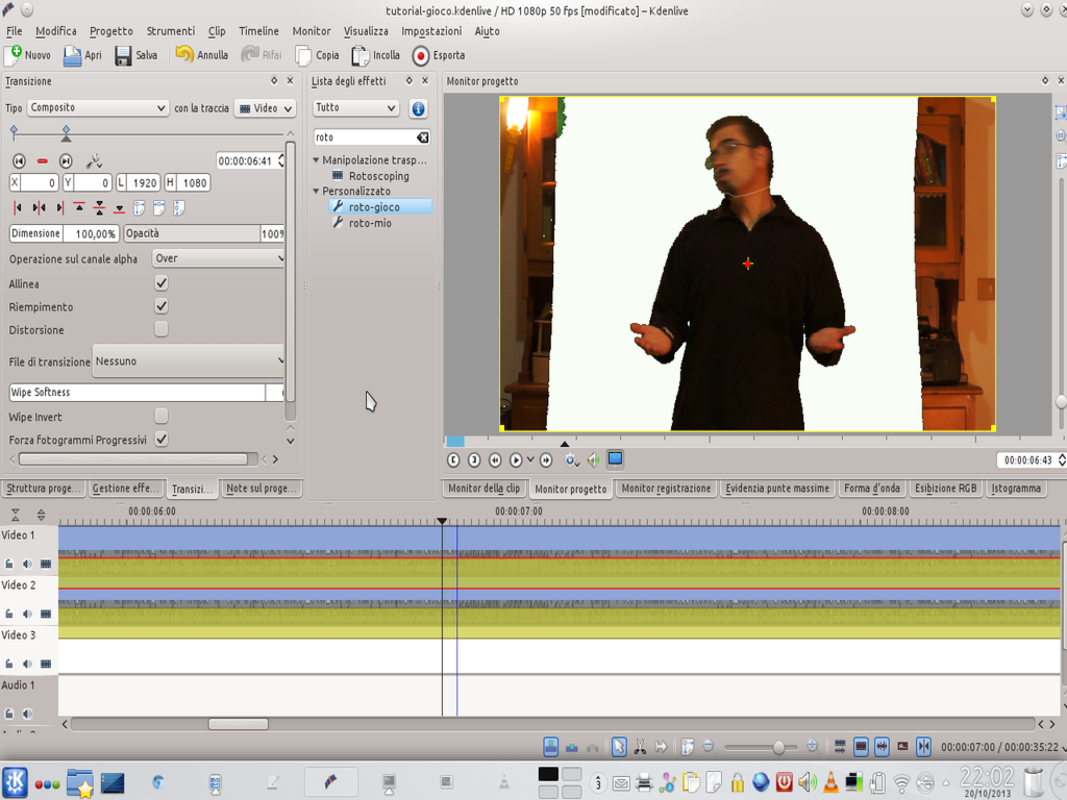 4 THE COMPOSITION – To move the head, you need to use the transition Composite of the clip of Video 1 . Let’s move on to the frame where the head must begin to move and create a new frame.