Can an actor be kicked from one part of a room to another without being Chuck Norris and without really causing serious injury to the “victim”? Of course, just mix the GIMP photo editing with the Kdenlive editor, and you’re done.
In movies it is quite easy to make fighting scenes. At least from the editing point of view: it is complicated for the actors, who normally have to learn a real choreography, so that they can repeat the same movements every time the camera takes them from a different angle. For the rest, no special effects are needed: when an actor is hit, he falls, and just film his movement. This applies in “normal” conditions. What if, on the other hand, we want the actor hit rather than falling to be blown across the room? It is a typical effect of karate films, in which you want to demonstrate the attacker’s strength. What happens, normally, is that one of the two actors hits the other: this flies (i.e. it is suspended from the ground) up to the wall placed in the direction of the shot, while the camera follows its movement. The first step is done: we have analyzed the effect we want to achieve. It is therefore immediately evident that the problem lies in being able to fly the actor who suffers the blow. But there is a detail: just because the punch (or the kick) was very violent, the flight movement lasts less than a second: twenty frames at most. Then we can simplify everything using photographs: ten or twenty in sequence are enough and the effect is built. In particular, what we can do is to fix the camera (or camera) on a tripod. You choose the first shot and film where one of the actors hits the other. At this point the recording stops, the camera is moved slightly in the direction in which the victim will have to fly, a high enough stool is positioned in the scene and a photo is taken with the actor-victim on the stool pretending to have been hit. Then you remove the stool from the scene and take another image without moving the camera. In this way we obtained two images with the identical background: the only difference is that in one there is the actor sitting on the stool. Now we can move the camera again in the same direction, place the actor again on the stool but this time a little closer to the wall on which he will have to crash, and take two more images (always one with the actor and one only with the background). Eventually we will get a sequence of images which, seen one after the other, give the illusion of the actor’s movement. We also took photographs to the background because in this way we will be able to superimpose the pairs of photos created in order to cancel the stool, making visible what is behind it. In this way the actor will seem suspended in the air. To complete the effect, just hold the camera fixed in the position of the last photo taken, and film the actor who performs a jump backwards so as to slam his back against the wall and fall to the ground. By combining the first movie, the sequence of images, and the last movie, we will obtain a perfect rapid flight. You can find the example video at the following address: http://www.youtube.com/watch?v=jcawWs_oAzQ
 Different frames that make up the actor’s “flight”
 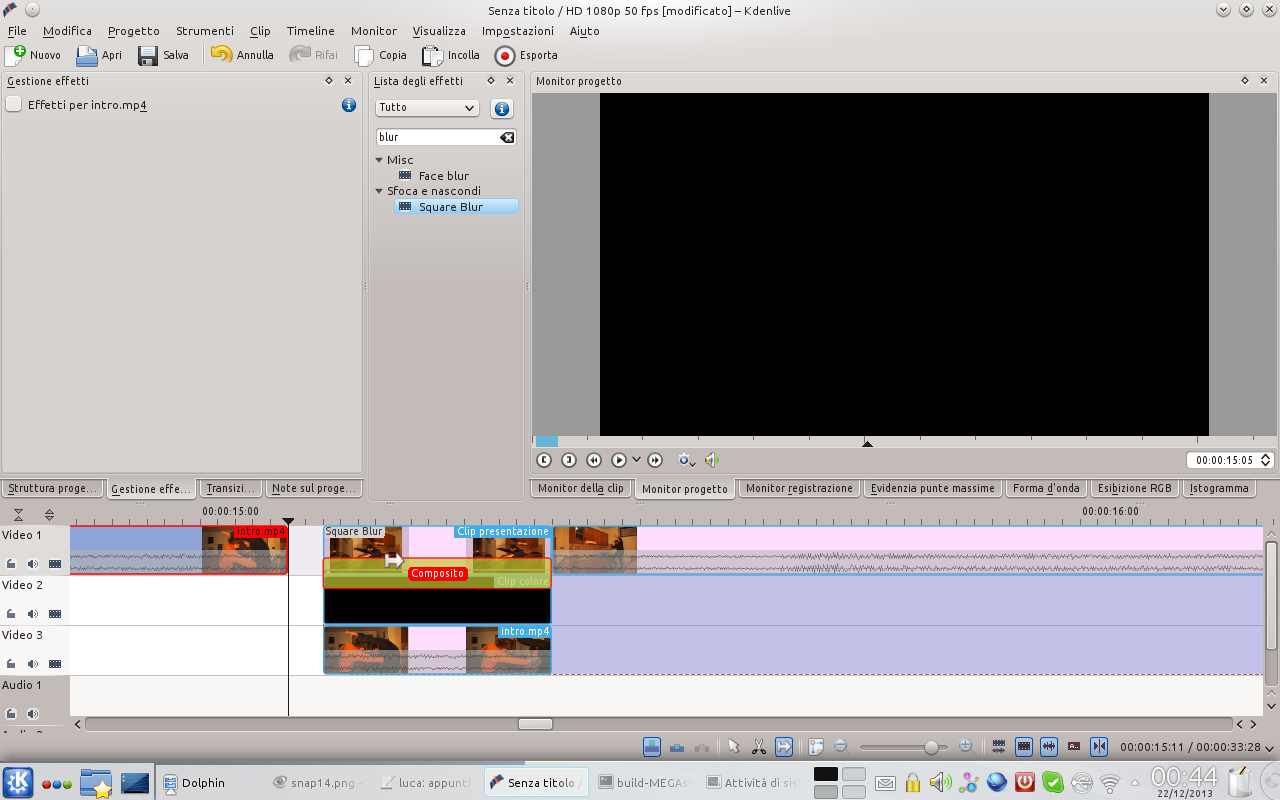 An entire group of clips can be moved
 Shooting angles, wide angle, and cuts
There is no “right” way to shoot the fist sequence: we propose that you start with a shot of the actors from the side, and then simply rotate the camera in the direction of the actor-victim’s flight. This movement, combined with a wide angle lens, will provide a good image distortion effect, which will improve the rendering of the effect. Another very important question is that of the cuts: in an action film in general, and in the fighting scenes in particular, it is very important that the times are always very fast. In practice, the actions must follow one another without interruption, otherwise the tension drops and the effect does not perform well. So, in doubt, it is better to cut the videos a little more, stopping a few handfuls of frames earlier, rather than risk having a too slow passage from the punch sequence to the flight sequence, and from the flight sequence to the fall one. along the wall.
Two shots for one frame
We prepare the pair of photographs for their merger
 1 THE TWO PHOTOGRAPHS – Our work begins by uploading the two photographic shots in GIMP, in the same image but on different levels, that capture the scene with and without the actor. We can do this using the menu File / Open as Layers .
  2 IS IT TRANSPARENT? – The two images must be positioned on two different levels, so that the one with the actor is above the one with the background only. Click on each of the two levels, in the appropriate panel, with the right button and choose Add alpha channel .
 Let’s build the frame
It’s time to take the photograph that has never been taken
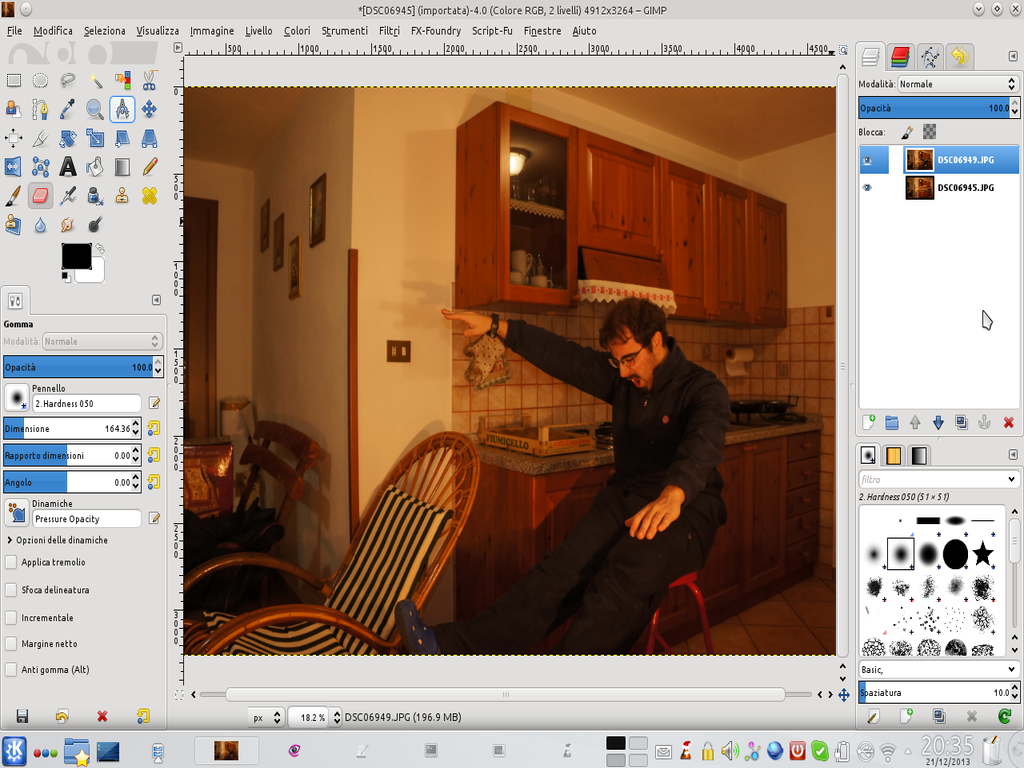
 1 STROKE OF RUBBER – Working on the upper level, we must make the stool on which the actor rests disappear, so that it appears to be suspended in the air. Just use the tool Rubber and erase the stool, making what appears on the lower level appear.
  2 TWO, ONE, AND TWO – Now we have to merge the two levels together into one: we can do it by clicking on the upper one and choosing the menu item Bottoms at the bottom . Next, we need to duplicate the newly created layer, choosing from the same menu Duplicate level .
  3 IS MOVING – Right now, we have two identical levels. Working on the upper one, we apply the movement effect from the menu Filters / Blur / Movement . We set the angle at 180° and the length to 100, more or less.
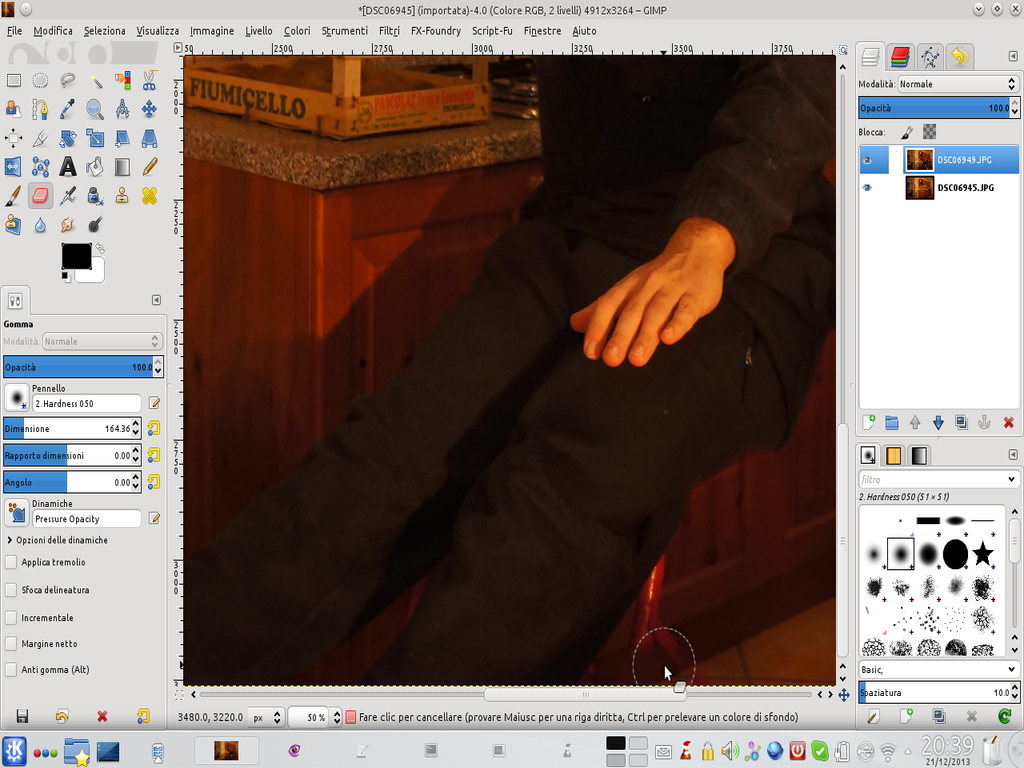
  4 STILL RUBBER – Now the whole image looks blurry. We must therefore bring the actor back into focus. Just delete with the Rubber (with soft edges) the part of the upper layer that covers the image of the actor present on the lower layer.
 From photos to videos in a couple of clicks
Kdenlive allows us to build a clip with the images made
 1 THE “REAL” MOVIES – After having prepared all the necessary frames with GIMP, we can start editing with Kdenlive. By opening the program, we can first load the video clips that we shot, and insert them in the timeline .
 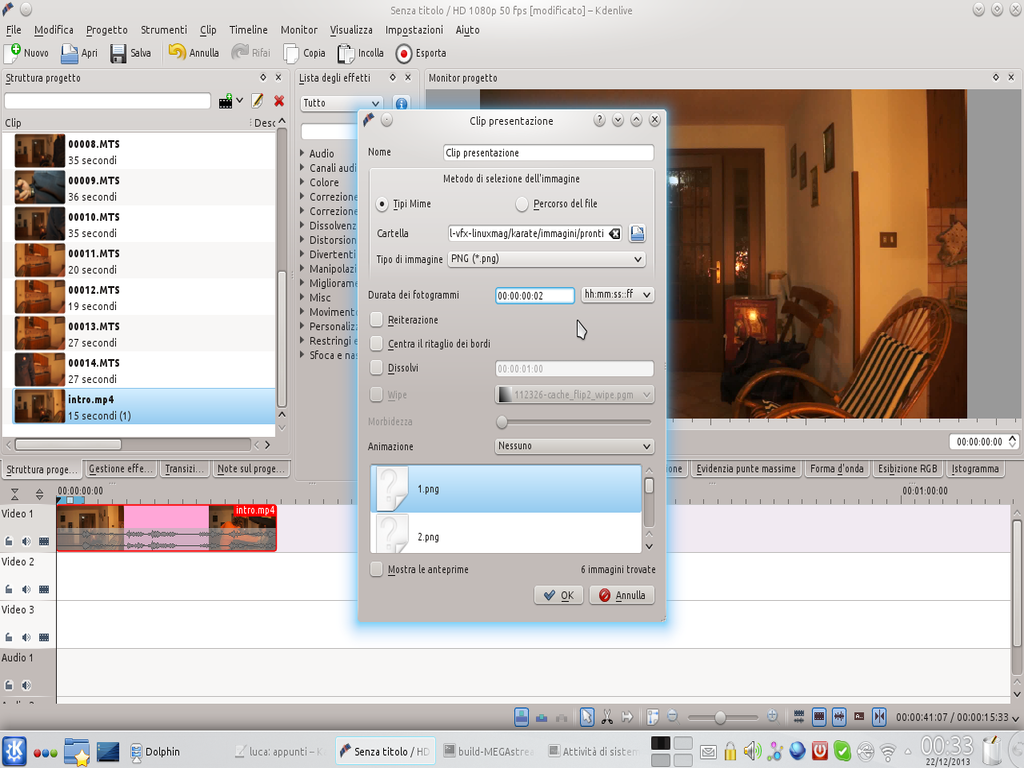 2 PRESENTATION – Immediately after the video of the fist, the sequence of images must be inserted. We can do it through the menu Project / Add presentation clip . We indicate to Kdenlive the folder containing the PNG images and a duration of 02 first courses for each frame.
  3 IN THE TIMELINE – As soon as the presentation clip is created, we can load it into the timeline. In its same time interval, but on the lower track, we insert a color clip ( Project / Add color clip ). We apply a transition to the presentation clip.
 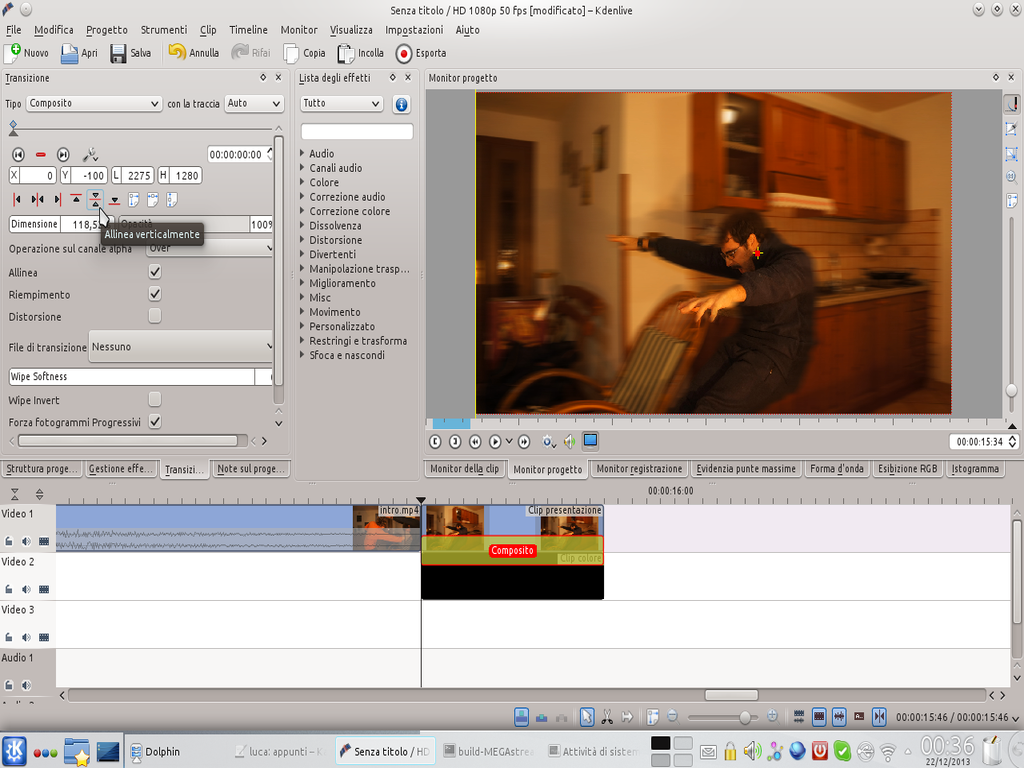 4 THE COMPOSITION – The transition of the presentation clip must be composite: in its settings and we must increase the size until it covers the entire screen (more or less 119% ). Then we press the button Vertically align .
 Every clip in the right place
To obtain a good effect, pay attention to the assembly
 1 AGAINST THE WALL – Immediately after the presentation clip, the film in which the actor slams his back against the wall must be inserted. Of course, the movie needs to be cut (tool Scissors ) so that its first frame is very similar to the last frame of the presentation clip.
  2 NO SILENCE – The presentation clip will last less than a second, but it has no sound, since it is not a movie. So we can insert in coincidence with it, but in a lower track, a segment of the initial clip, so as to cover the audio hole with background noises.
 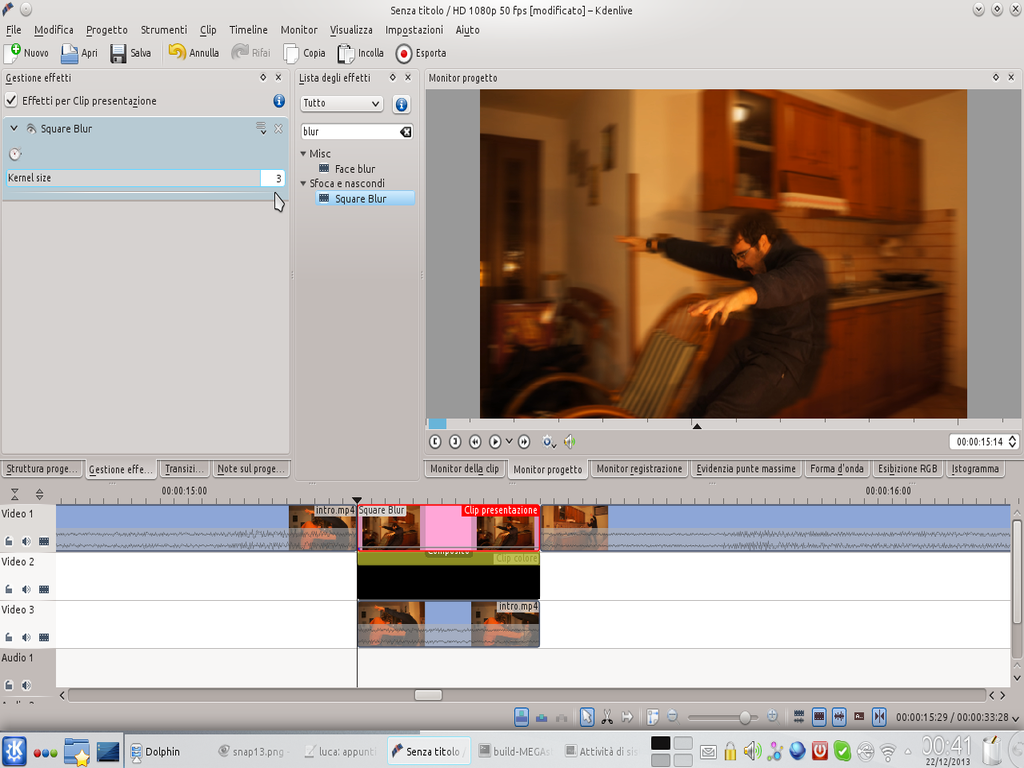 3 A LITTLE BLUR – It is possible that the images of the presentation clip appear too sharp for the speed they should have: we can therefore add a slight blur to the clip thanks to the effect Square blur , setting the Kernel less than 10 .
  4 STILL THE CUTS – The success of the effect lies in the speed of the sequence of movements and changes of view. So it is advisable to minimize the duration of the movie that precedes the presentation clip: to find the right times, it is necessary to watch the sequence several times.
 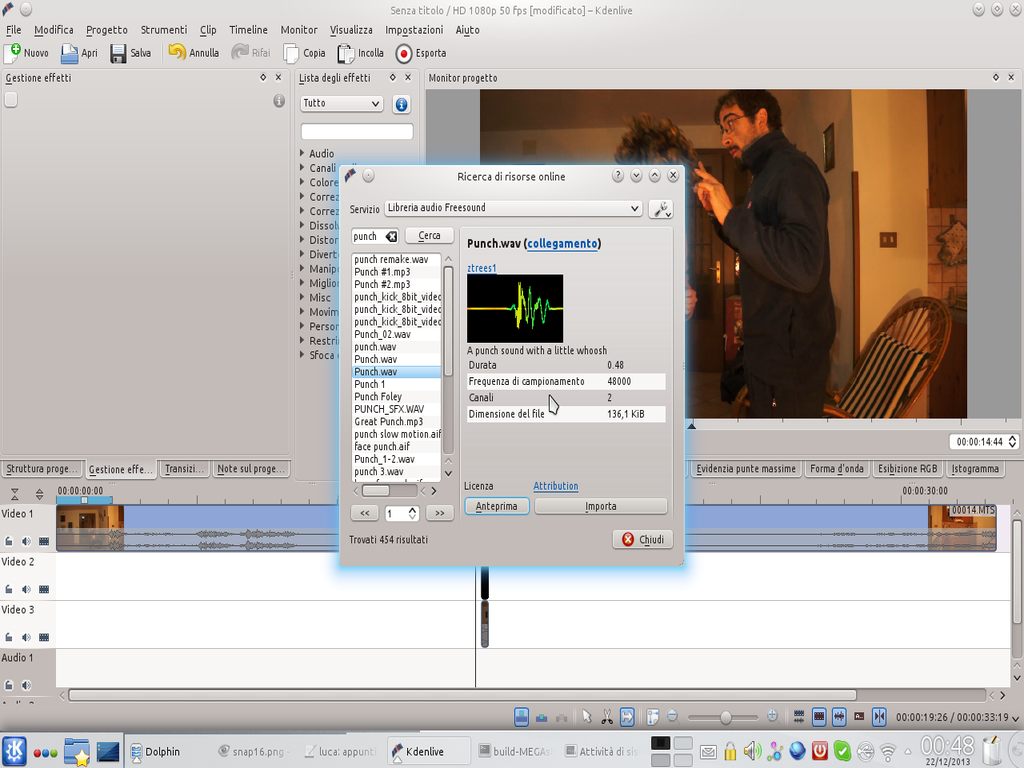 5 THE AUDIO EFFECT – To add veracity to the movie, you need to add an audio effect. The effects can be found thanks to the menu Project / Network Resources . The effects that interest us are part of the library Freesound .
 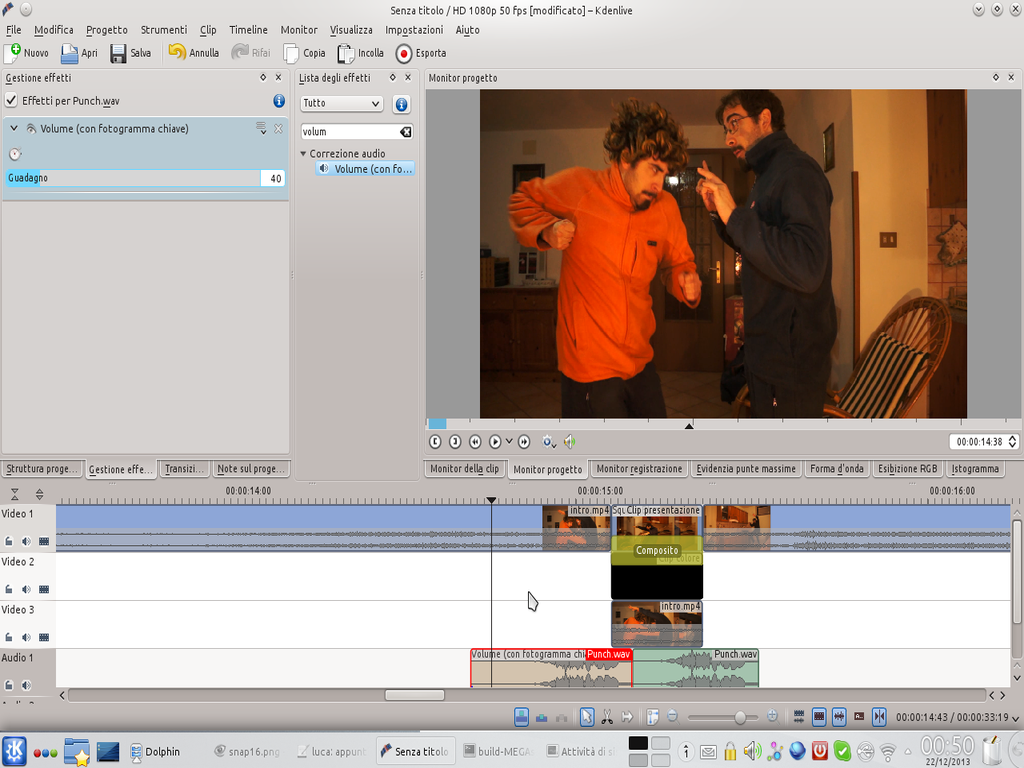 6 DOUBLE USE – We look for the word “punch” to get the punch sound effect. We can use the same effect both when the actor is hit and when he hits the wall. The effect is added to adjust the volume Volume in the audio clip.

