Let’s see how to use Blender’s camera mapping to transform a 2D photograph into a 3D scene to be included in our movies. It is a digital method to achieve what was once called matte painting, but at no cost and in a few tens of minutes.
Very often it happens to want to build landscapes to be included in our videos. However, creating a three-dimensional world is not very simple, especially if we want a truly realistic result. Instead, producing a photograph or drawing is fairly simple. Can we not build a three-dimensional model based on a photograph? Fortunately for us, yes. With Blender, in fact, we can “translate” a photograph into a very realistic three-dimensional scene. The camera mapping, as it is called the function of Blender that performs this task, is a digital version of the matte painting used since the dawn of film cinema. The basic idea is very simple: it is not necessary to build complete three-dimensional models, because the film is still two-dimensional. What is needed is only a series of panels with images painted in perspective. The matte painting, in fact, was made by placing glass plates in a laying theater, and each of the plates was painted with some components of the scene (the sky, the floor, the mountains, the walls of a building, trees, etc….). The logic is more or less the same as the painted backdrops that we see in the theatrical works, but with a fundamental difference: by moving the camera, you can change the perspective and, if the drawings have been made well, the final movie will give the illusion that the backdrops are real. For example, if we drew the sky, the trees, and a building on the same panel, as soon as the room was moved, we would notice the trick, because all the objects would appear flattened on the same plane. If, on the other hand, we place them on different panels, distant from each other, it is obvious that when the video camera is moved, the various objects will “move” differently, depending on their distance. This simple trick guarantees great realism, and easily deceives the eyes and brains of the spectators. A similar result could be obtained by building paper mache models but it would be much more expensive than drawing on glass plates and even less realistic than a photograph (which can instead be printed on the glass). With computer graphics we can achieve the same result without having to bother a glazier: thanks to Blender, in fact, we can easily build a 3D model of the scene we want to create, using only simple rectangles. Of course, our starting point will be an image (which of course can also be a photomontage, in order to reproduce a landscape that we cannot shoot with a camera). Thanks to GIMP we will divide the image into all possible plans. In practice, we simply have to create many files: in each of them we will insert only some objects of the original image, objects that are on the same plane. For example, we will create one file for the sky and another for the mountains, because these objects are evidently on different planes, in reality. If, however, there is a row of houses in the distance, we can insert them all in a single file, because from a distance they will still appear as a single block. Obviously, to get excellent results you need to pay attention to the details of the objects in the foreground. This method allows great results even in the case of drawings: in practice, it is also possible to build imaginary landscapes based on drawings instead of real photographs. What matters, in fact, is only having an image and being able to build a stylized version in three dimensions. As always, you can see the example video at the following address: https://www.youtube.com/watch?v=XvAr3TwbLfQ Take note that the following is just the first part of this tutorial: the second and last part is published here.
 Some of the plans extracted from the original photograph
 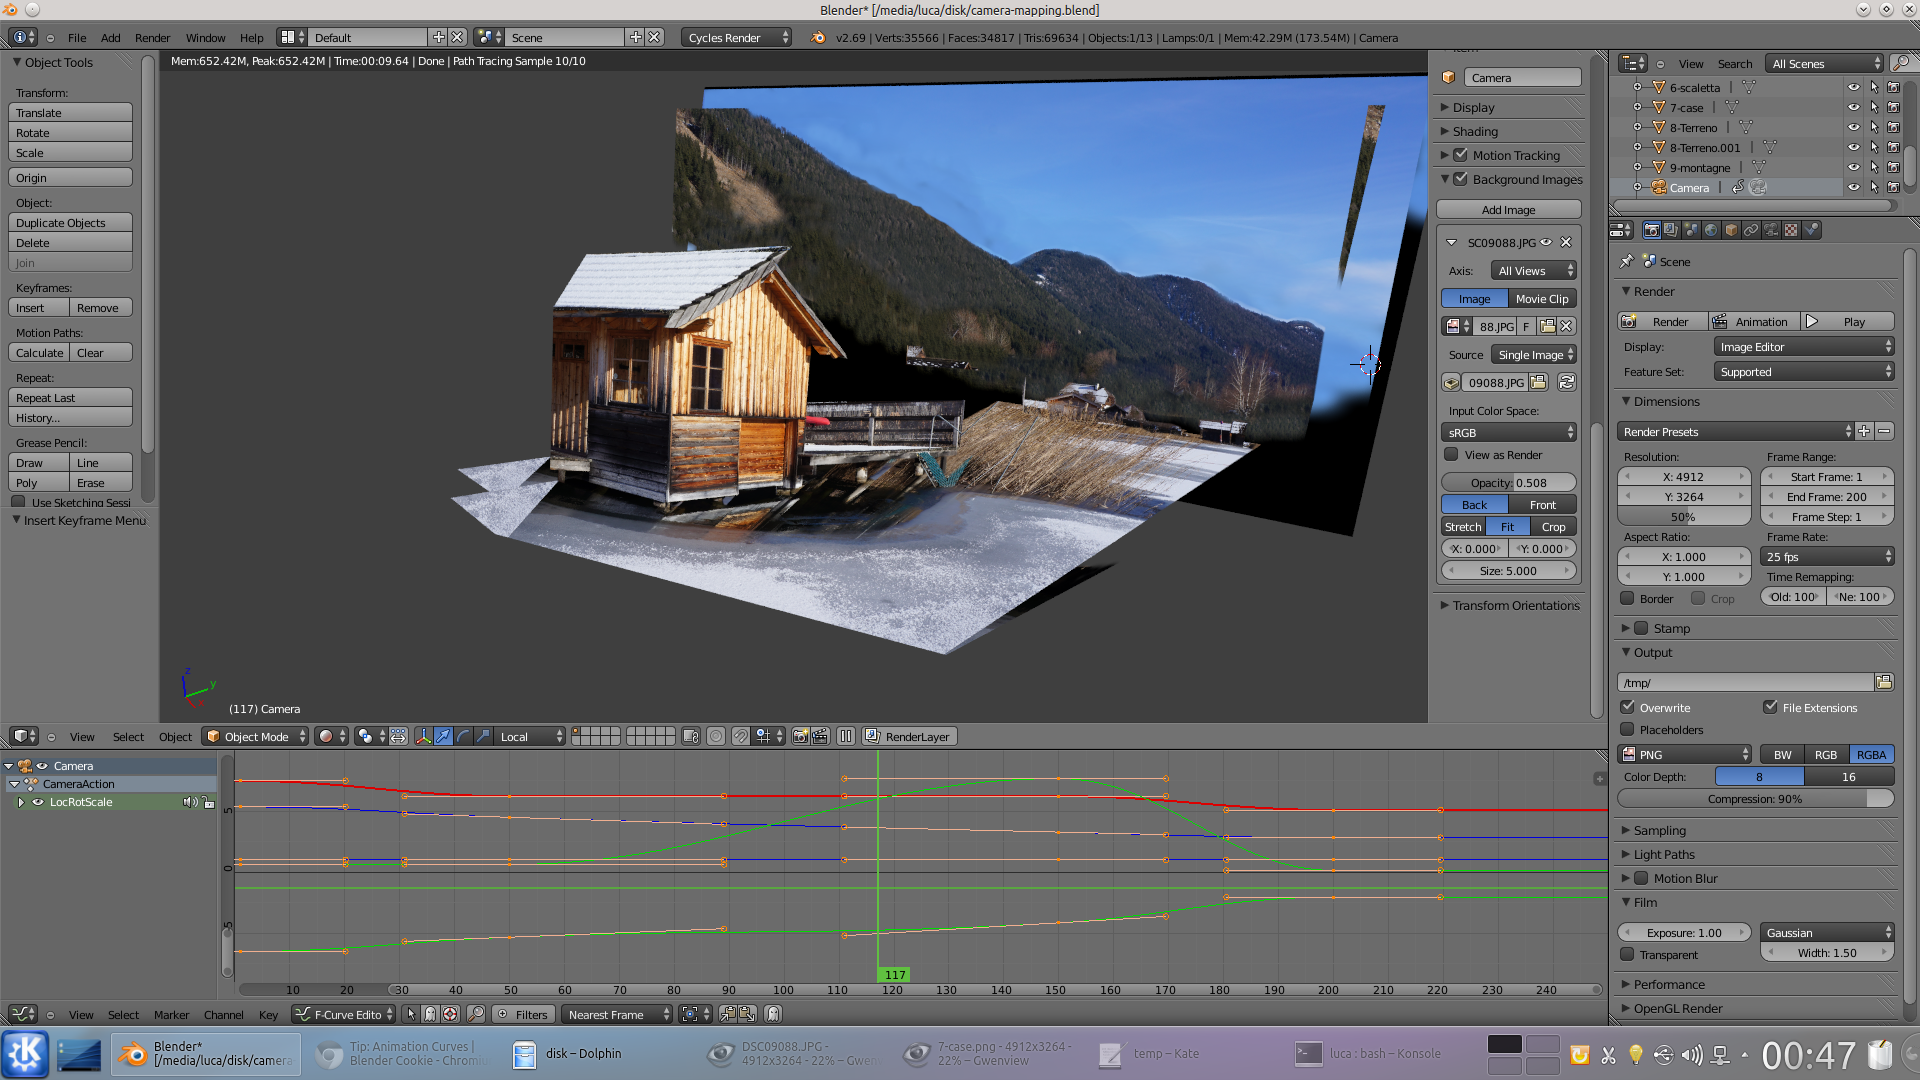 The 3D model we are going to build
 How to work with Blender
Fortunately, the beauty of the method we propose is that the 3D model that we build with the plans can be built quite fast: there is no need to reconstruct the scene in detail, nor is it necessary to accurately replicate the shapes. In fact, if we want to represent a tree, we just need to take a rectangle and place it vertically. It is not necessary to replicate the leaves and branches: these details will be represented by the camera mapping. All that matters is the position, rotation, and size of the rectangles. However, those who have never used Blender before may find it difficult to understand how to make these changes. First of all, it is important to note that in the toolbar at the bottom of the 3D view (the one with the View, Select, Object menus) there is a series of three buttons flanked on the right by a drop-down menu box (which by default is set to Global ). The first, from the left, of the three buttons allows you to move the selected object, the second to rotate it, and the third to resize it. To perform these operations you can use the blue, red, and green lines that appear in the 3D view: each allows the modification of one of the three axes of the object. Working with global references may not be easy: it is much better to decide to set the menu to value Local (the axes are determined by the shape of the object) or View (the axes are established by the current display), rather than Global .
Some changes with GIMP
We add transparency to the basic level and duplicate it
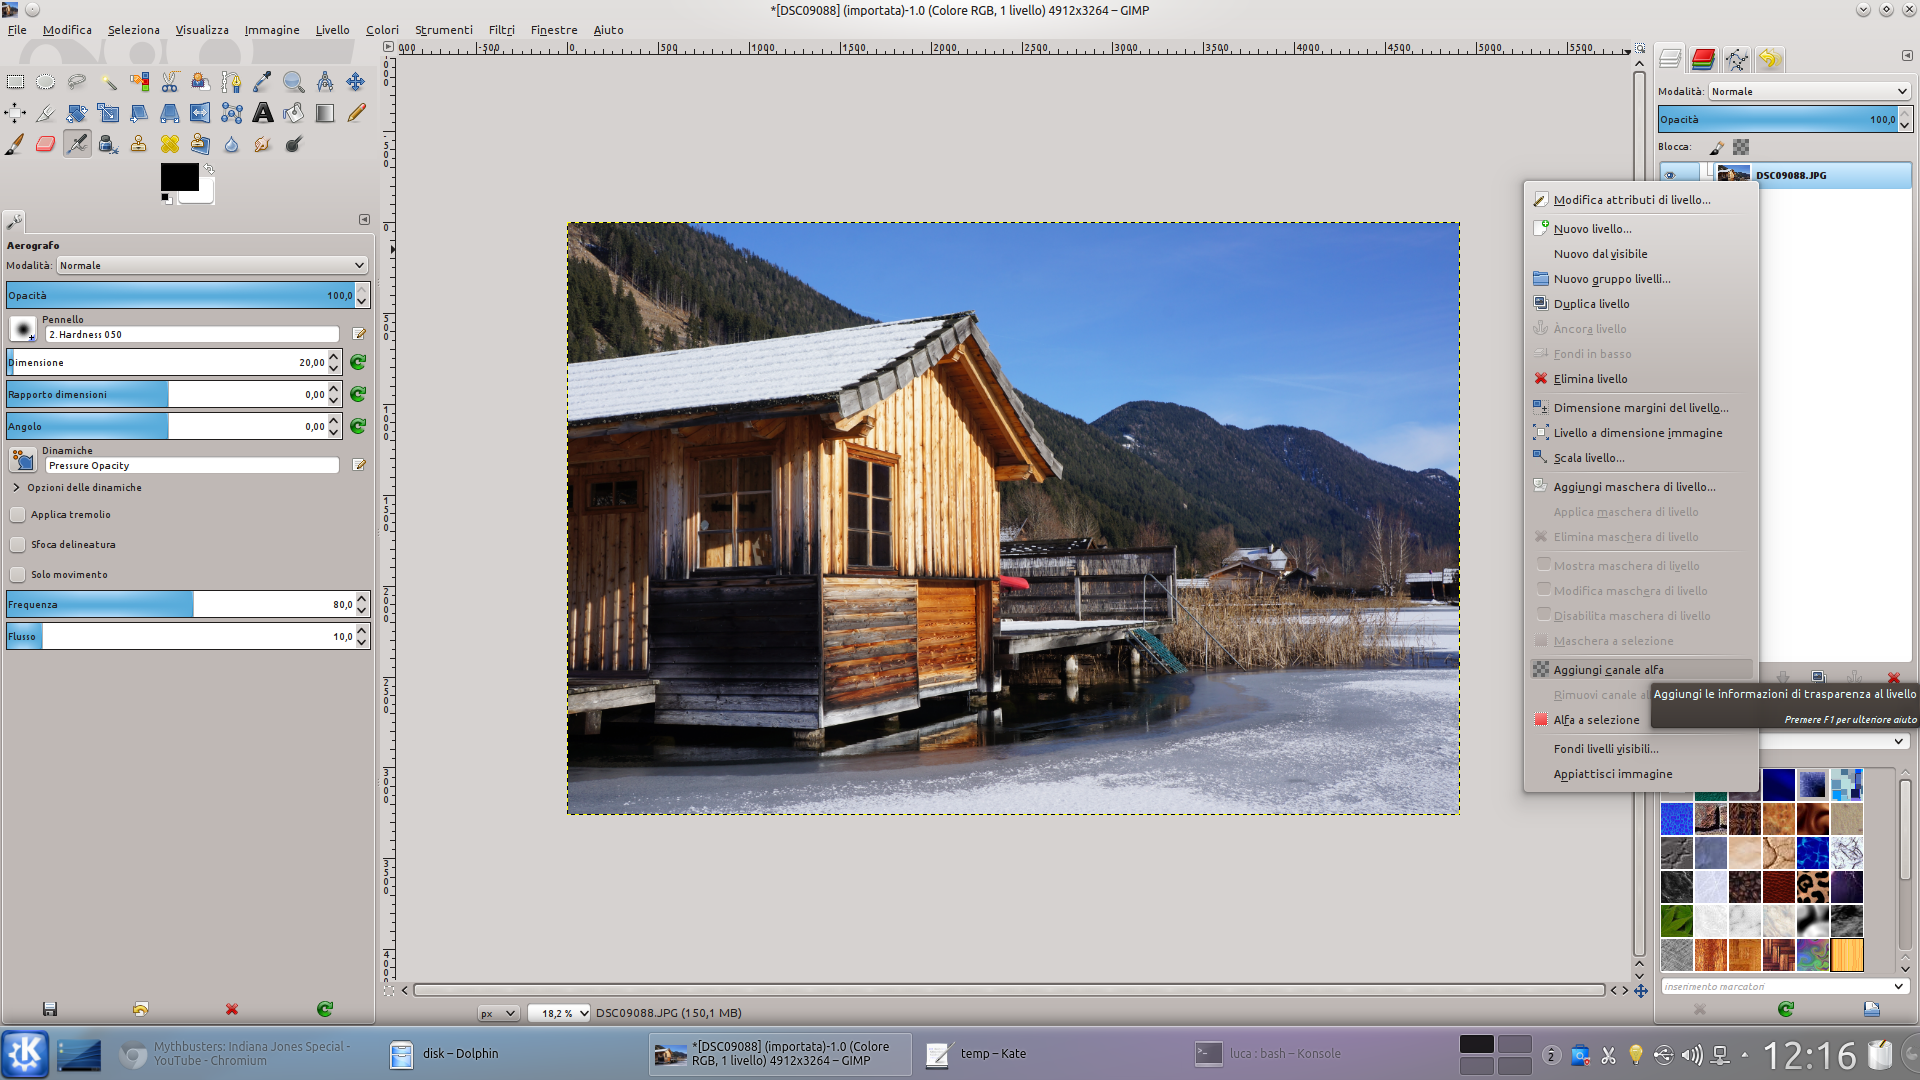 1 WITH THE ALPHA CHANNEL – Let’s open the image we want to work on in GIMP. If it’s a photograph, it probably won’t have an alpha channel (for transparency). So let’s add it by clicking on the existing layer with the right button, choosing Add alpha channel .
  2 INVERTED SELECTION – Always clicking on the layer with the right button, we choose the item Duplicate . We hide the original and working on the new copy, we select a “flat” area, for example the ground or the facade of a house. Then, we reverse the selection (Ctrl + I).
 Each floor must be separated
Let’s divide the image into parallel planes and separate them on several levels
 1 WE DELETE – The goal is to isolate a single floor, so now that we have selected everything except the floor we want to work on (the image is the right wall of a building) just press the button Delete to erase what is not part of the plan in question.
  2 DUPLICATION – We proceed to work on the next floor, for example another facade of the building. So, we need to duplicate the base layer (the one that contains the whole photograph) and make the new copy visible.
 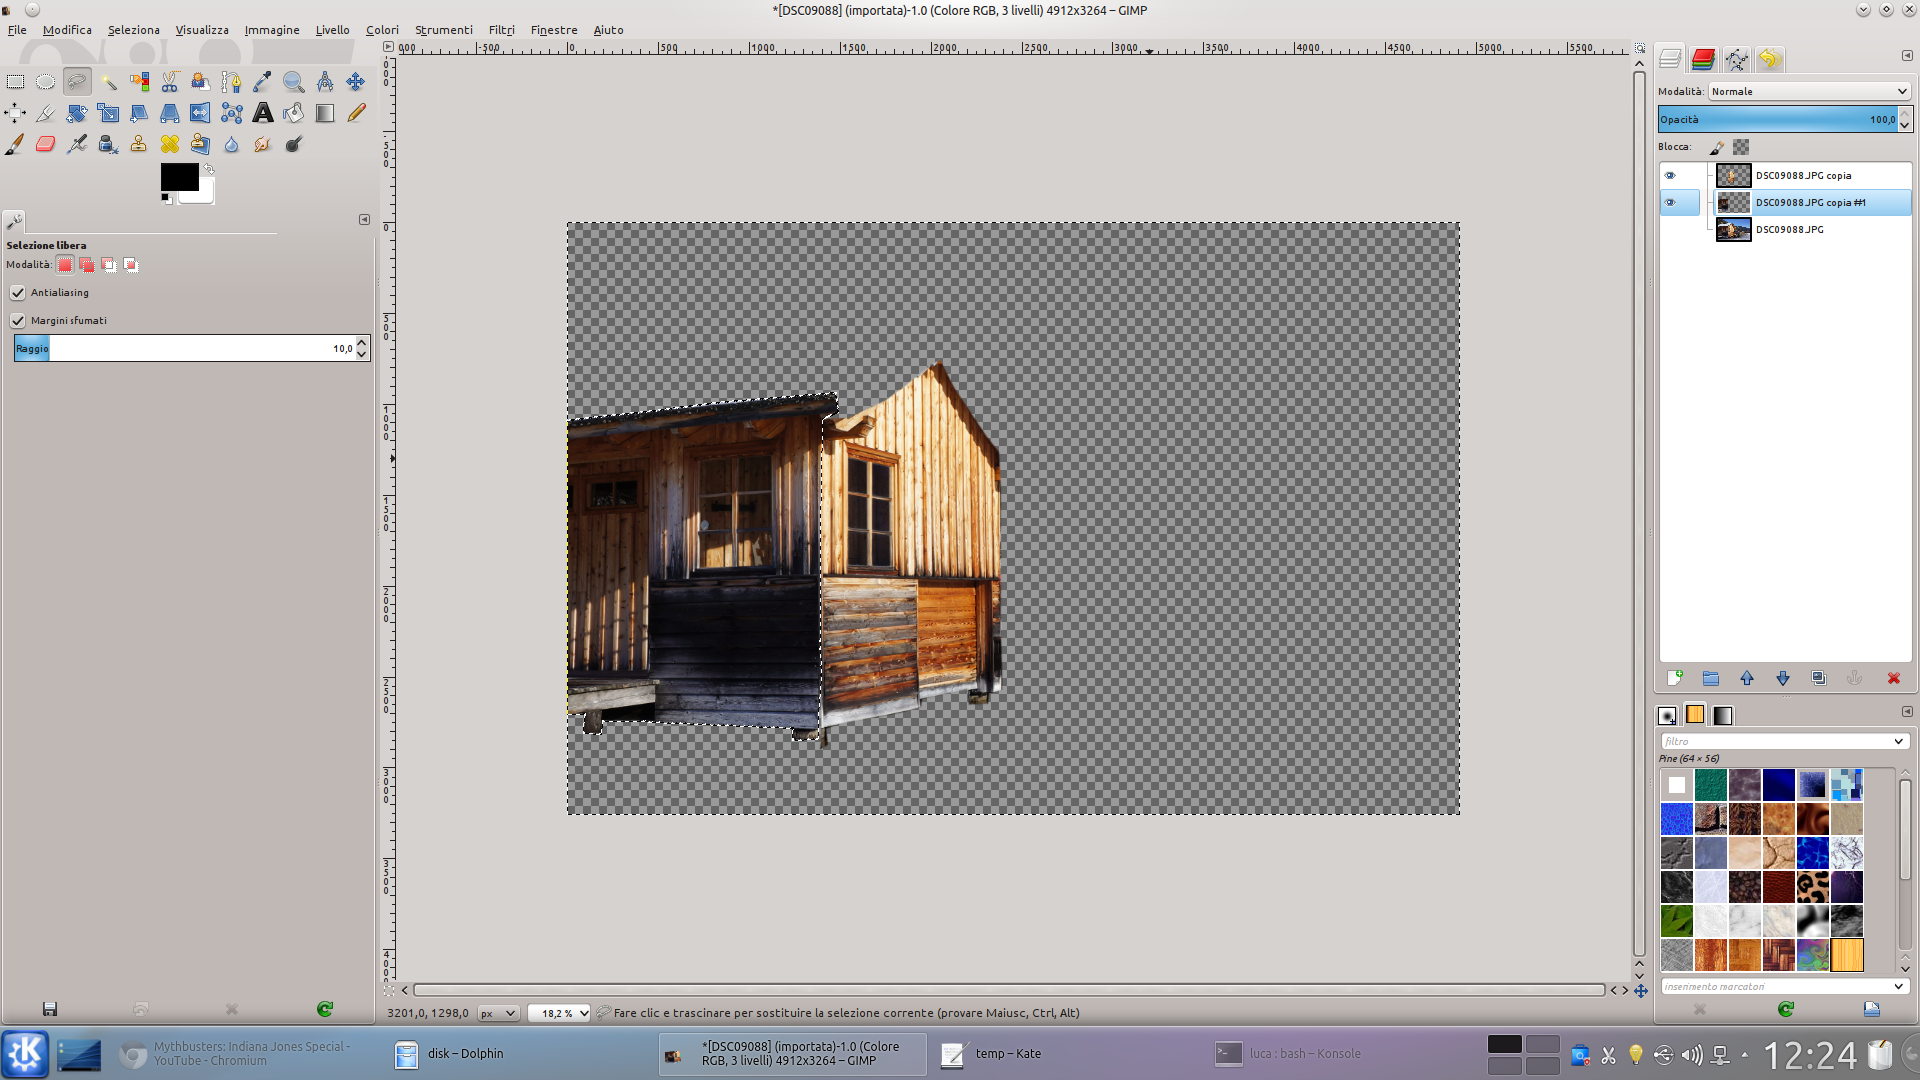 3 EVERYTHING IS REPEATED – Again, we use the selection tool Lazo to select the plan. Then we press Ctrl + I is Delete , so as to erase everything else. Just proceed in this way until we have separated all the planes of the image.
  4 RECONSTRUCTION– Now we must begin to reconstruct the parts of the image that are not visible: for example, a part of the facade of the building could be hidden by the roof: we must reconstruct it. We can select a part of it with the Lasso, copy it, and paste it.
 One file per floor
We export each layer to a different file, to be able to upload them separately in Blender
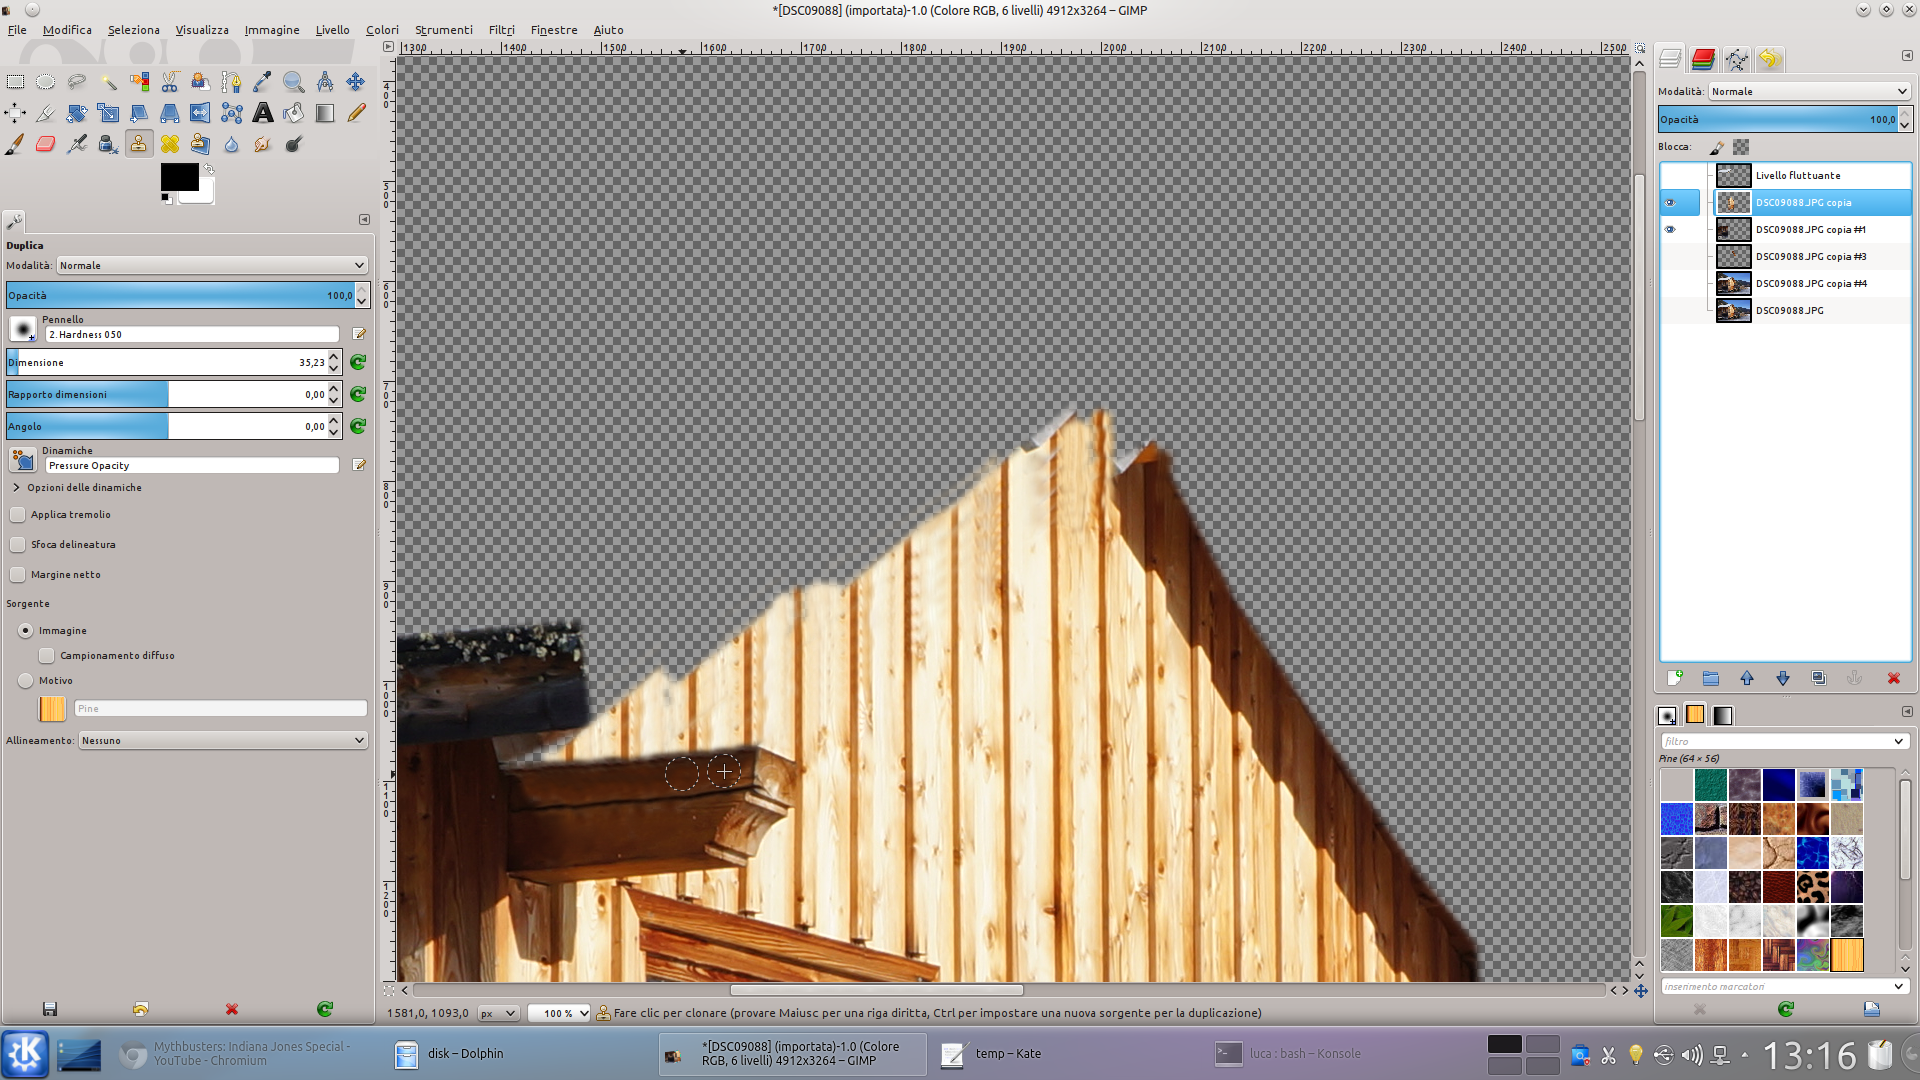 1 WITH ACCURACY – The image must look realistic, so we have to reconstruct every portion of the image. To build the details, we can use the tool Duplicate and also the patch , which automatically corrects unreal areas.
  2 THE SEPARATION – We have to separate all the possible levels of photography: facades of a building, ground, very distant objects such as the mountains, the sky, etc. But in the end the overlap of the various levels of GIMP must represent the original image.
 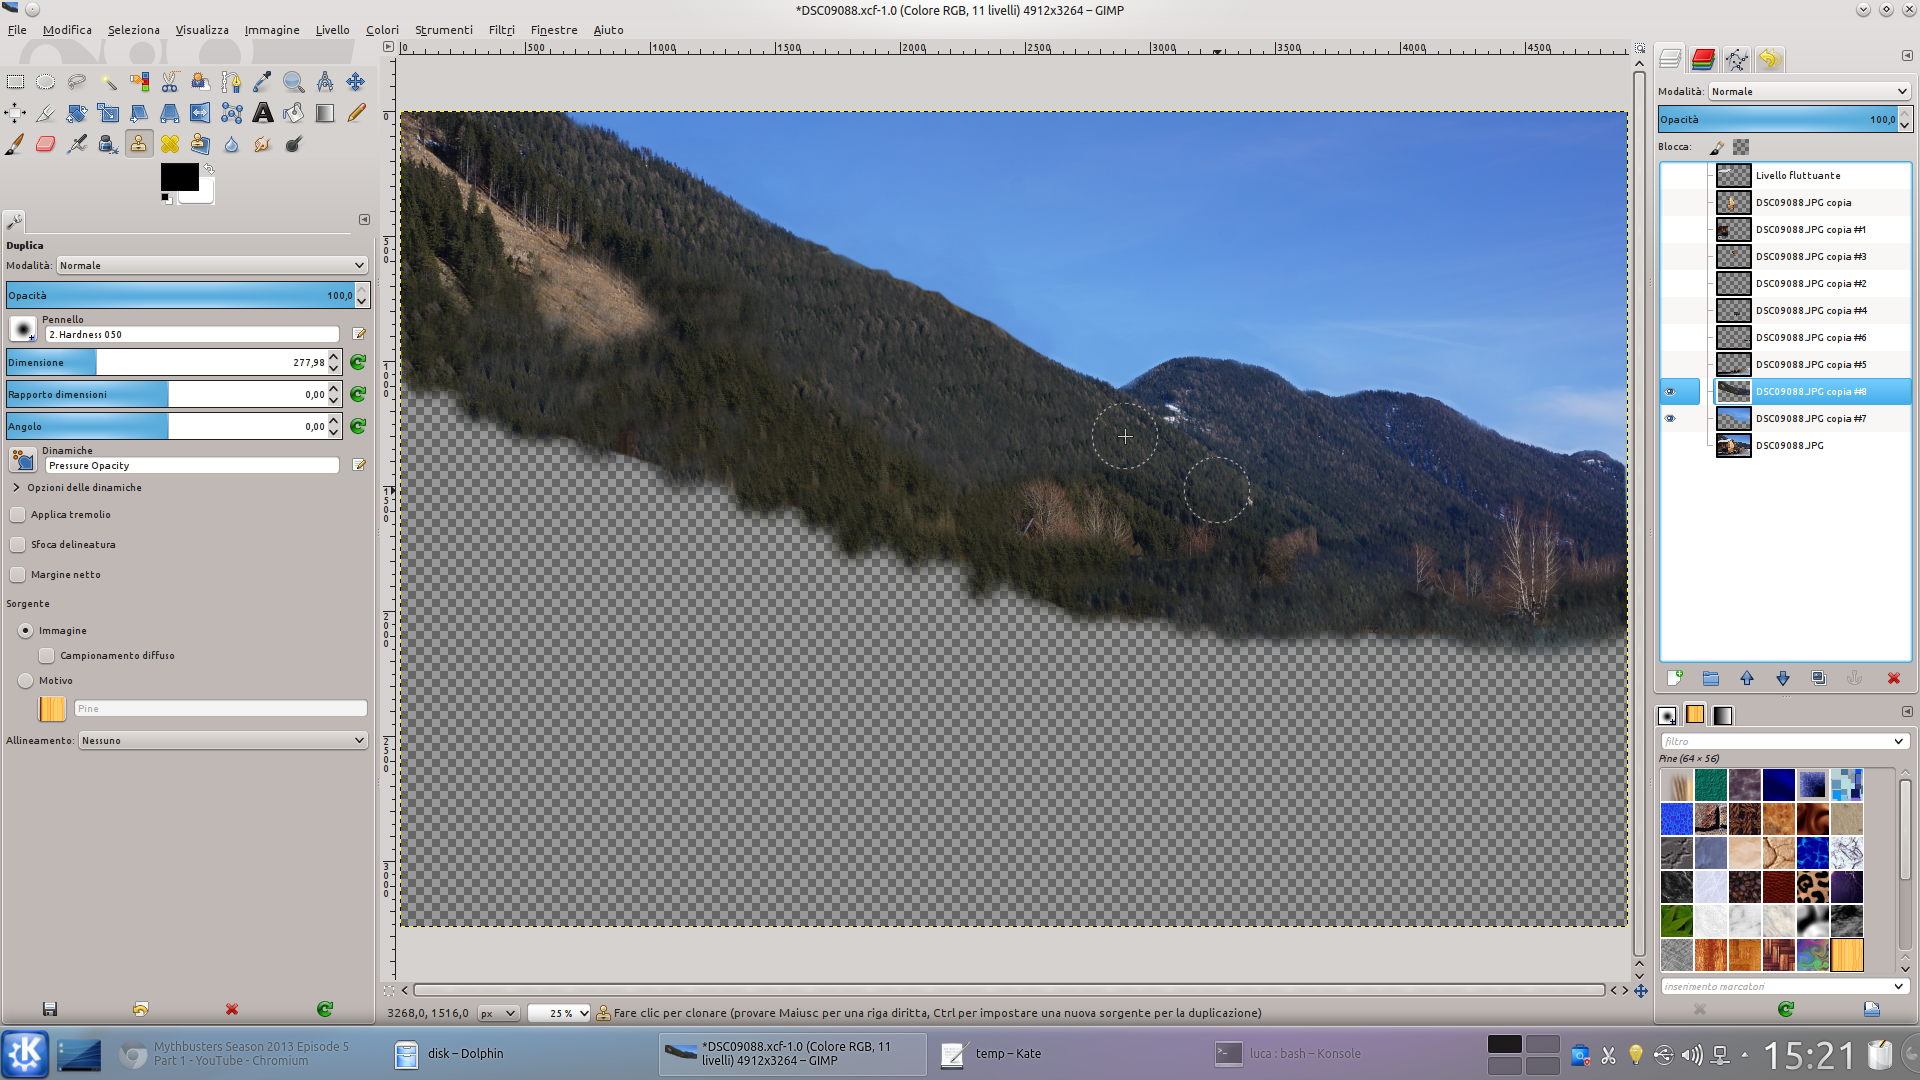 3 FAR AWAY OBJECTS – It is very important to reconstruct the most distant elements: usually, the sky and the mountains. For the sky the tool can be very useful Feather . To replicate the mountains, however, just use Duplicate to reproduce stones and trees with realistic shapes.
 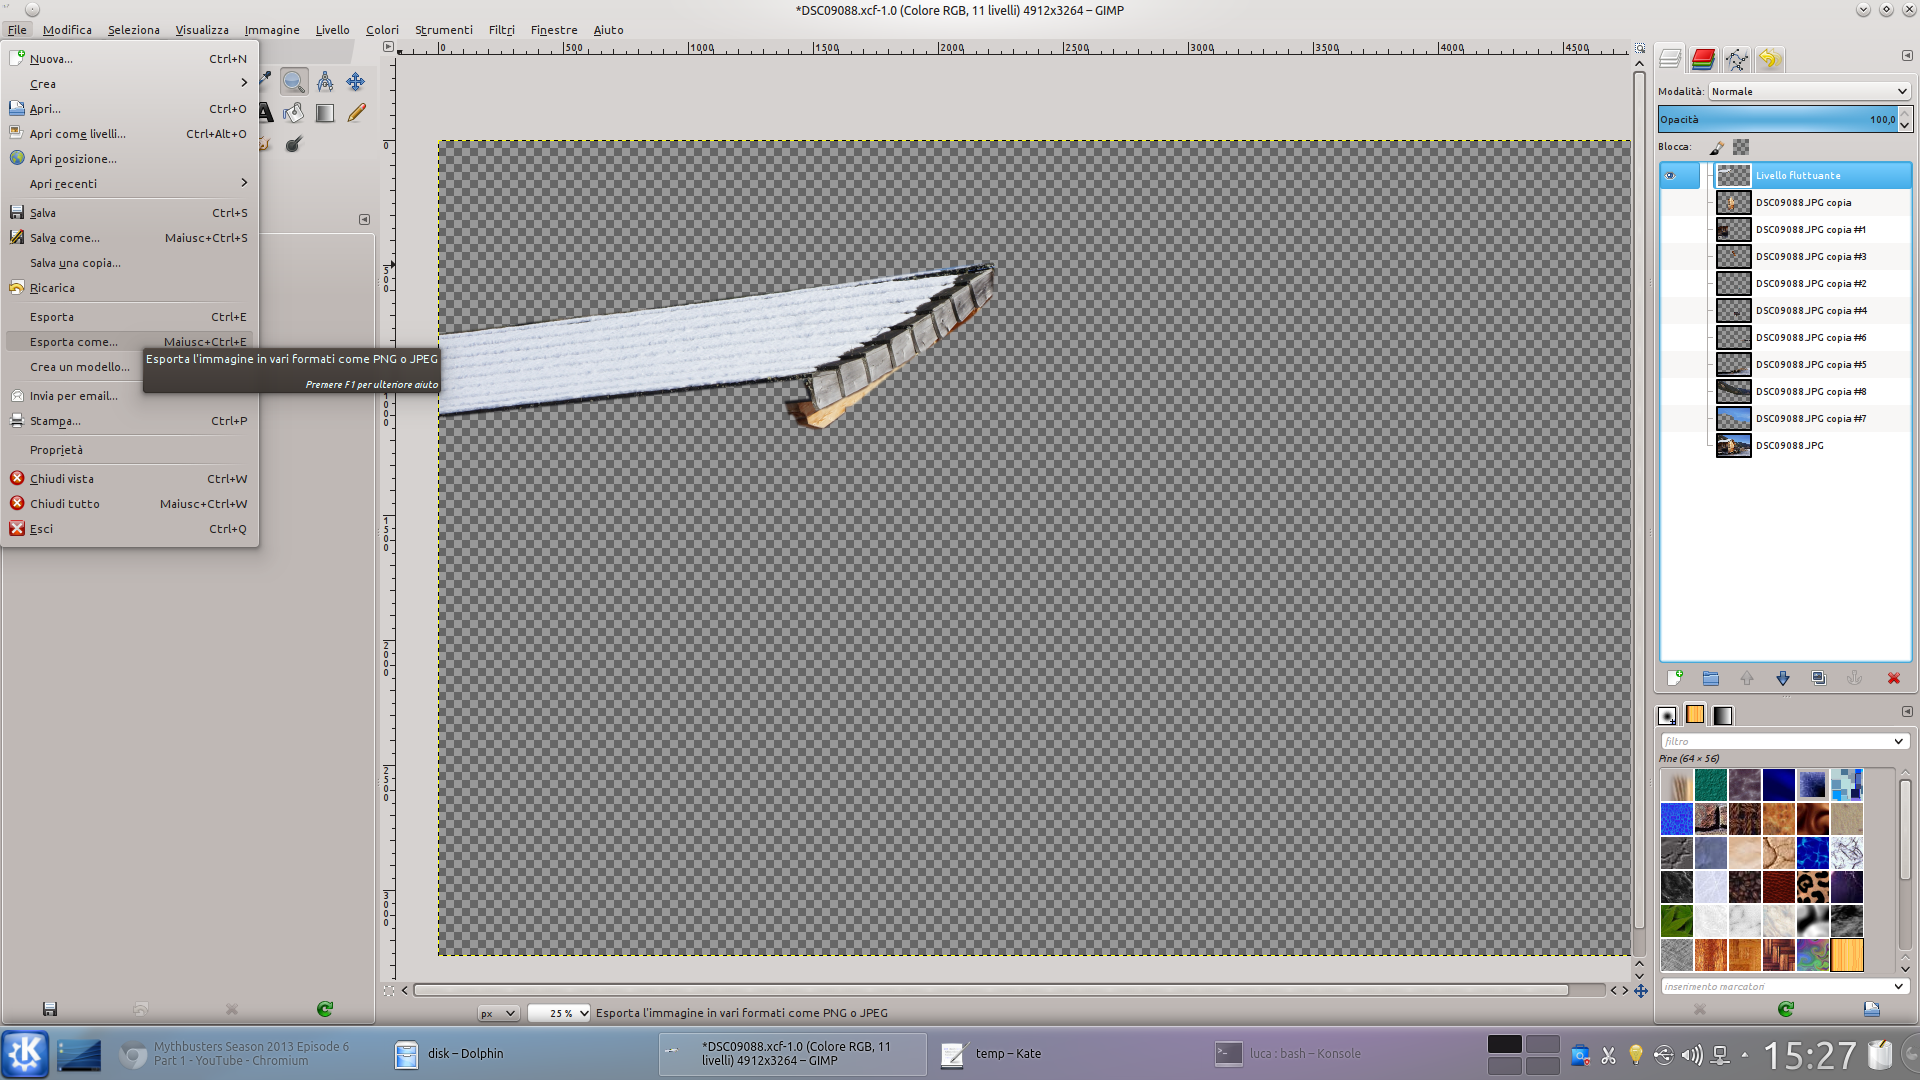 4 EXPORT – When the whole image has been separated into layers, we must make only one layer visible at a time and export each one (one at a time) by clicking on the menu File / Export as . We give each file a name that remembers its content (sky, ground, etc…).
 The 3D model
Let’s build a stylized 3D model of the photo with a couple of rectangles
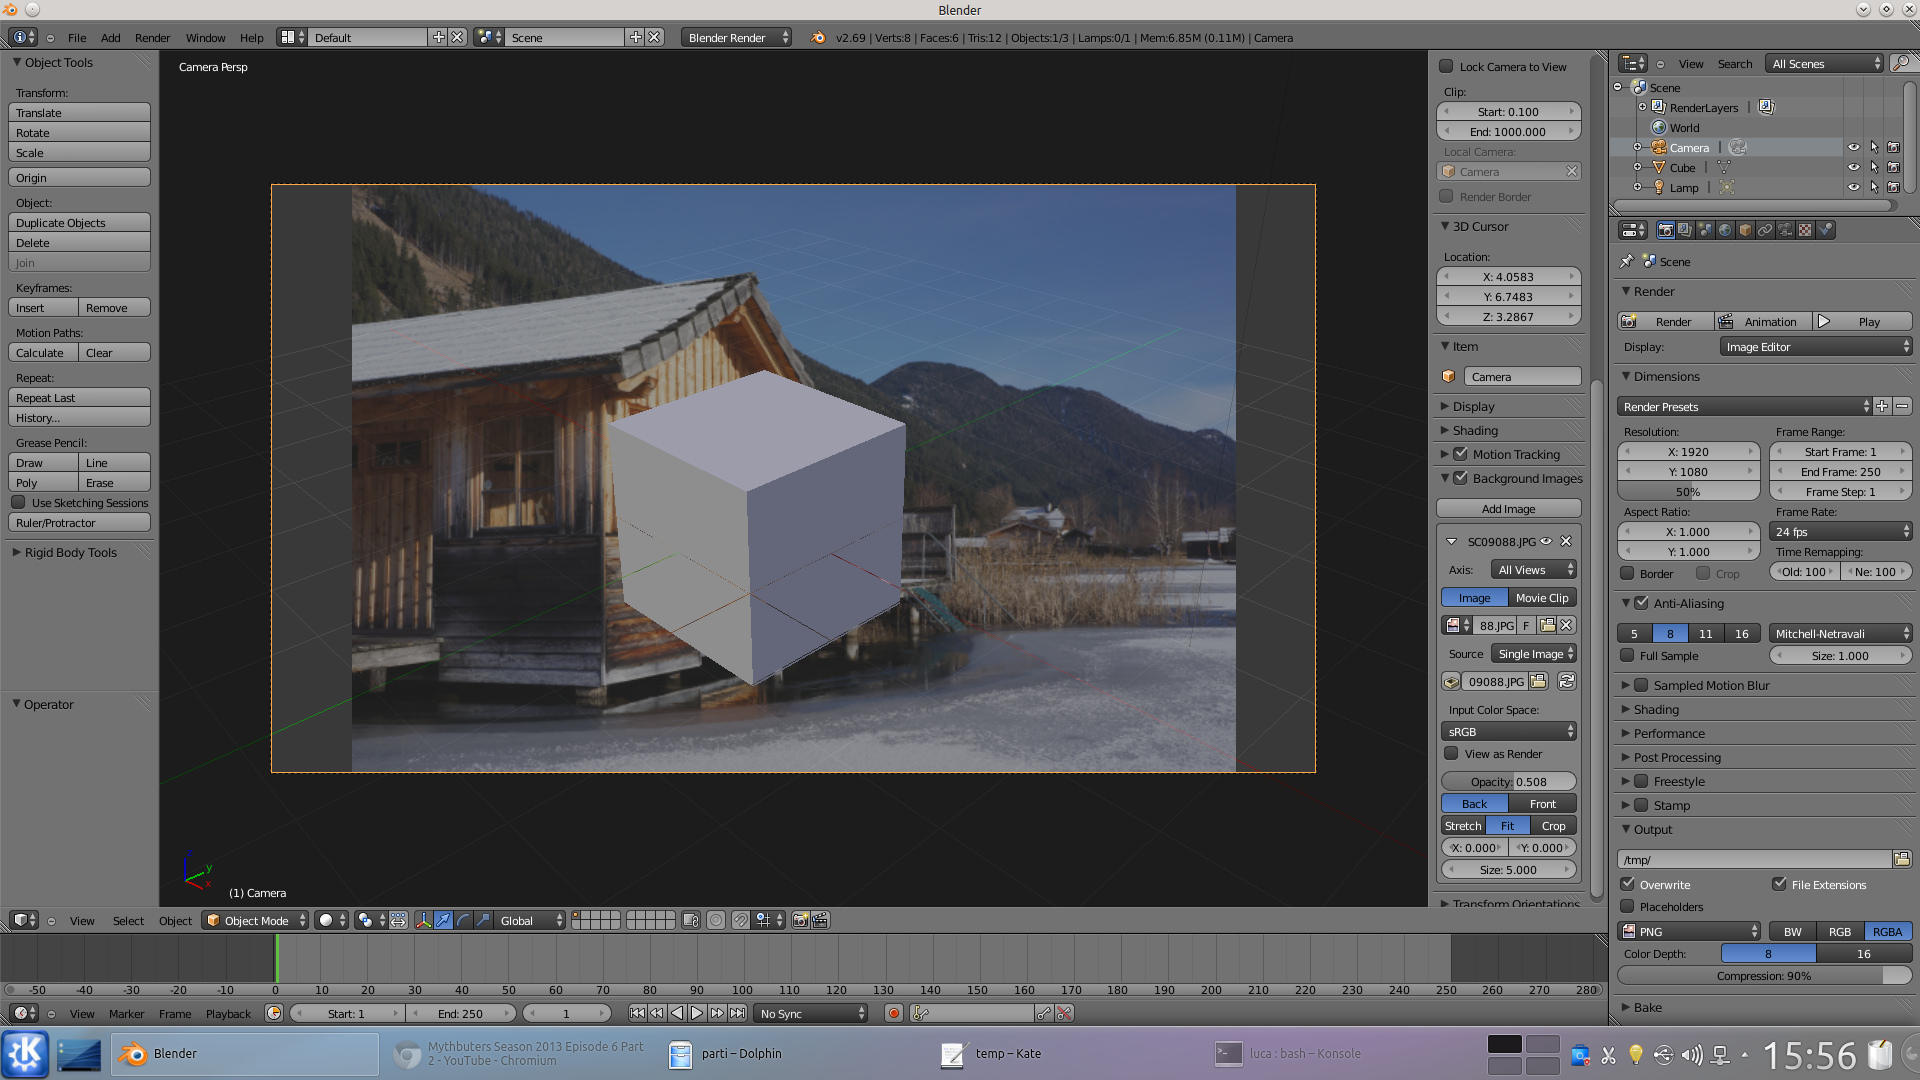 1 BACKGROUND IMAGE – Let’s finally open Blender. As a first step, we press it 0 from the numeric keypad and then the key N . In the panel that appears, we find the entry Background image . We then select the background image: it must be the original photograph.
  2 DELETE THE CUBE – Blender supplies us with a cube, called Cube . However, we don’t need it. So, just select it using the tree diagram at the top right and then, in the 3D view, press the button X . Blender asks for confirmation: just press again X .
  3 WE NEED A PLAN – Now we begin to reproduce the scene with a stylized 3D model: we add a plan by clicking on the menu Add / Mesh / Plane . The floors, in fact, are the basic elements with which to build each three-dimensional scene: they are simple rectangles.
  4 GOES TO ITS PLACE – We begin, for example, to move the plane, rotate it, and resize it to position it as if it were the ground of our scene. To make the changes more convenient, we can decide to work with the references Local or View instead of Global .
 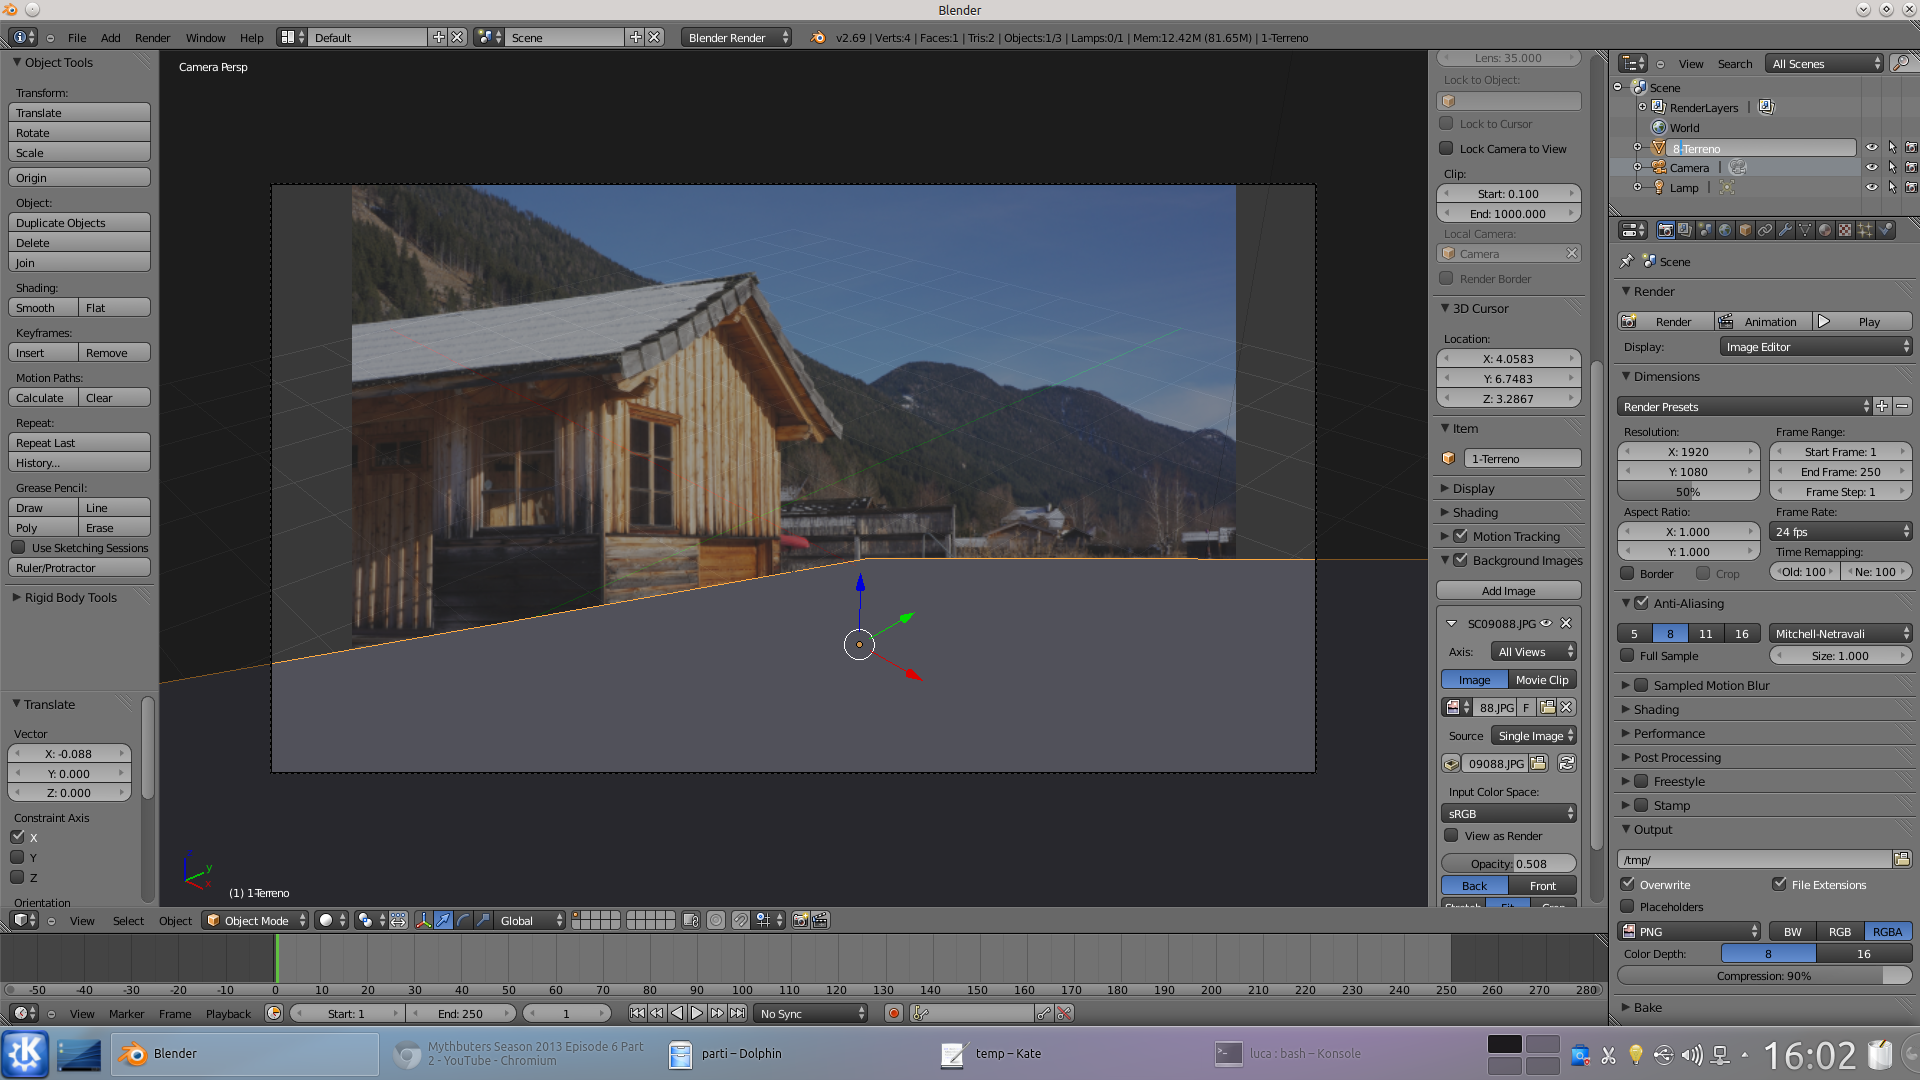 5 WE CHANGE THE NAME – The plan, which for now is called Plane , will represent the ground. We can then change its name by double clicking on it in the tree diagram. We should give it a name that identifies it immediately, for example “Terrain”.
 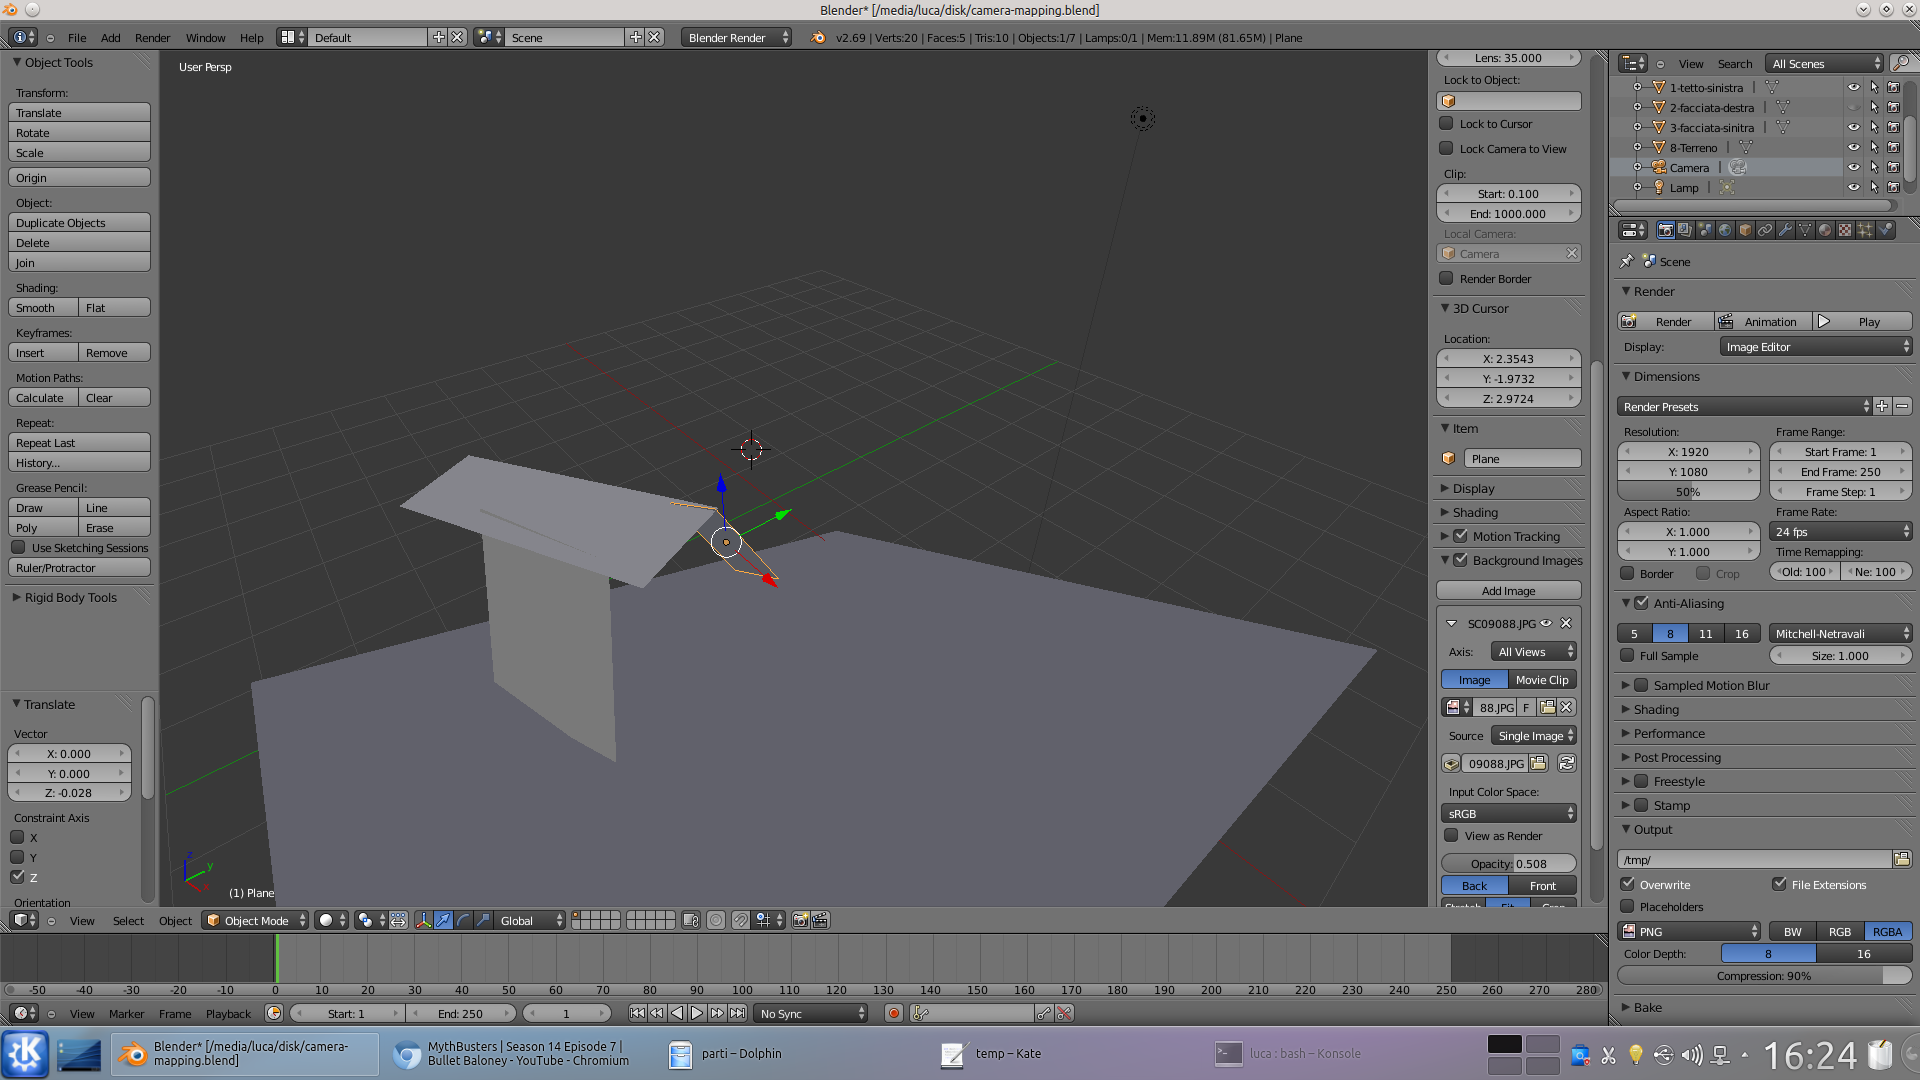 6 OTHER PLANS – Now let’s add another plan ( Add / Mesh / Plane ), to be positioned in order to simulate another portion of the image (for example a facade of the building). We repeat the operations until we have reconstructed each level of the photograph with plans.


Pingback: From 2D to 3D... PART TWO - Kdenlive Tutorials