Let’s see how to use Blender’s camera mapping to transform a 2D photograph into a 3D scene to be included in our movies. It is a digital method to achieve what was once called matte painting, but at no cost and in a few tens of minutes.
In the previous article we began to describe the procedure called “UV mapping” or “camera mapping”, which allows us to transform any photograph into a perfect 3D landscape for our movies. Last month we illustrated all the preparation work, basically divided into two phases: in the first one, GIMP must be used to separate all the various objects that make up the photo. For example, we will create a PNG file for the sky, another for the mountains, another for the terrain, and others for each of the facades of each building. The more precise we are in this work, the better the rendering of our final movie will be. The second step is to build a three-dimensional model in Blender using Plane objects, which are simple rectangles. The model will have to resemble the scene portrayed in the original photograph, but obviously it can be very stylized, not many details are needed. In a nutshell, we have to insert in the 3D model a rectangle for each of the png files that we have produced in GIMP: a rectangle for the sky, one for the mountains, another for the ground, and several other rectangles for each of the facades of the buildings present in the image. When we have achieved all this, we will have the necessary to start carrying out the UV mapping procedure. It was at this point that we stopped in the previous article, and it is from here that we will start again now. UV mapping is an operation that, in Blender, can be done in just a couple of clicks. In fact, working in edit mode on an object, just press the U key to bring up a menu that, among the various options, allows you to enable the projection of the texture, which is exactly what we want to achieve. In fact, our “trick” to transform a photograph into a 3D scene is simply to project the individual components of the photo onto separate panels. Of course, it is essential that while performing the projection, the current view is that of the Camera (which can be obtained by clicking on the View / Camera menu) and that it has the same proportions as the original image (we must therefore set the same in the rendering panel resolution of the photograph). What we do is a sort of modern version of the dear old cardboard panels that were cut out and painted to be placed in front of the camera. Thanks to simple painted cardboard it was possible to build any world: the best scenographers managed to obtain truly realistic results. Thanks to camera mapping, anyone can become a digital designer. To get really good results it is necessary to take some precautions in the construction of the texture: it is for this reason that our tutorial does not just perform the projection of the photograph on the various objects. In fact, we must also give the material with which each texture is associated (remember that we have created one for each fragment in which we have divided the photograph) the correct transparency using the Blender Node editor. Thanks to this solution, it becomes possible to simulate an object of any shape with a simple rectangle. For example, if we want to insert a tree into the scene, just load it as a texture into a rectangle. Since in the photograph we use as texture for this object we have made the whole background transparent and the only visible part is the tree itself, in the final rendering you will only see the tree: all the parts of the rectangle that correspond to a transparent area of the texture, will be invisible. As always, you can see the example video at the following address: https://www.youtube.com/watch?v=XvAr3TwbLfQ
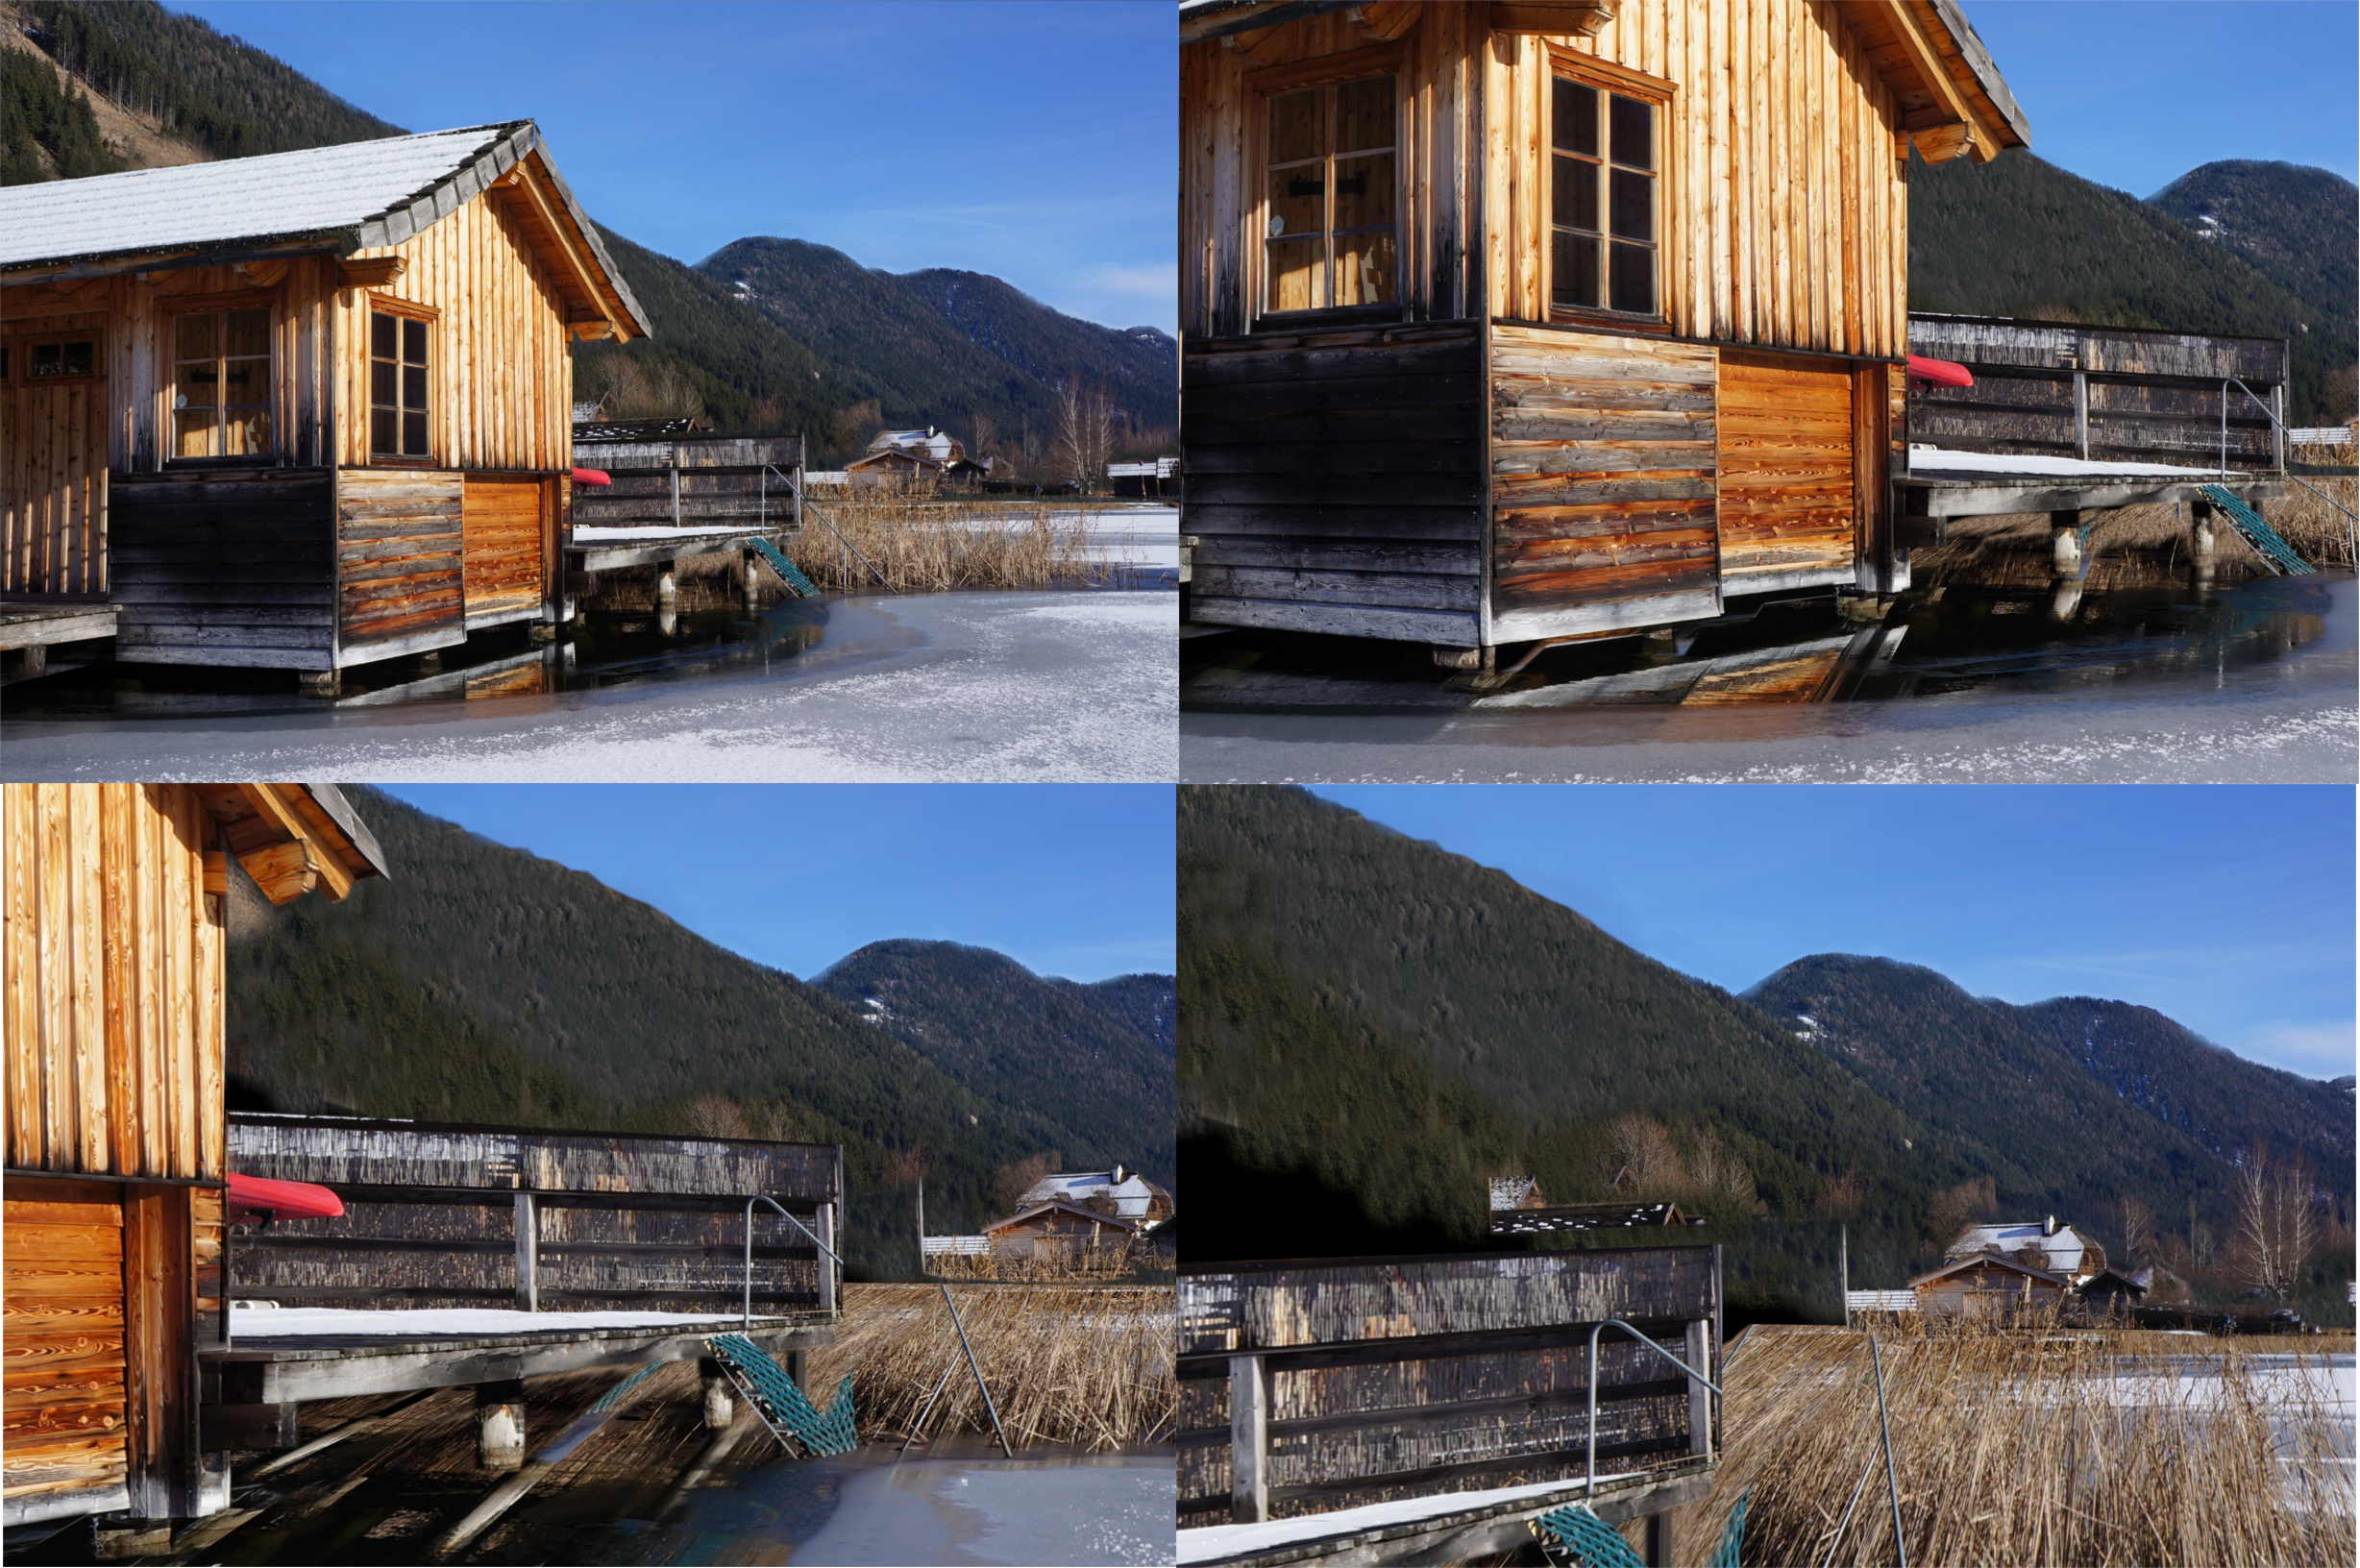 Some frames from the final movie: note the perspective distortion of the elements of the scene
  The 3D model we built without textures (above) and how it looks with textures (below)
 UV mapping: quick and convenient
We used a lot of steps to describe this method, but only because we didn’t want to leave out the details, so as to avoid doubts. In fact, if you try to practice this technique, you will find that it is quite fast: the slowest and most boring part is to separate, with GIMP, the various areas of the starting photograph. But it is not only a quick method, it is also very convenient. In fact, making all the objects with simple three-dimensional rectangles we take very little time to build even complex scenes without having to add too many details. But even if we wanted to add some details, we wouldn’t need to work too hard. For example, if we wanted to give the ground a different shape from the flat one, we just need to move the points that make up this plane (in Blender there is the Sculpt tool that allows you to make changes as if we were making a sculpture). By assigning a reinforcement to each floor, it is also possible to move them in a rather simple way. For example, we can flex a plane on which we have represented (through the texture) of sheets of paper or bamboo canes to simulate the effect of the wind.
Let’s prepare the UV mapping
We have to choose the Cycles rendering engine
 1 THE RIGHT RENDERER – To begin with we have to choose Cycler Render from the menu of the bar at the top, and make sure you have set the resolution of the rendering to the size of the starting photograph (from the rendering tab in the settings panel).
  2 EDIT MODE – Now, we have a stylized model of our scene made with plans. Let’s select one from the tree diagram, for example that of the terrain. Let’s get into Edit mode and press the button U to assign a UV mapping texture.
 Building the right material with knots
We use Blender’s node editor to make the texture perfect
 1 MAP PROJECTION – From the menu that appears we must of course choose Project from view . One will appear in the materials tab from the settings panel UV Map . We open the panel where possible Node Editor and, working on the materials, we reward Add new material .
  2 KNOTS MATERIAL – We delete (pressing the X key) the various nodes that are added automatically, and insert new ones with the menu Add / Shader / Emission , then with Add / Output / Material output , and also Add / Input / Image texture .
 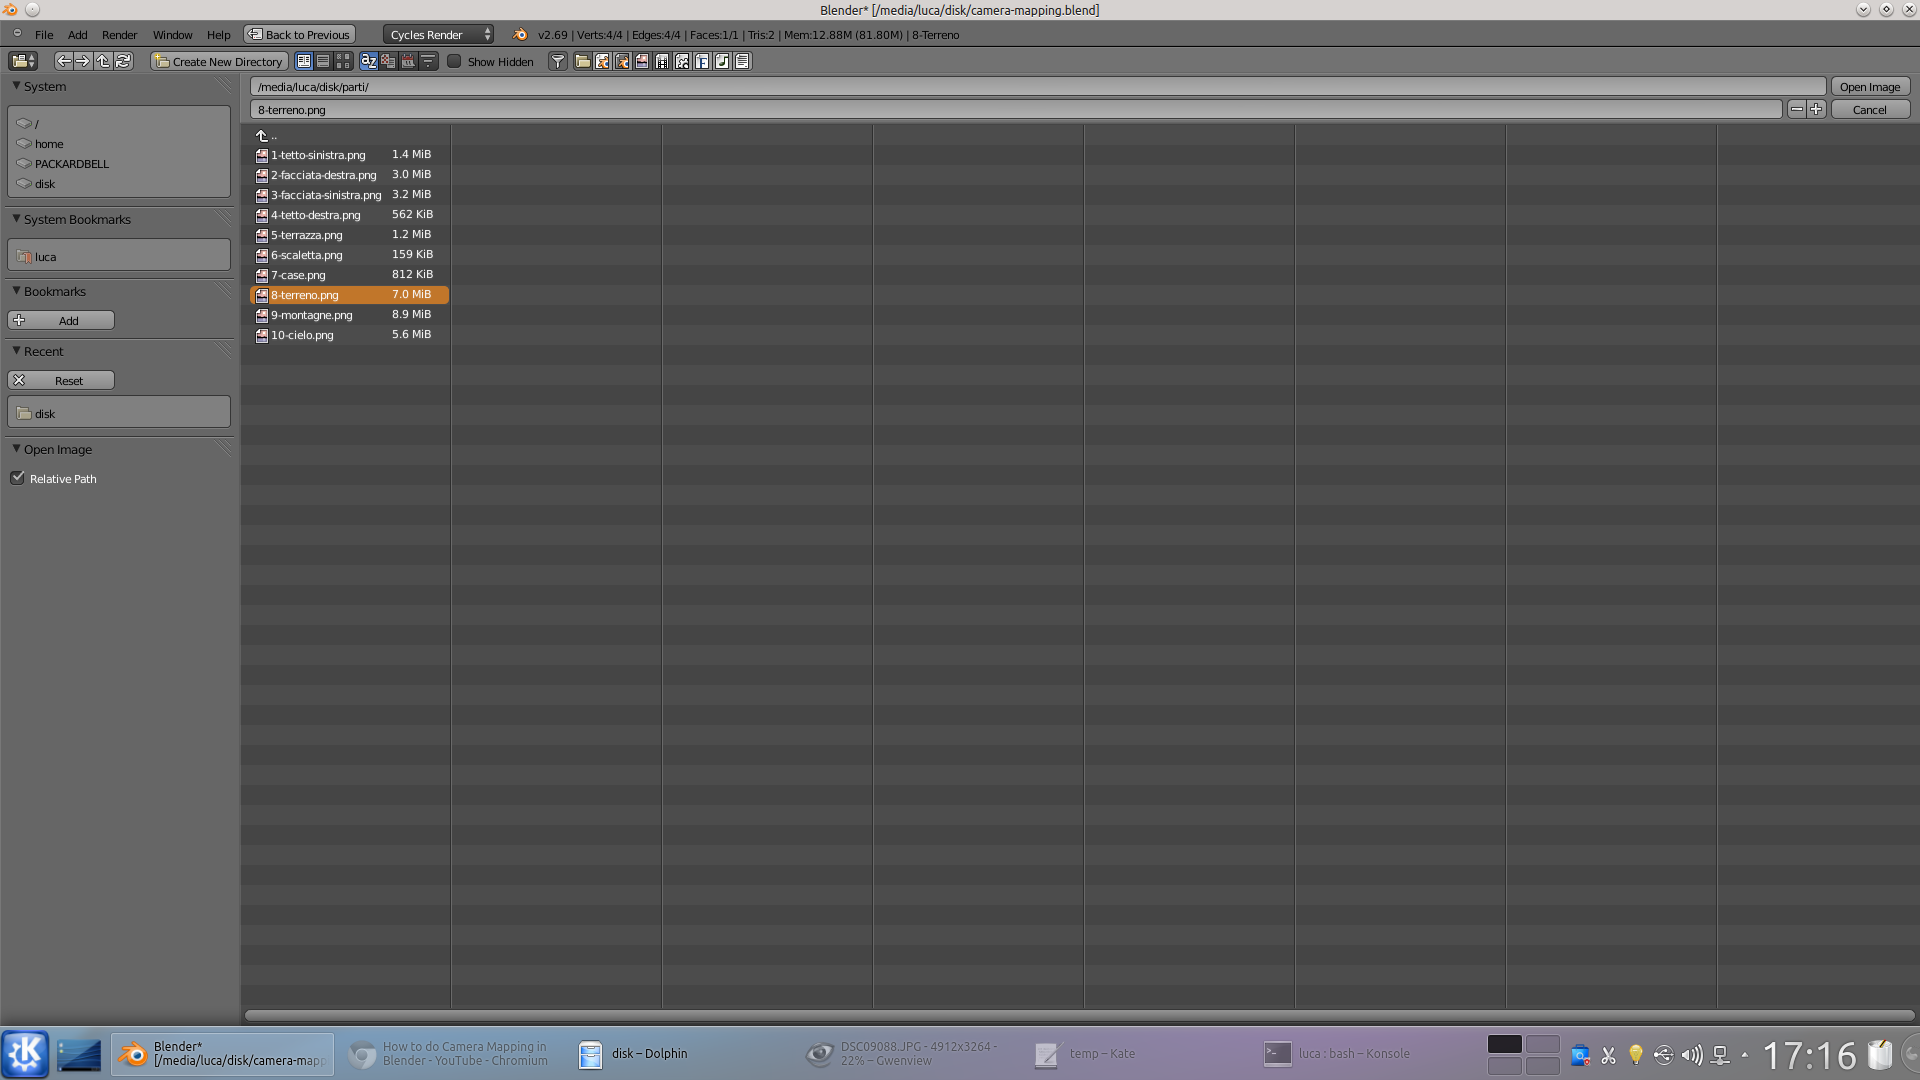 3 IMAGE TEXTURE – We connect the point Color of the Image texture to the Color Item Emission . We connect the output of this object to the entrance Surface of the Material output . Click on Open to give an image to the Image texture , the terrain PNG file.
 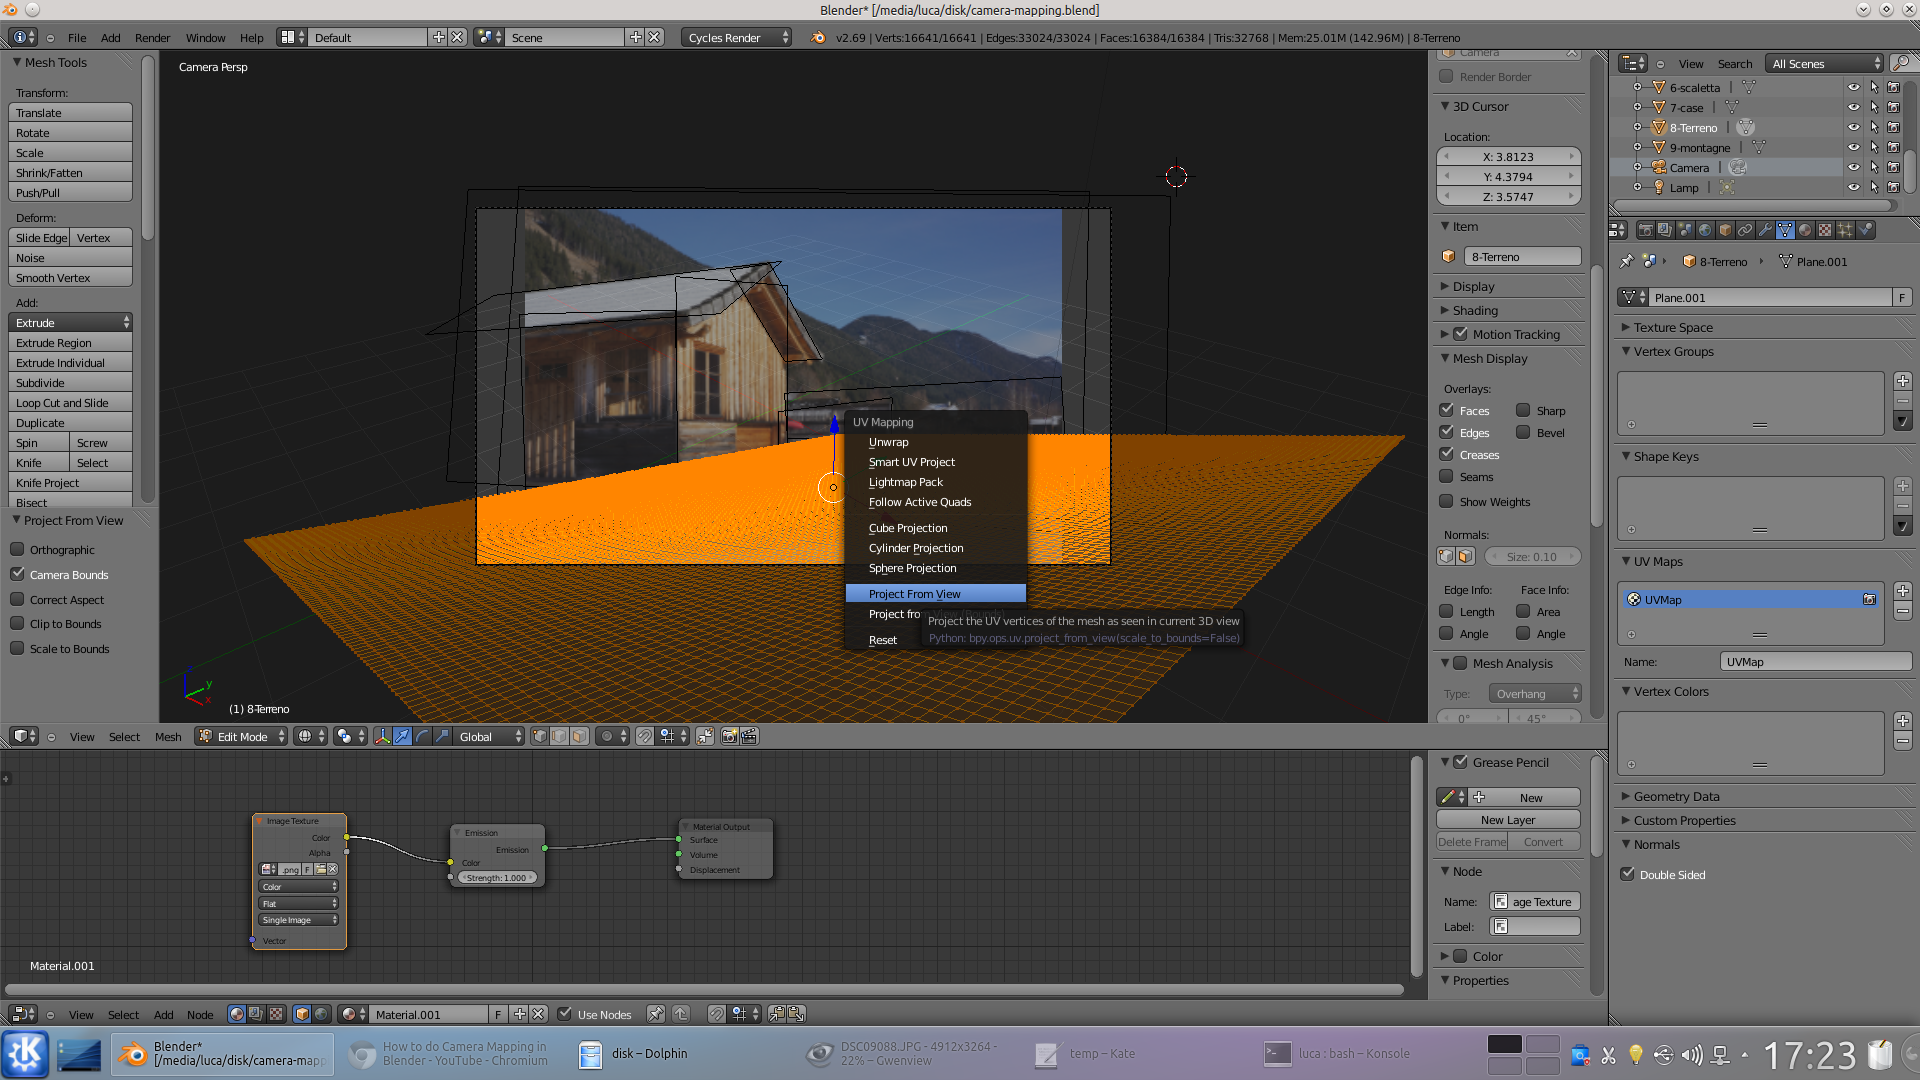 4 THE DIVISION – Now working in the 3D view in Edit mode , we press the button Subdivide a couple of times: the more divisions we perform, the more detailed the rendering of our texture will be. Finally, we press the button again U , choosing Project from view .
 Transparency and animation: the finishing touches
We create a simple animation for the Camera object with the F-Curves
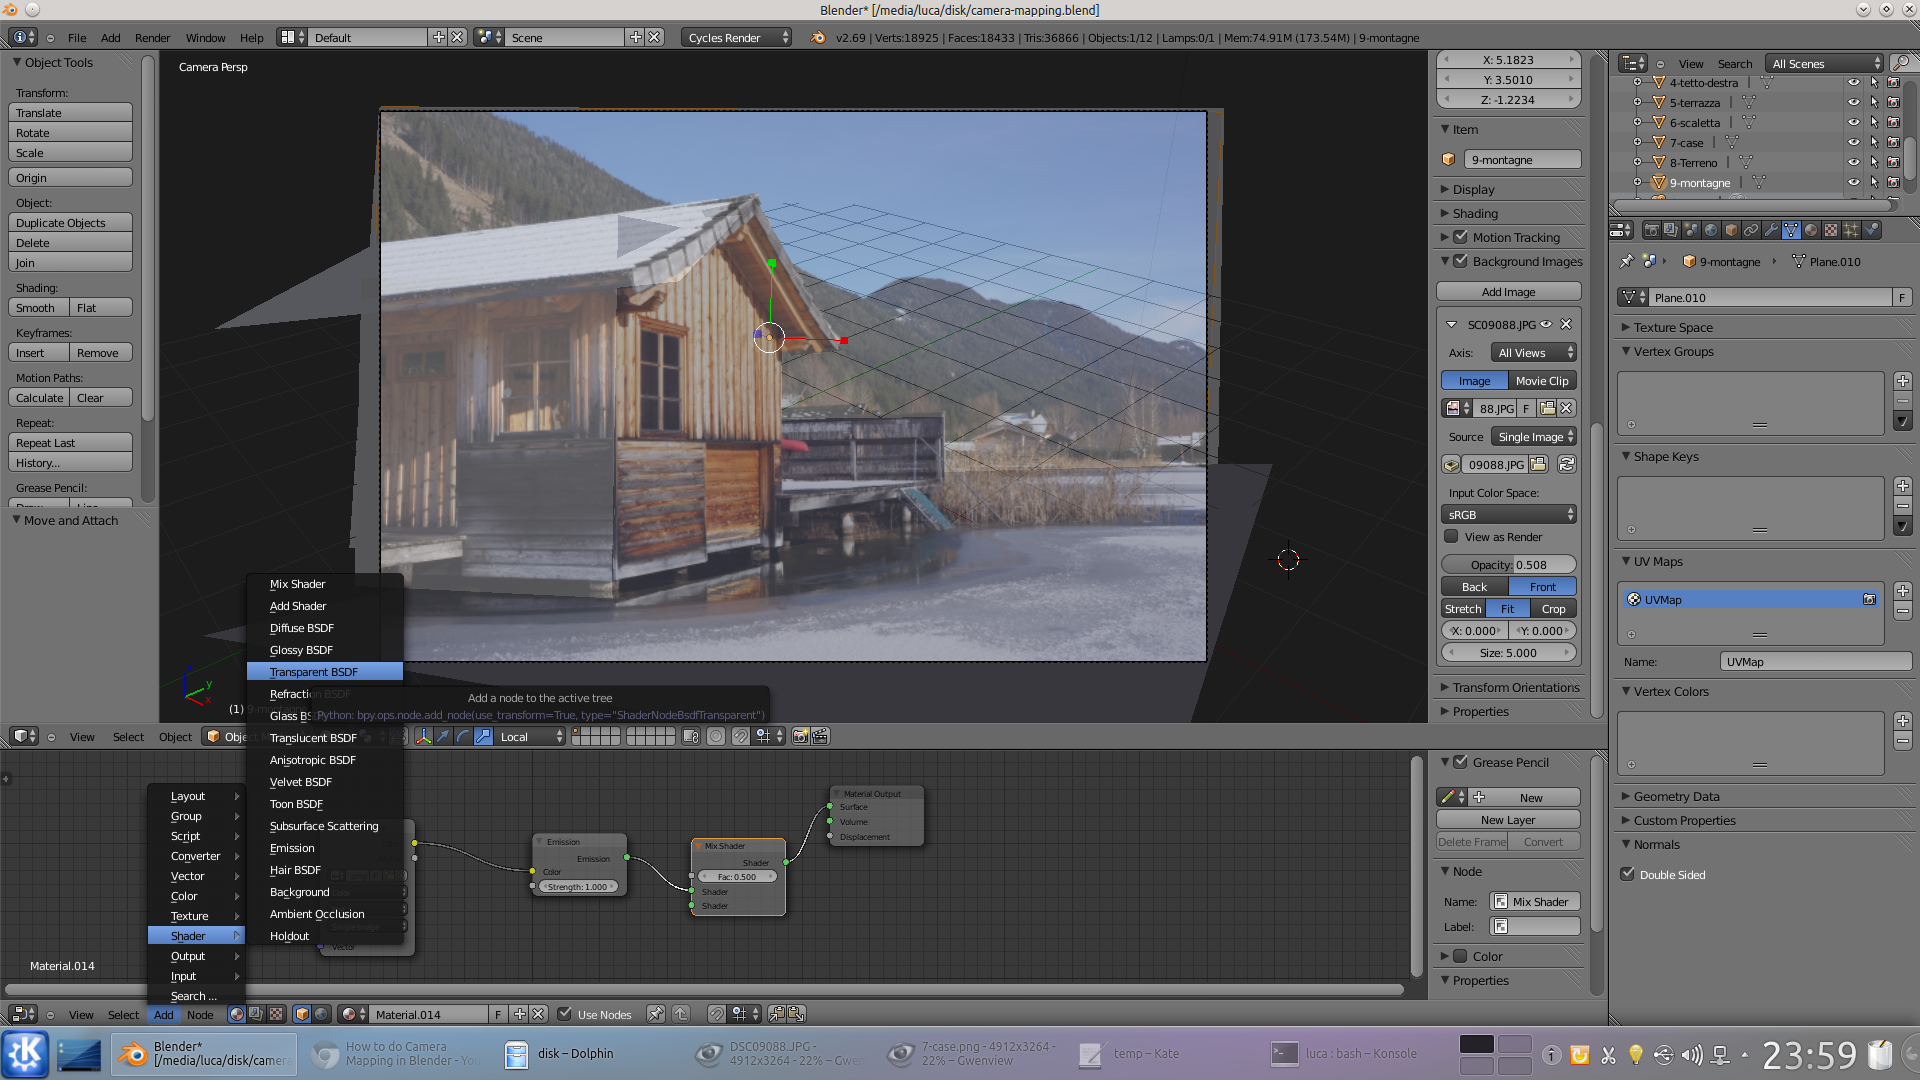 1 THE MIXER – Now we have to manage transparency: in the panel Node Editor , add a node of type Shader / Mix shader and one of a kind Shader / Transparent BSDF . The output point Shader Item Mix shader must be connected to the point Surface of Material output .
 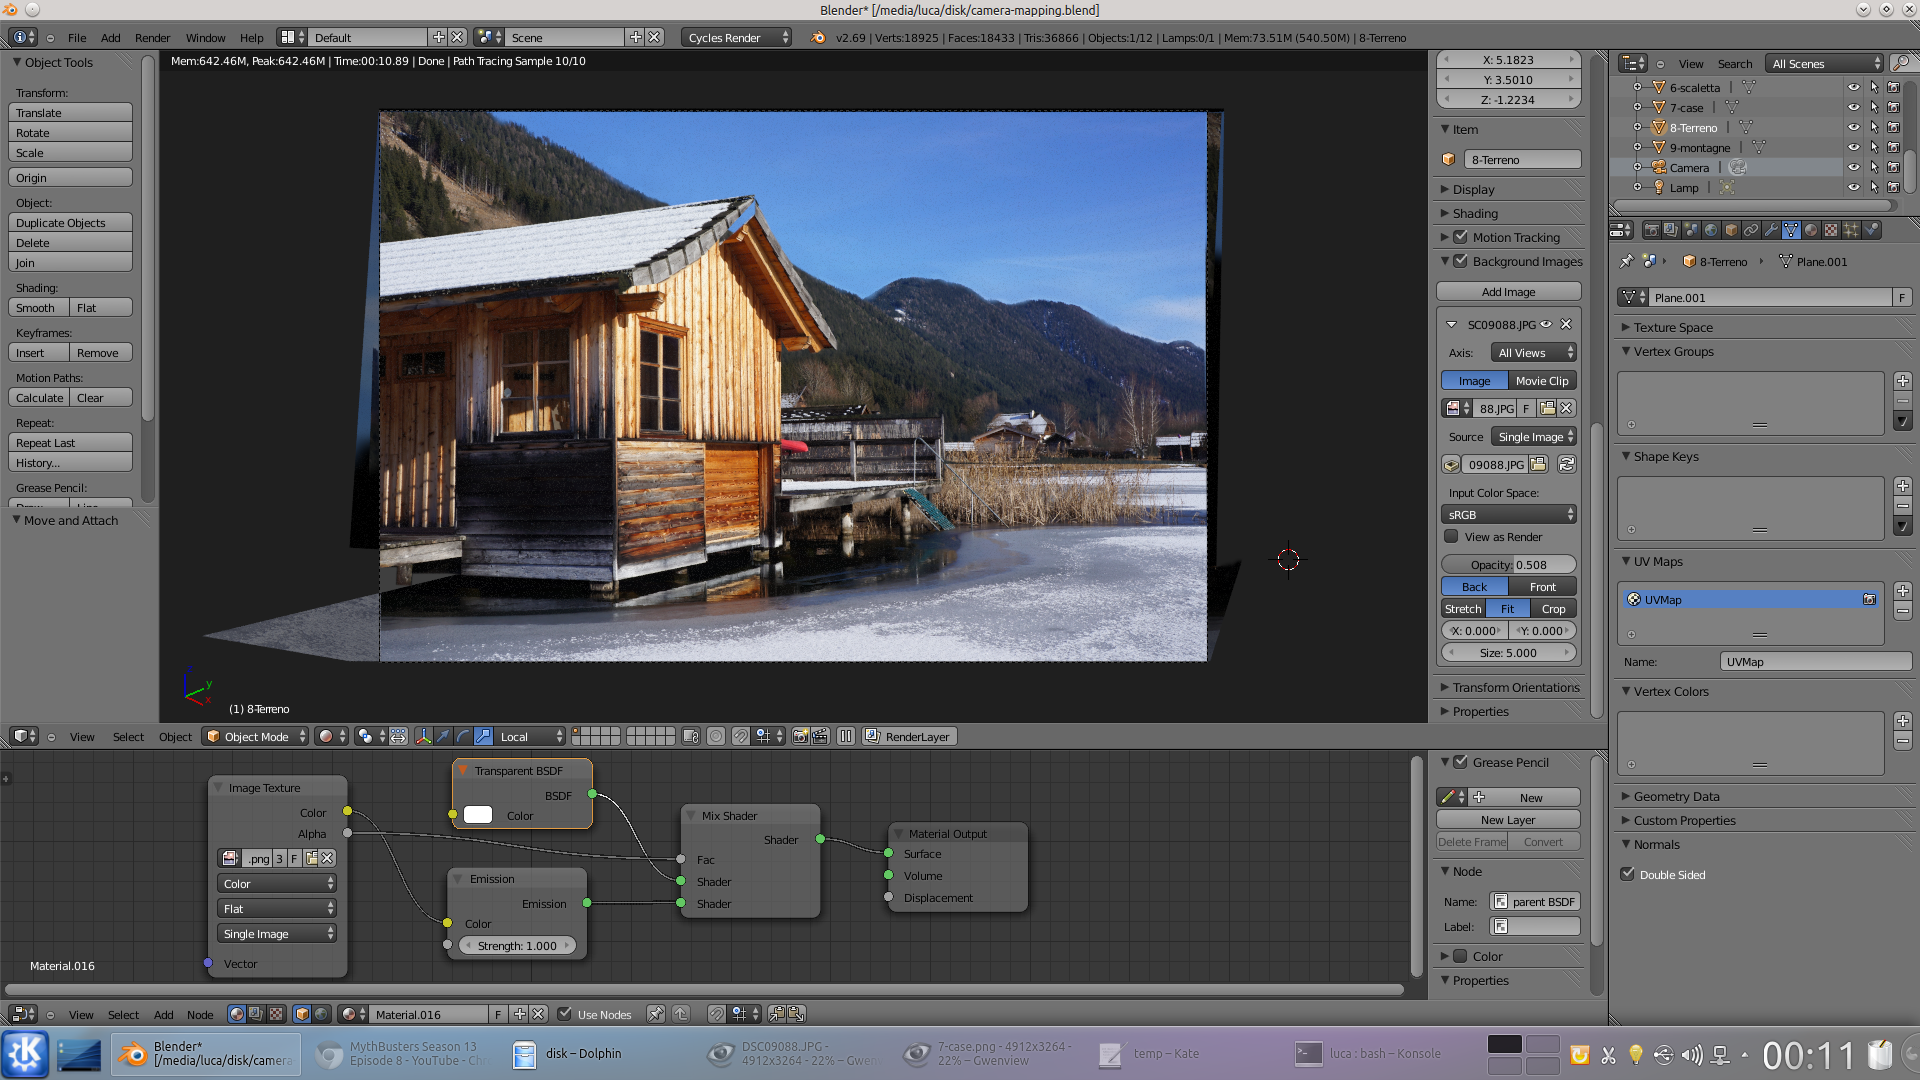 2 TRANSPARENCY – The output of Emission must be connected to the entrance Shader lower than Mix shader , while to the rest Shader you have to connect BSDF of Transparent BSDF . Finally, Alpha of Image Texture must be connected to Fac of Mix Shader .
 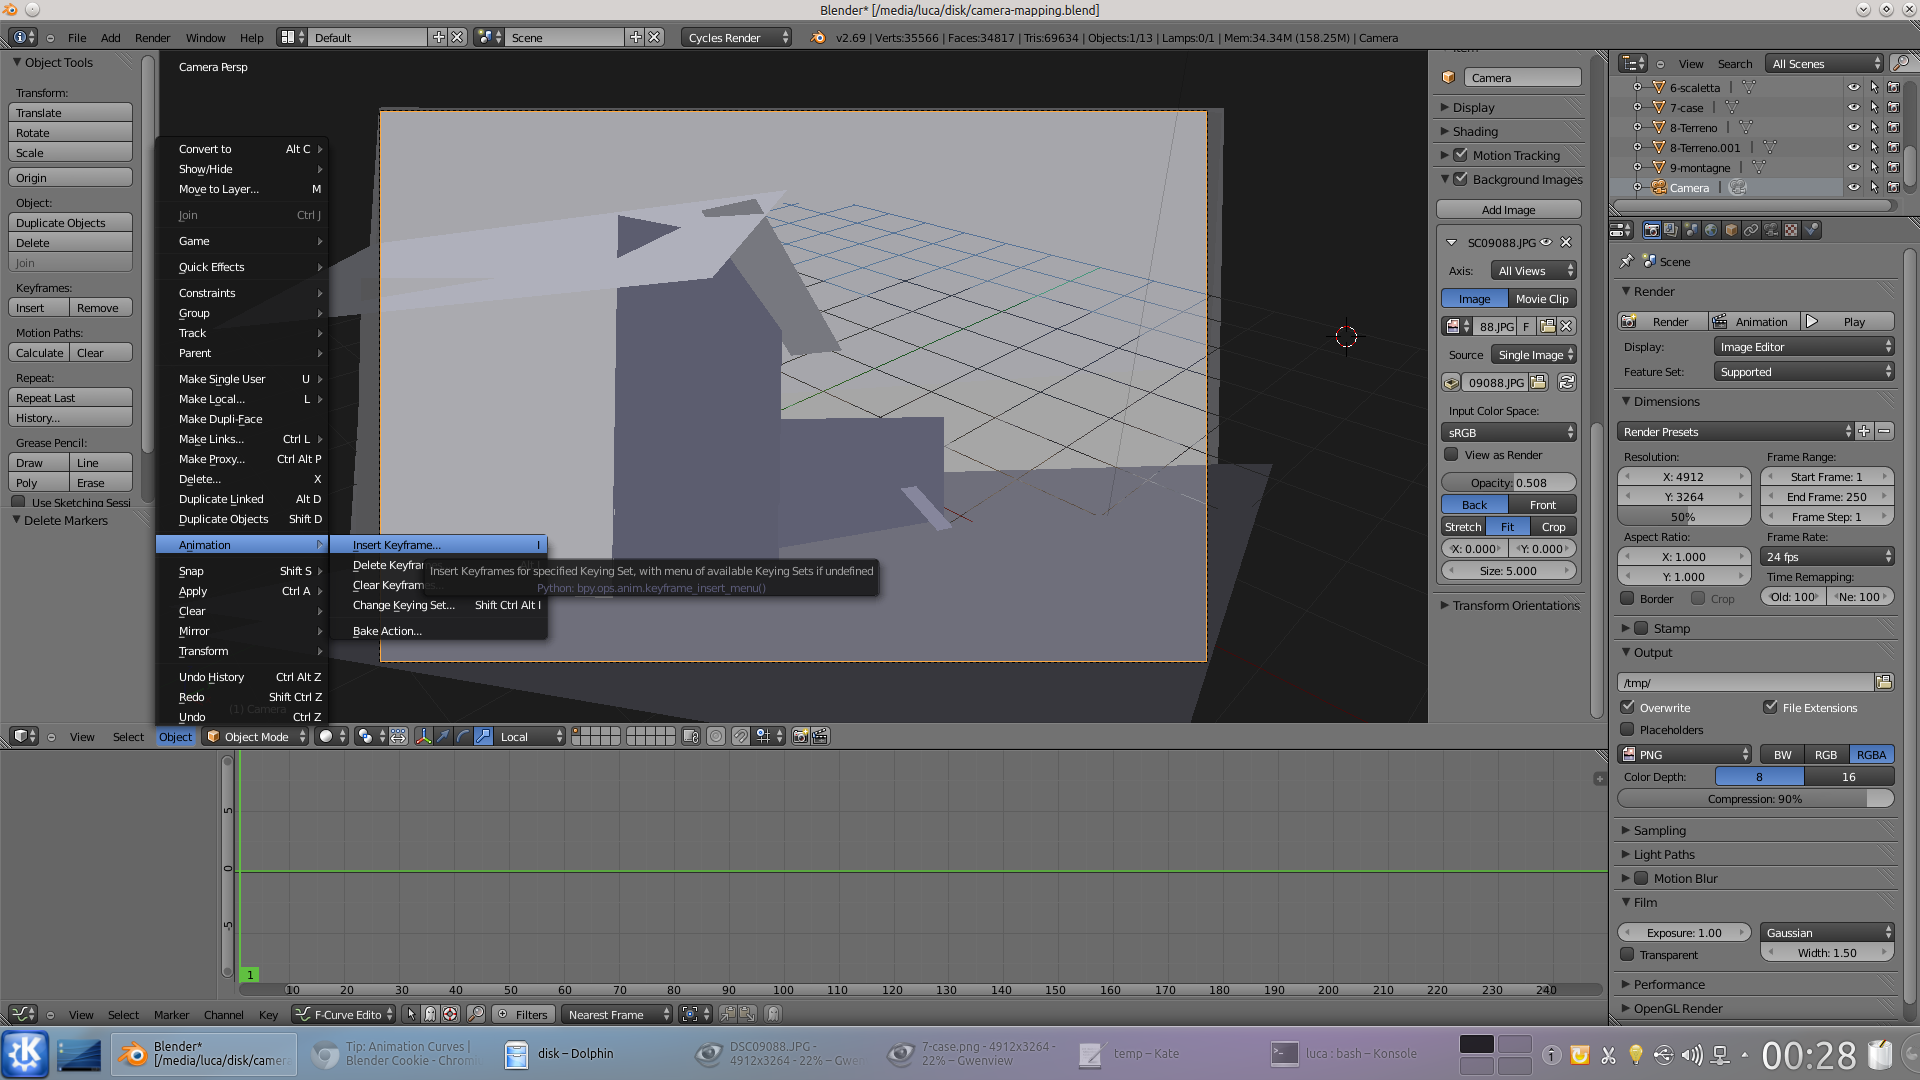 3 THE FIRST FRAME – We begin to animate the scene by moving the object Room . First we have to select it and open it instead of Node editor the panel F-Curves . From the bottom bar of the 3D view, we press the menu Object / Animation / Insert keyframe .
 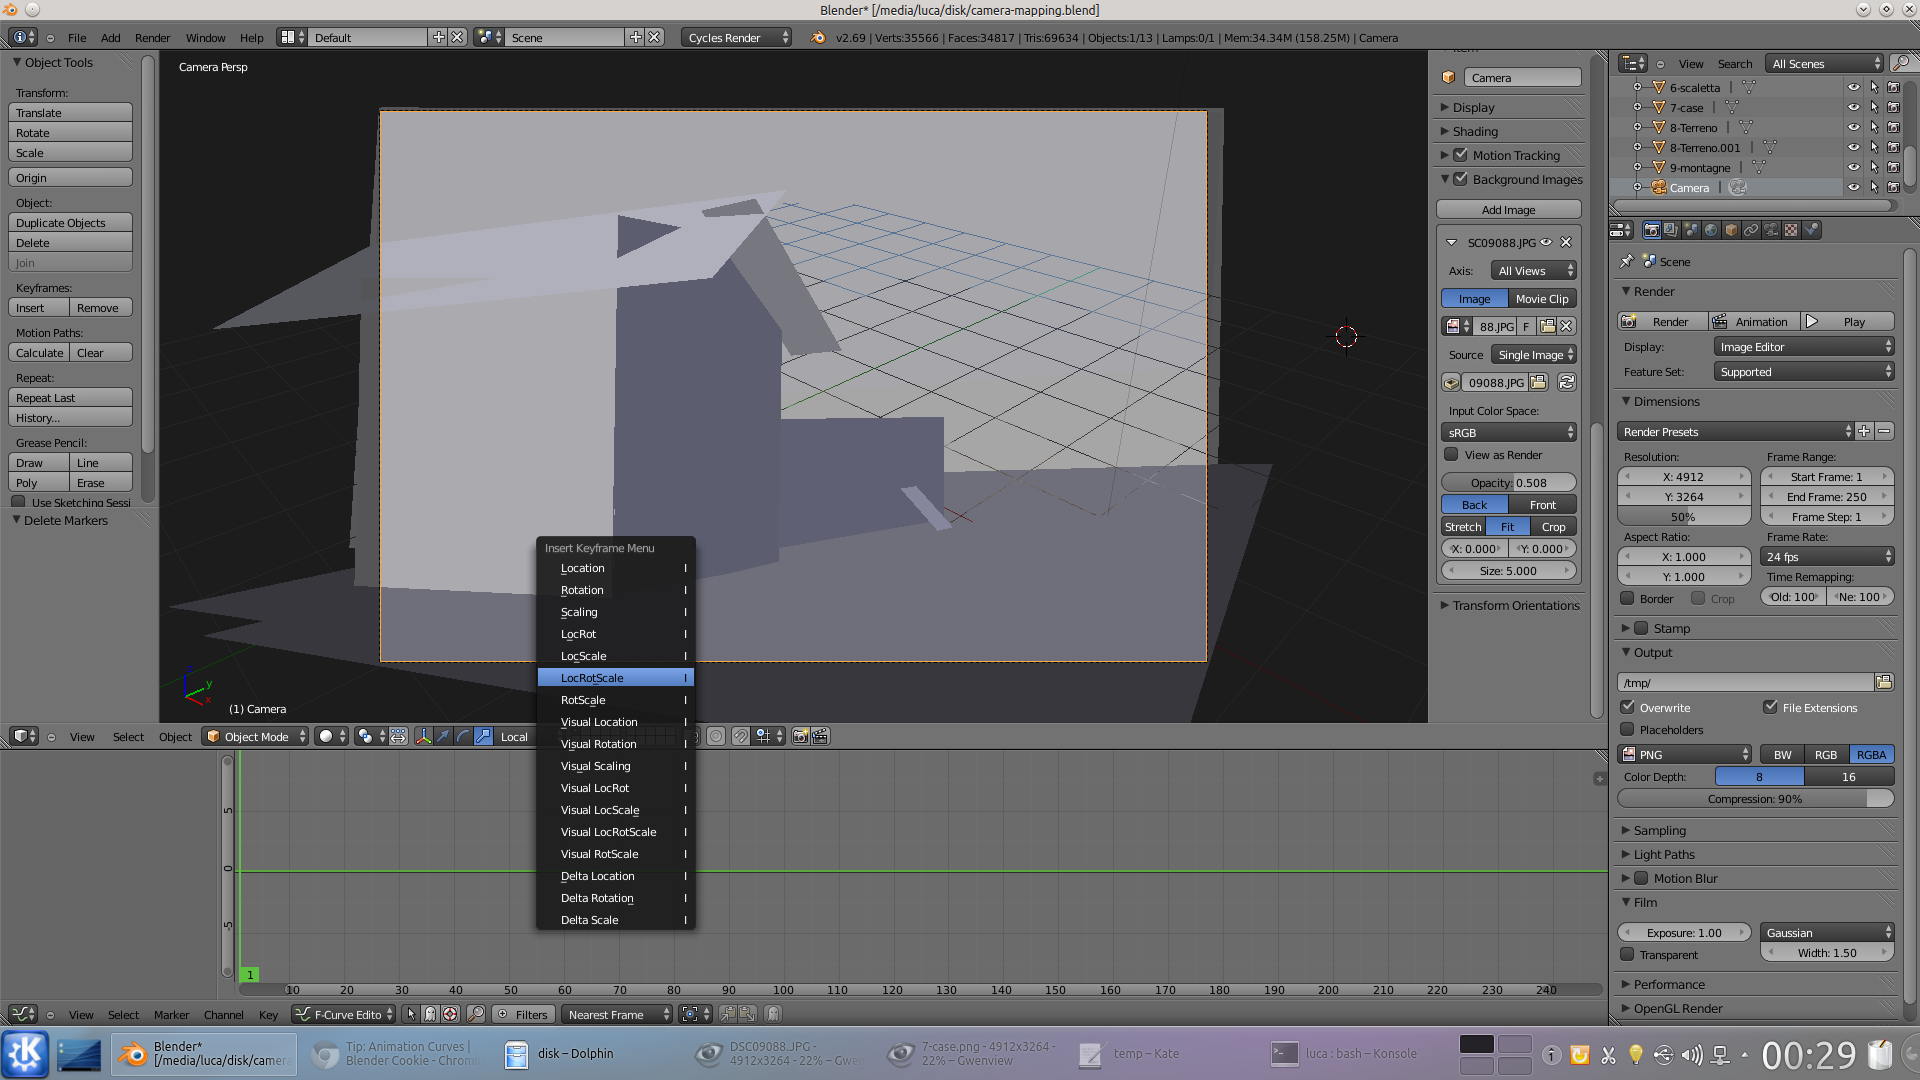 4 LOC-ROT-SCALE – A menu appears that allows you to choose the variables for which to set a keyframe: if we choose LocRotScale Blender will take into account position, rotation, and scale. From now on, the camera position is set for the current frame (number 1).
 Our movie is ready
Render frames and we import into Kdenlive
 1 FORWARD WITH TIME – Using the key right arrow we can move in the frames: remember that a second lasts 25 (or 50) frames. We can move the camera using the usual translation and rotation tools, and then press the button THE to register a new key frame.
 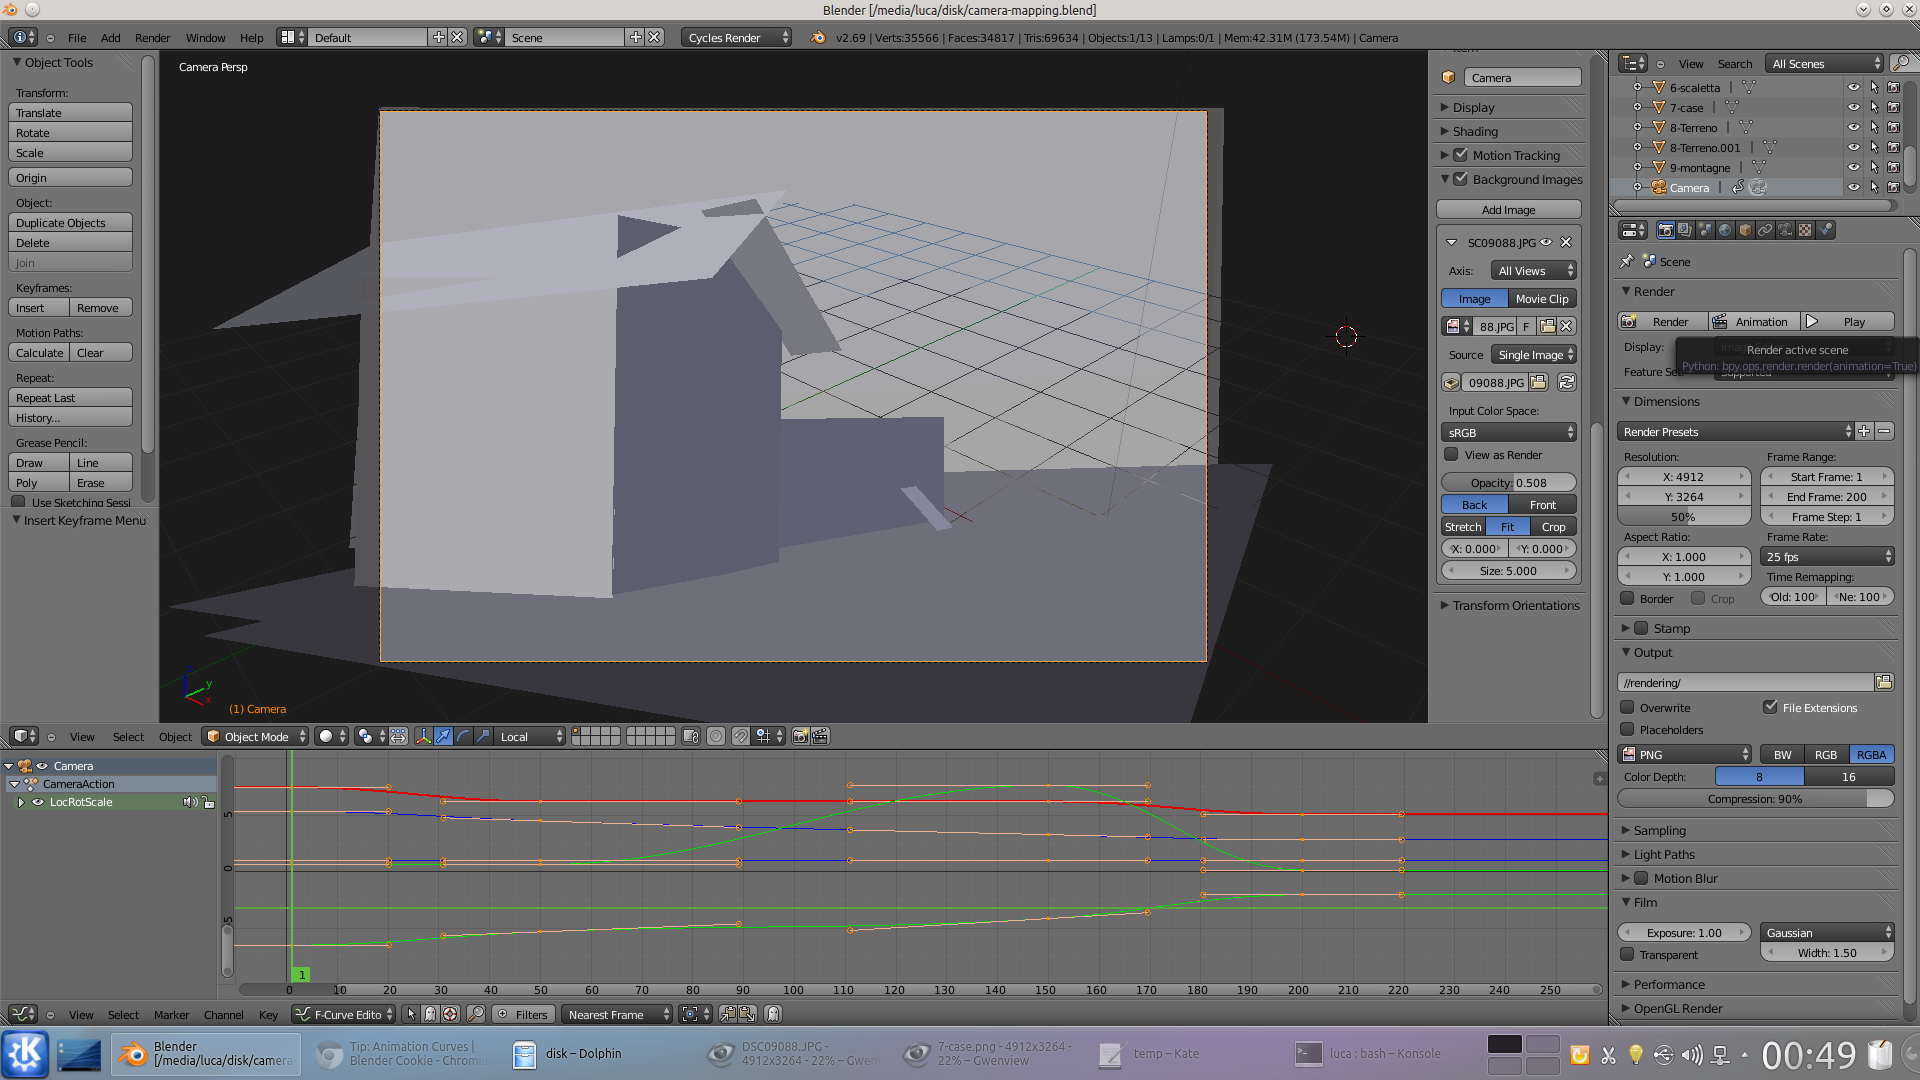 2 START RENDERING – When we add a new key frame, Blender automatically draws the displacement curves of the intermediate frames. In the end, in the rendering tab, we set a folder for the rendering images and then we press Animation .
  3 CLIP PRESENTATION – In the folder that we have specified, we will find all the frames of the animation: a png file for each frame. To turn them into a movie, open Kdenlive and click on the menu Project / Add presentation clip .
 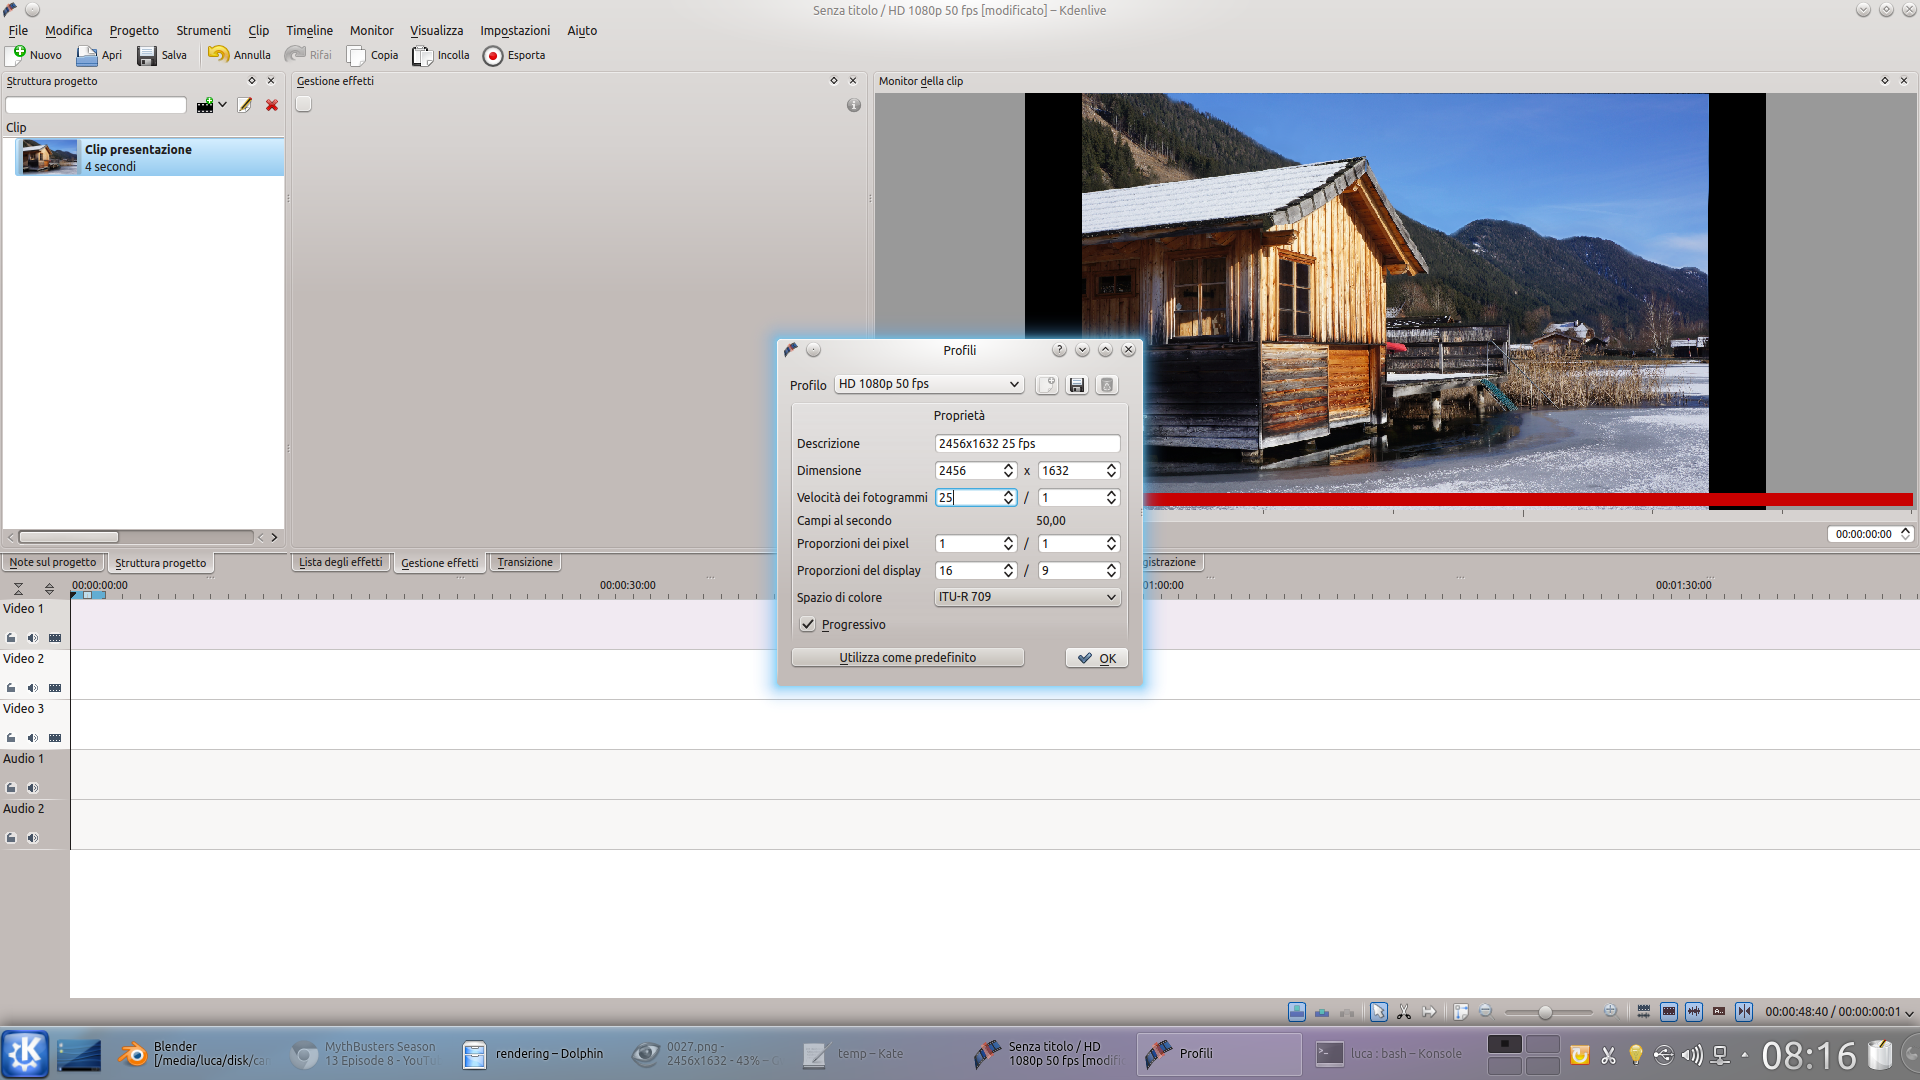 4 PROJECT PROFILE – Select the folder of the rendering files and set 00: 00: 00: 01 as duration of a single frame. Click on the menu Settings / Manage project profiles and create a new profile by pressing the first button on the left in the window.
  5 THE RIGHT PROFILE – The profile must be created with the resolution of the frames made by Blender. Then, click on the menu Project / Project settings and set the newly created profile as the video profile of the current project.
 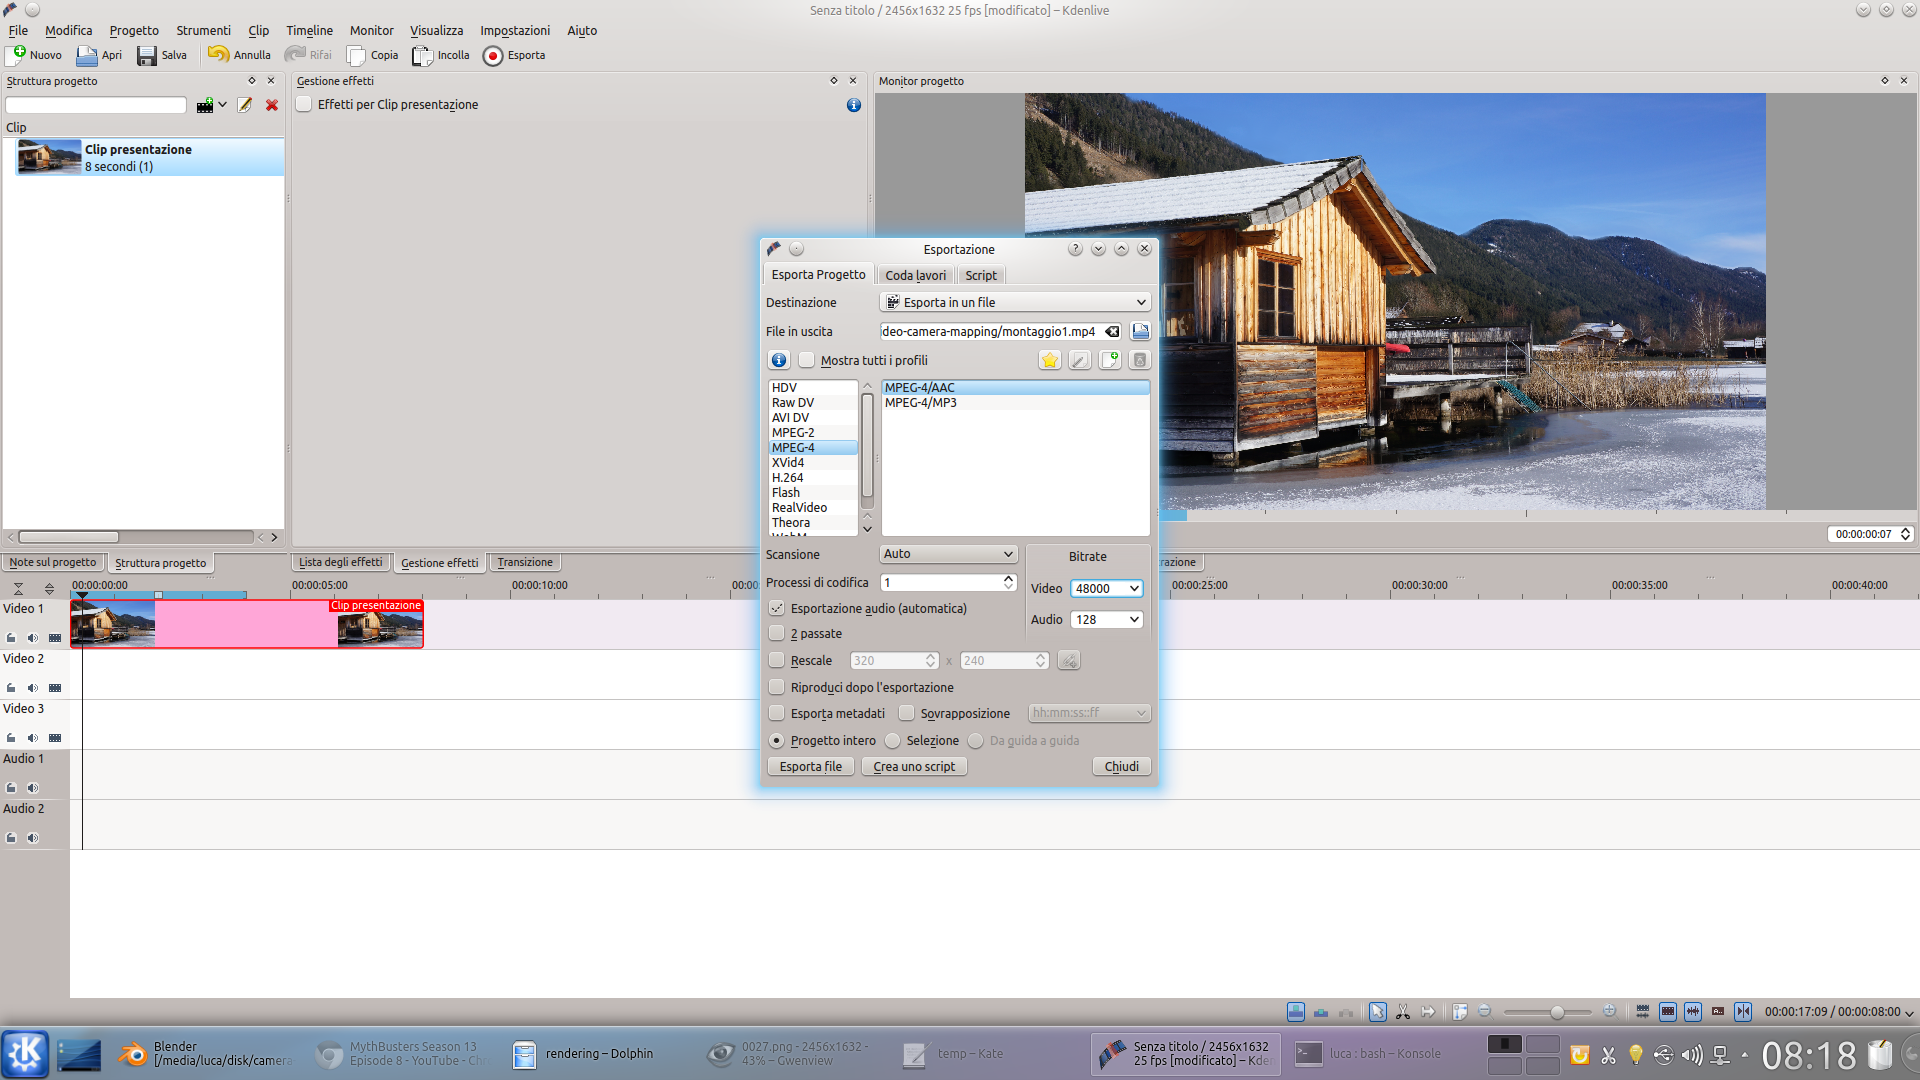 6 ON EXPORT – Now we can drag the presentation clip into one of the video tracks. You can make all the changes you want (effects, titles, etc….) as if it were a normal video clip. In the end, just export the movie and we can see the result.


Pingback: From 2D to 3D... FIRST PART - Kdenlive Tutorials