Even if you are not Michael Bay, you will certainly have thought at least once of detonating something in your movies. In these pages we show you how with Kdenlive and GIMP it is possible to obtain this effect at a cost almost equal to zero.
Until a few decades ago, the easiest way to insert an object’s explosion into a film was to actually detonate it, and to hope that nobody got hurt. Remember the scene of the Langstone bridge explosion in the movie “The Good, the Bad and the Ugly”? If you have looked at it well, you will have noticed that one of the stones of the bridge flies, during the explosion, less than a meter from Clint Eastwood’s head: the scene is spectacular, but the “good guy” risked being hit by a splinter at least 2 kilograms and end his career prematurely. Fortunately, the actors (and also the directors) are no longer the 1960s, and today it is possible to simulate very realistic explosions in computer graphics. As absurd as it may seem, an explosion produced by computer programs is often more realistic than a real explosion. After all, some fiction has always been introduced even in the early years of cinema, as far as explosions are concerned. In fact, in reality almost no explosion produces the masses of fire that we are used to seeing on the big screen: it would be a waste of energy. The explosives used in reality to demolish objects mainly produce transparent, and therefore invisible, gases and at most a small amount of smoke. Thanks to the magic of computer graphics, it is now possible to have videos of “beautiful” explosions that can then be superimposed on any other object to pretend that it is exploding. And Kdenlive, with its composition tool, is perfect for this task. Not only that: Kdenlive can also allow us to deform an object in order to give the illusion that it is swelling before exploding from the inside. The trick is simple: first of all we isolate a frame where the object appears immediately before the moment we decided to detonate it. Then, using the GIMP image editor, we eliminate the background in order to isolate the object in question. At this point just insert the image containing only the object in Kdenlive and superimpose it on the original movie, applying distortion. Probably, the probably greatest difficulty will be finding good explosion videos to insert in our video. The videos we use for our tutorial can be found on the detfilmshd.com website. Movies must be purchased, but it’s worth it as they are ready for use. Of course, we recommend that you use the “pre-keyed” version, that is, those whose background is already transparent, so you don’t have to apply the chroma key. If you don’t want to spend, you can get some low definition movies, which could still be good for some movies, on the old site, now closed but still accessible through the Web Archive: http://web.archive.org/web/20130508224023/http://www.detonationfilms.com/ Stock_Directory.html . T ruined an explosion of our liking, just insert it in Kdenlive, above the original movie, but below the image of the object that “swells”. In this way the public will have the illusion that the smoke and flames of the explosion come from inside the object that is exploding. As always, you can see the example video at the following address: https://www.youtube.com/watch?v=qyiidigXiYg
 In the first frame of the explosion the box begins to “swell” and a little smoke appears
  The box has increased in size, and there is now a blaze of the explosion
 Sound also matters
In explosions, sound effects are important: although we intend to make our movie with a soundtrack, we cannot avoid the sound of an explosion at the right time. An explosion without its sound effect is not realistic. Of course, we can get a good realistic effect by looking for some videos on YouTube that contain sounds of explosions, such as the films of the LUCE archive on the first and second world wars. Alternatively, we can produce the sound we want ourselves by recording, for example the sound of an exploding balloon, or by lighting a firecracker inside a bucket. Of course, it is also possible to add particular effects in post production: for example, the explosion of a balloon is a very rapid sound, it ends in less than a second. If we want to prolong the sound effect we can add an echo directly from Kdenlive, or change the speed or time of the sound recorded with the Audacity program.
We choose the clips
We select the right clips and place the first one in the timeline
 1 ALL CLIPS – Let’s start by loading the clips we need in Kdenlive: the clip in which you see the object that must explode, the clip in which it is practically identical except for the absence of the object that must explode, and obviously at least one explosion “already ready”.
  2 STARTING POINT – We load the clip with the object that is to explode in the track Movie3 and scroll the movie along the timeline until we find the moment we want the expansion the object in question begins. We can also add a guide.
 Help from GIMP
We modify the image of the object that explodes with GIMP
 1 PULL OUT THE FRAME – Found the frame where we want the explosion to start, extract it into a PNG file by clicking on the gear-shaped button and choosing the menu item Extract frame .
 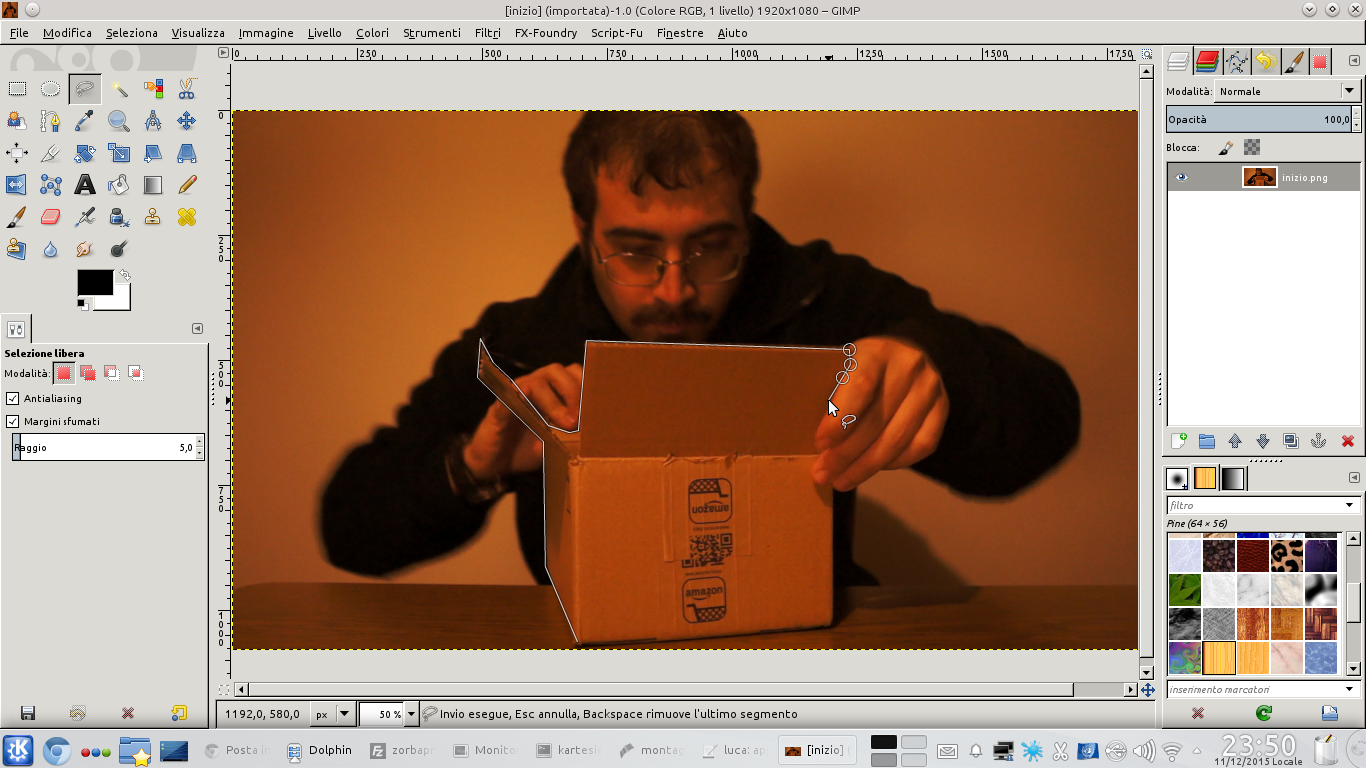 2 THE LAZO SELECTION – We open the PNG image containing the frame just extracted with the GIMP program. Using the selection tool lariat , select the contours of the object we want to detonate. It is good to set up shaded margins , but no more than 5 points.
 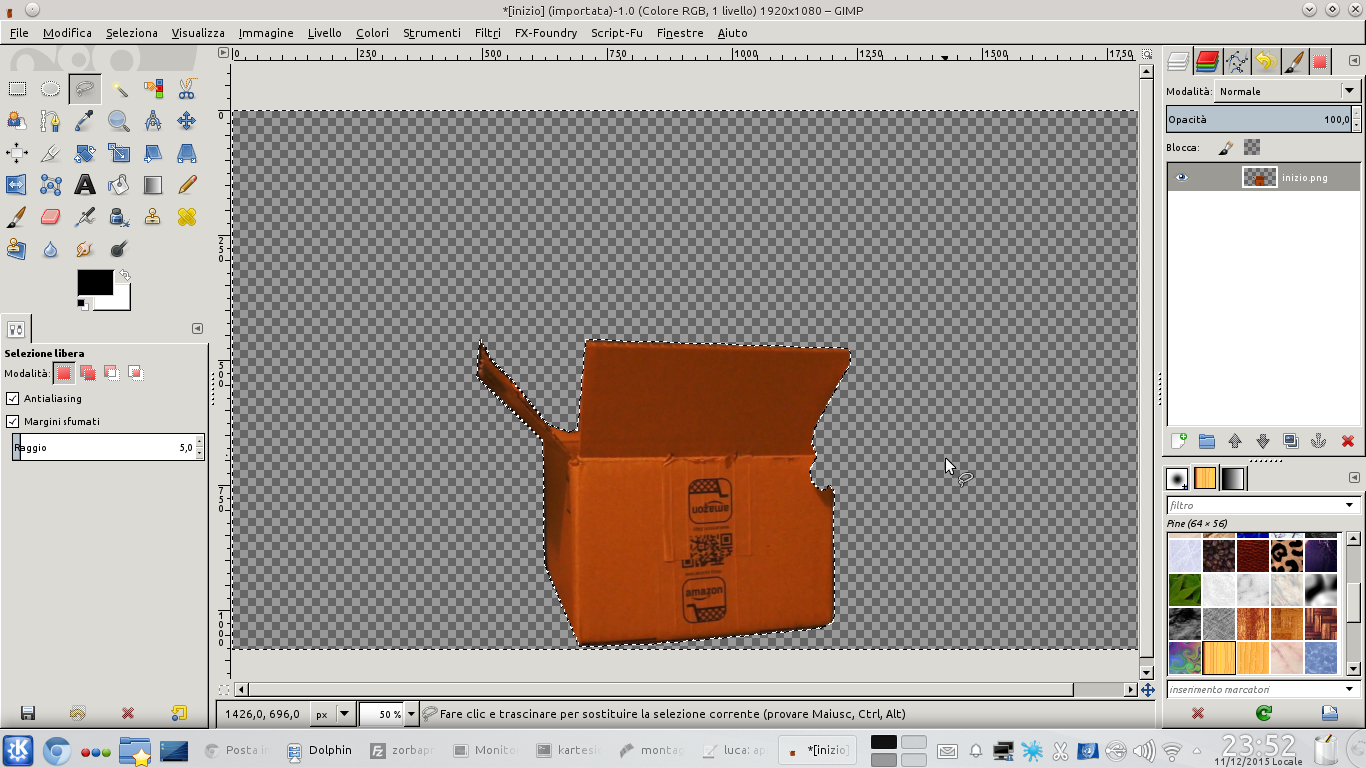 3 WITHOUT THE BACKGROUND – We have to eliminate the background, in order to work only with the object. Then, once the selection has been made, we press the keys CTRL + I to reverse the selection and then DEL to clear the background content.
  4 REBUILD IT – Probably, the object must be fixed: for example because a part is missing due to another object that covered it. Just use the tool Duplicate to copy parts of the object to rebuild it.
 Deformation before the explosion
With Kdenlive we can deform the image by “inflating” the object that is to explode
 1 IN THE TIMELINE – Export the GIMP result to a PNG file and import it into the Kdenlive project. The image must be positioned in the track Video1 , starting at the same point where we had extracted the frame, and ending about ten frames later.
  2 THE COMPOSITION – We apply to the track clip Video1 a transition, directed towards the track Movie3 . The transition must be of the type Composite . If everything is correct, the object that is to explode should currently be perfectly superimposed on the original image.
  3 WITH DISTORTION – We tick the box Distortion in the transition options Composite . Let’s move to the end of the clip and add a key frame: in this, we enlarge the object that must explode, so that it appears clearly deformed.
  4 THIS IS THE EXPLOSION – Few frames after the start of the track clip Video1 , we can put it in the track Video2 the video of the explosion. This too will have to have a type transition Composite referred to the track Movie3 .
 Choose the right times
For a good effect, the timing must be corrected on the frame
 1 A LITTLE FASTER – After correctly positioning the explosion, so that it seems to appear from inside the object that is to explode, we also apply the effect to the clip Speed . In fact, we will probably have to speed up the explosion, because DetFilmHD movies are slow.
 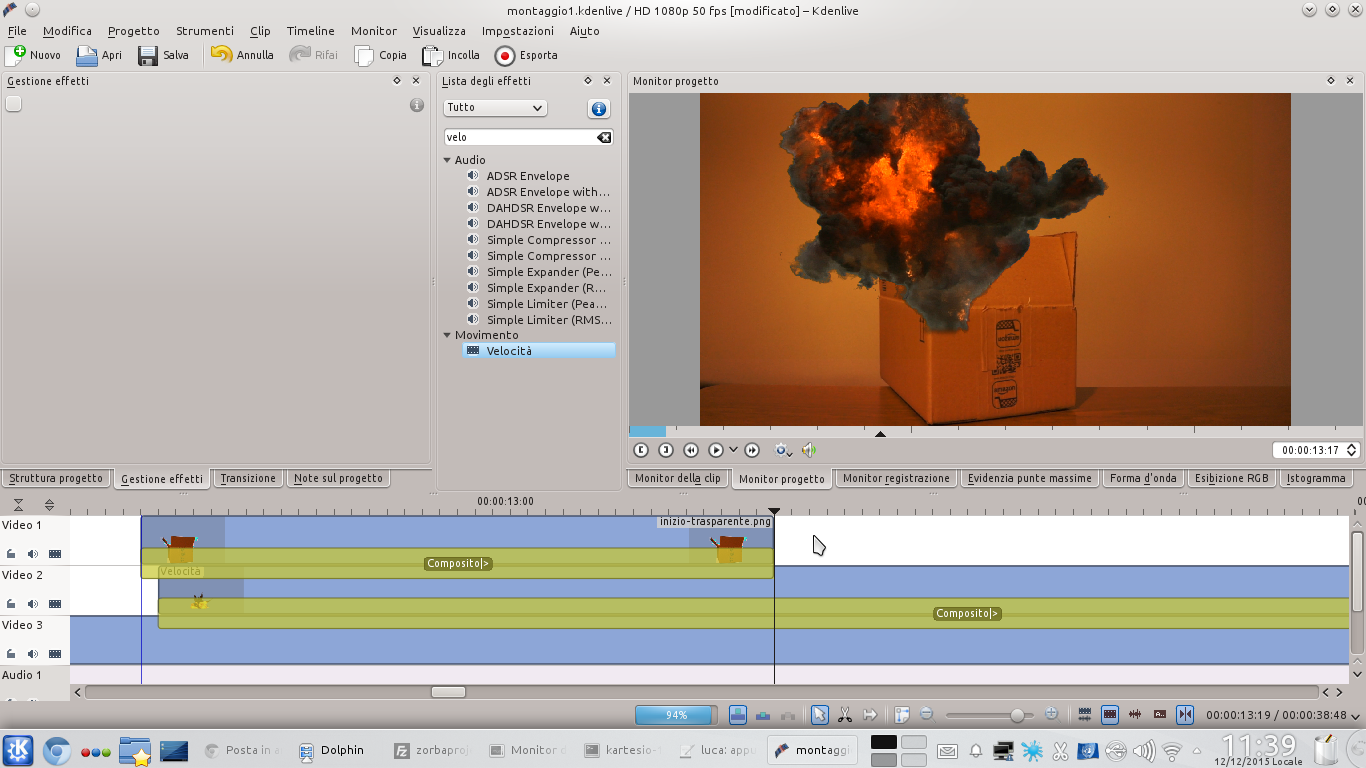 2 THE RIGHT CUT – At the moment, when the track clip ends Video1 the original object appears again as it was before it exploded. We must therefore reach that moment in the timeline and cut the track clip Movie3 , eliminating the next part.
 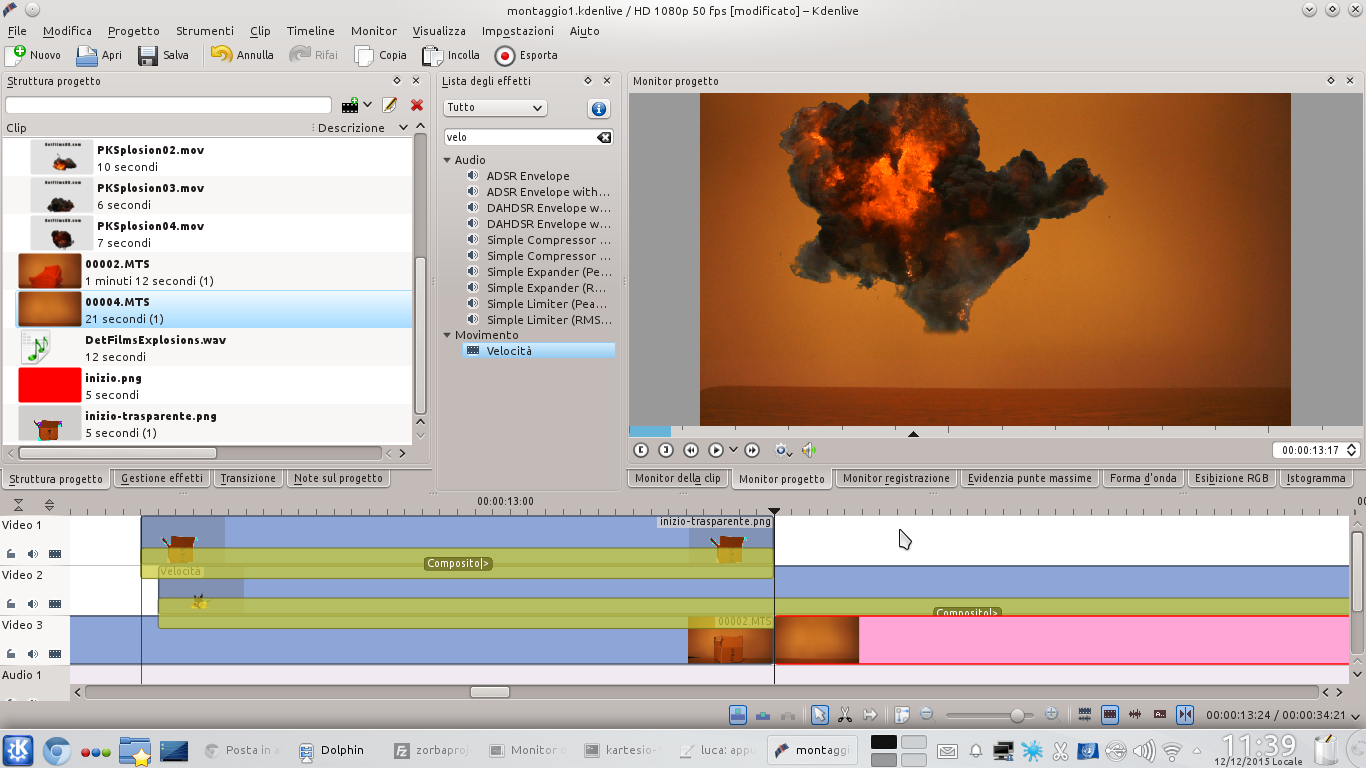 3 A REPLACEMENT – Instead of the newly erased part of the track Movie3 , insert the clip containing the scene without the object that exploded. The transition from one clip to another must take place in the last frame of the track clip Video1 , not to be obvious.
  4 NEW KEYFRAME – Let’s go to work now on the track clip Video1 : let’s position ourselves 3 frames before the end of the clip and add a new key frame. We don’t have to make any changes to the newly created keyframe.
  5 IN TRANSPARENCY – Now we can move to the end of the clip, to the last key frame. In this, we simply bring opacity to 0% . We made a quick fade to make the exploded object disappear.
 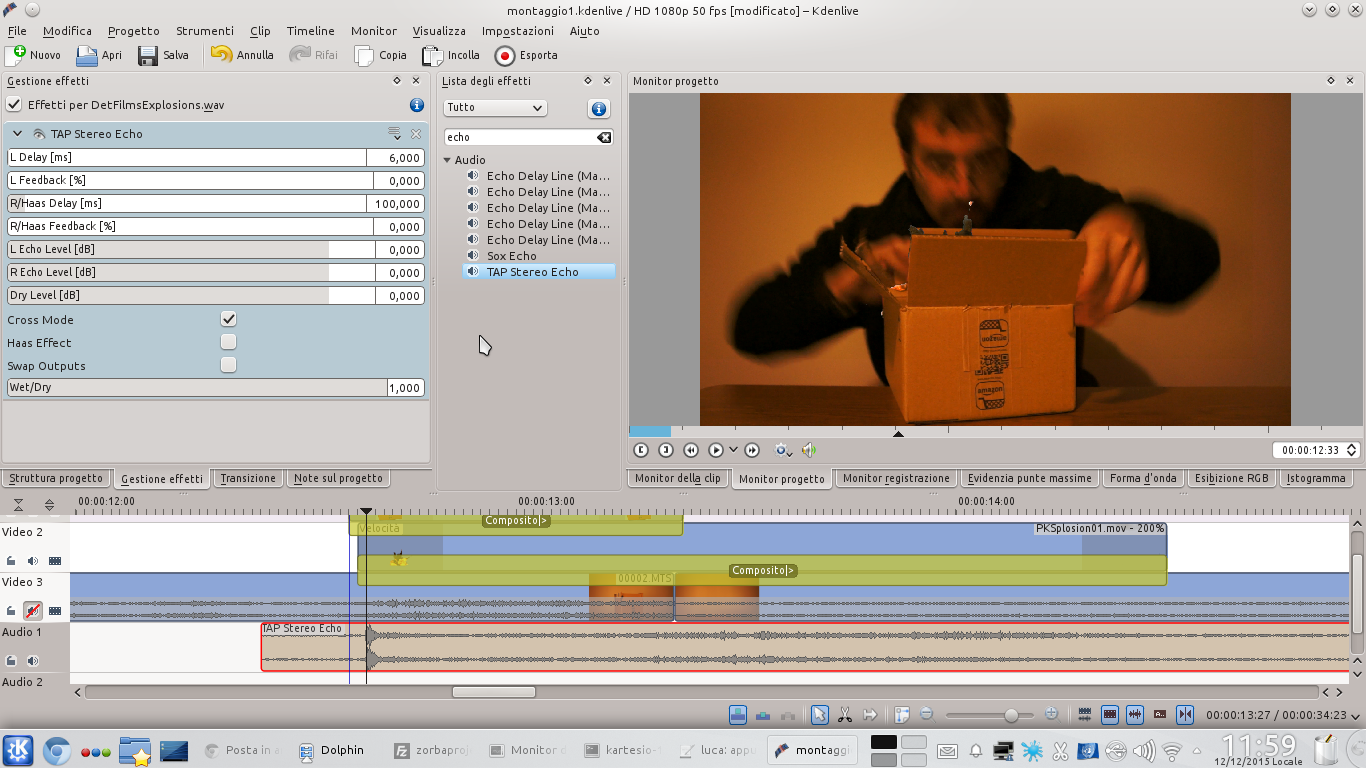 6 SOUND EFFECT – To increase the realism of the scene, we can add an audio track that contains the recording of an explosion. Timing is paramount: the sound of the burst must begin the moment the smoke of the explosion appears in the scene.

