We can use Kdenlive to pretend that we have managed to pass the camera through a wall, from one room to another adjacent to it. We do not just slide the image, we will also change the perspective.
In many films there is a need to present events that happen in side-by-side rooms: in large film productions the now classic sequence in which the camera passes through the wall is often made. In the film “a bullet popped” he jokes about this too. In fact, in a shot of this type, Leslie Nielsen suddenly goes through the wall just like the video camera thus revealing the trick. In fact, if you have a big budget you can build your movie set with fake walls in front of which to slide the camera. But if you don’t have this budget, and you would like to make a hole in the wall of your house to get a camera through, the best solution is to use computer graphics. The method we will implement is the one with the lowest possible cost, and consists of making two separate shots, one in the first room and one in the second, then joining them with Kdenlive using a transition that provides the illusion of the passage from one room to another. The basic idea is obviously very simple: by exploiting the Affine-like transitions that Kdenlive makes available to us, we can slide the first video clip off the screen, for example by pushing it to the left, and we can simultaneously bring in the second video clip by exploiting another Affine transition. Of course, between the two clips we will leave a few pixels of space, to simulate the interior of the wall. But it may not be enough: in fact, the problem is that when you really pass a camera through a wall, you obviously get a change in perspective, because the camera lens gets closer and closer to the wall and the lines seem much longer than normal. To simulate this specific feature, it would be necessary to use a 3D modeling environment such as Blender and camera mapping. But this would take a significant amount of time, and can be overstated for a small home movie. Fortunately, the latest versions of Kdenlive offer the effect Corners . This effect allows us to modify the 4 corners of a clip separately: moving them we can therefore change the perspective. Specifically, we can give the illusion that the camera is approaching the wall if we keep the angles that in the filmed scene are close to the wall in the same position they are in (for example the corners to the right of the first clip) and move instead the other two (therefore those on the left for the first clip) in order to draw an isosceles trapezoid whose largest base is represented by the side between these two angles (i.e. the left side for the first clip and the right side for the second clip). The effect is clearly approximate, because if you look at the objects in the scene you realize that they do not follow the rules of perspective since everything appears as if it were flattened in the background, but if it is done quickly enough you can trick the viewer’s eye making a realistic passage through the wall. As always, you can see the example video at the following address: https://www.youtube.com/watch?v=31z0yF40VKY
 The transition between the two rooms
  The Corners effect also allows you to set a stretch of the image
 Make the effect credible
This type of sequences requires a wide angle lens, so that the perspective lines are very elongated and the movement of the camera can be easily felt. Obviously, the lens used in the first room should be the same as the second, since in theory it is always the same video camera that passes through the wall. In the example movie, you can see how the animation is much more credible in the first room than in the second. This is because in the first room the camera was positioned closer to the wall. To improve realism, you should try to bring the camera closer to the wall as much as possible: this allows you to reduce the extent of the perspective change to be made in post production. In postproduction it is important to set a wall size (the space between the two clips in the tutorial is 50 points) consistent with the objective that was used: the wall must not seem too large or too thin.
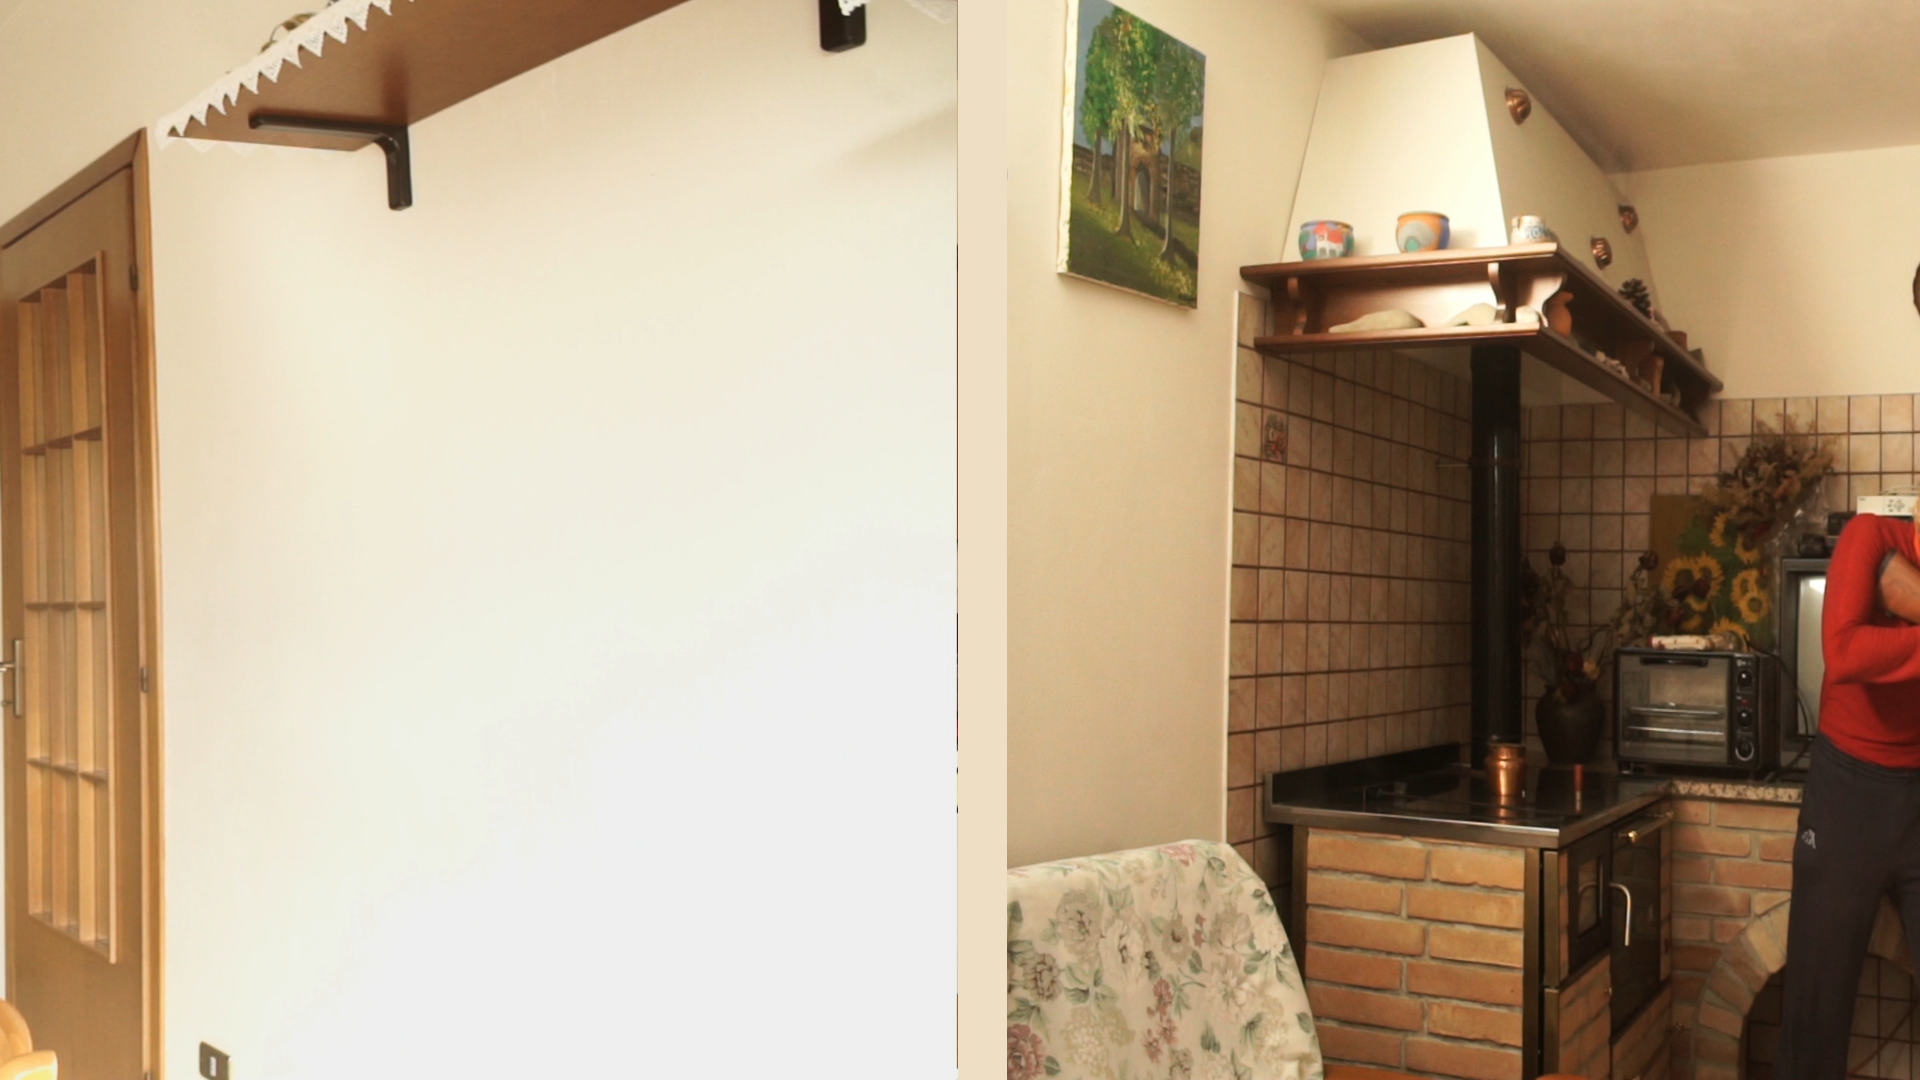
Two rooms, two clips
We correctly position the clips shot in the two rooms to be placed side by side
 1 THE FIRST ROOM – For our video two clips are needed: one that takes the first room, the other that takes the second room. The first room clip must be inserted into the track Video2 or the middle one.
 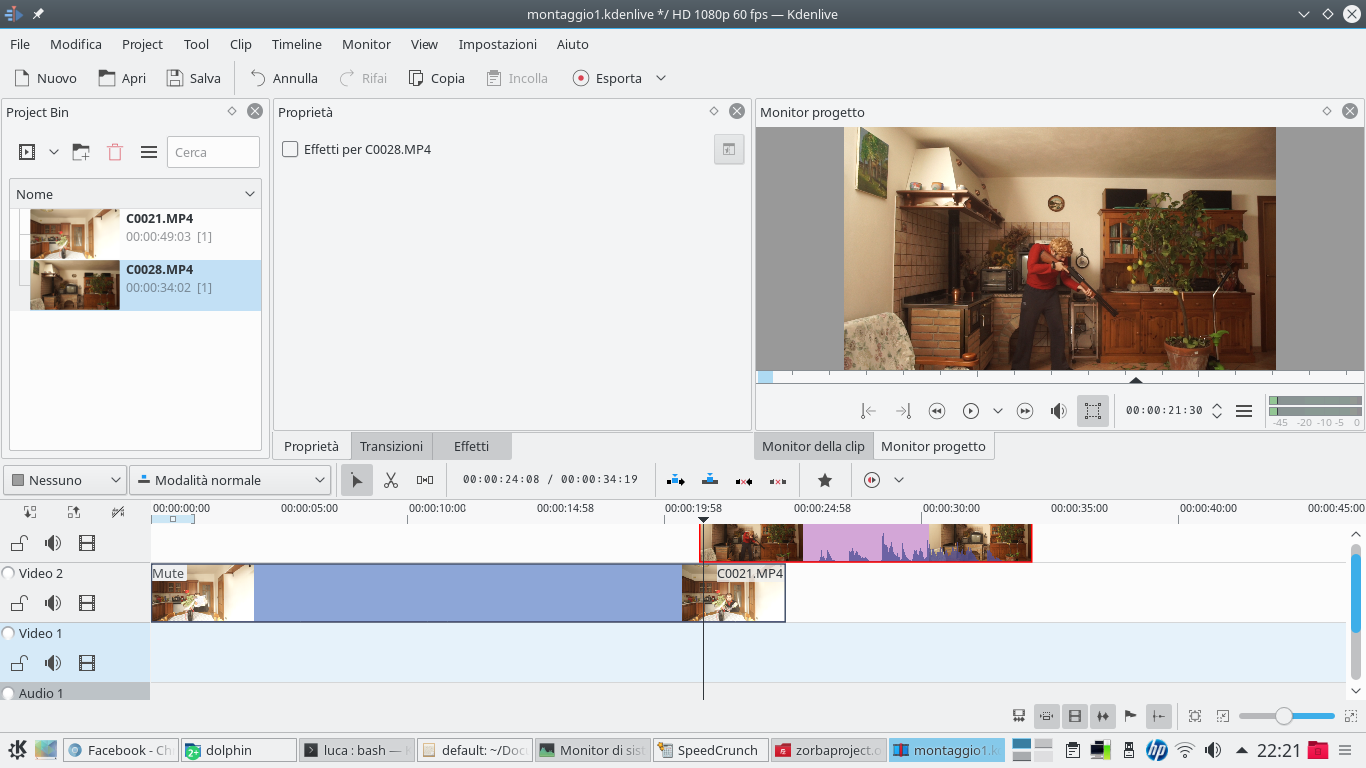 2 NOW THE SECOND – The clip of the second room, however, must be positioned in the track Movie3 , or in the track above the Video2 . We already align the two clips so that they overlap for a few seconds.
 Prepare for the transition
We begin to animate the first of the two clips
 1 ONE COLOR CLIP – Now add a color clip, through the menu Project / Add color clips . We can choose the color we prefer: it will be the one that will represent the inside of the wall. Usually you choose a dark color, or one closer to that of the walls.
 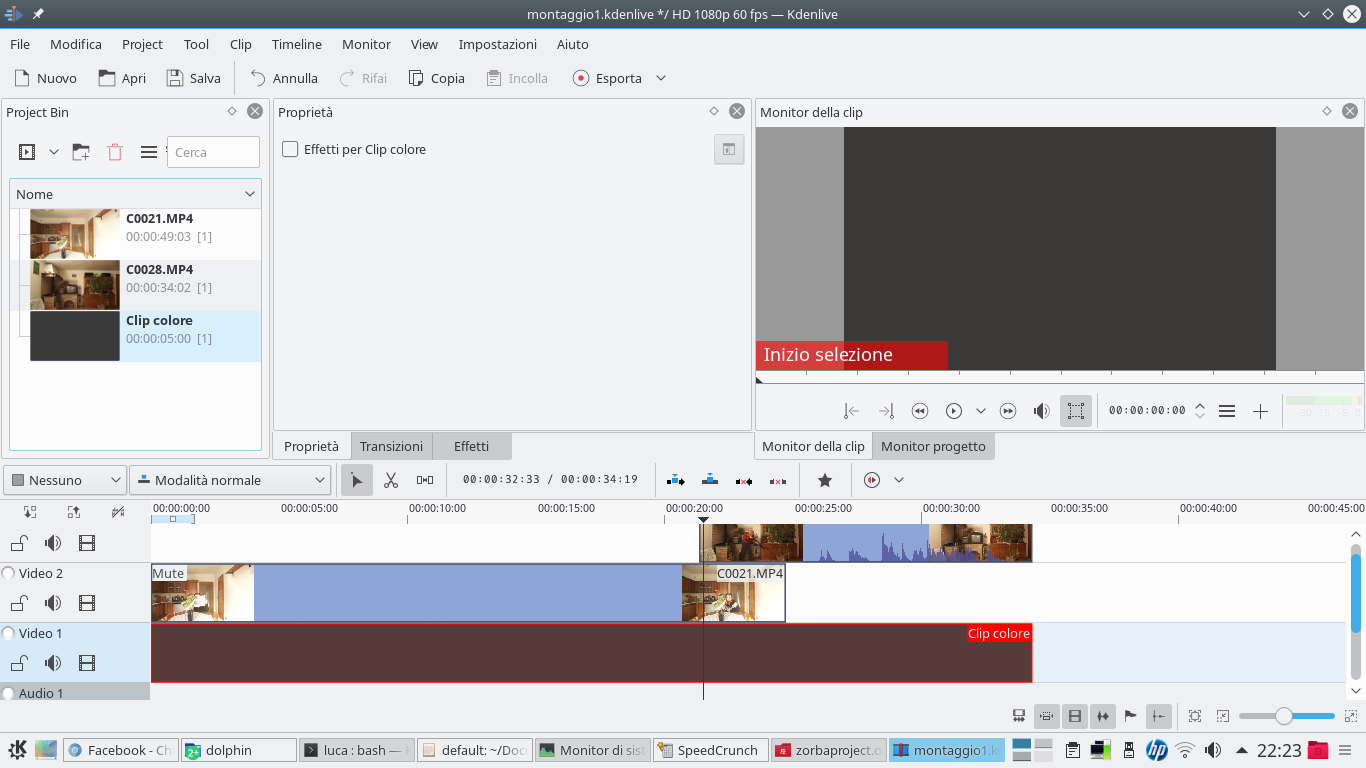 2 ALL DURATION– The color clip is placed in the track Video1 , and must last until the end of the second room clip. In fact, this clip will also be the basis of our composition. If desired, you can always change color or choose an image.
  3 A TRANSITION – Now, let’s add a transition between the track clip Video2 is Video1 . The transition must be of type Affine , and must be facing the track Video1 . For now, let’s leave the settings as they are.
  4 THE STARTING POINT – Let’s position ourselves a moment before the start of the second clip, ed we set a keyframe. This will be the beginning of the scrolling animation of the two scenes, so for now we will not change the key frame settings.
 End the animation
We move the two clips synchronizing them so as to leave a space between them
 1 THE SPACE OF THE WALL – Now we are right at the beginning of the second room clip and, working on the Affine transition, we add a new key frame. This frame should be created by moving the image slightly, setting X to value -50 .
  2 EXIT THE FIRST CLIP – Now let’s go to where we expect the camera to go completely to the second room and add a new key frame in the transition Affine . This will have like X the value -1970 .
  3 ENTER THE SECOND – Now we apply the same type of transition to the track clip too Movie3 , always referring to the track Video1 . Its first keyframe must have the value X set to 1920 , that is the width of the clip (if in FullHD).
 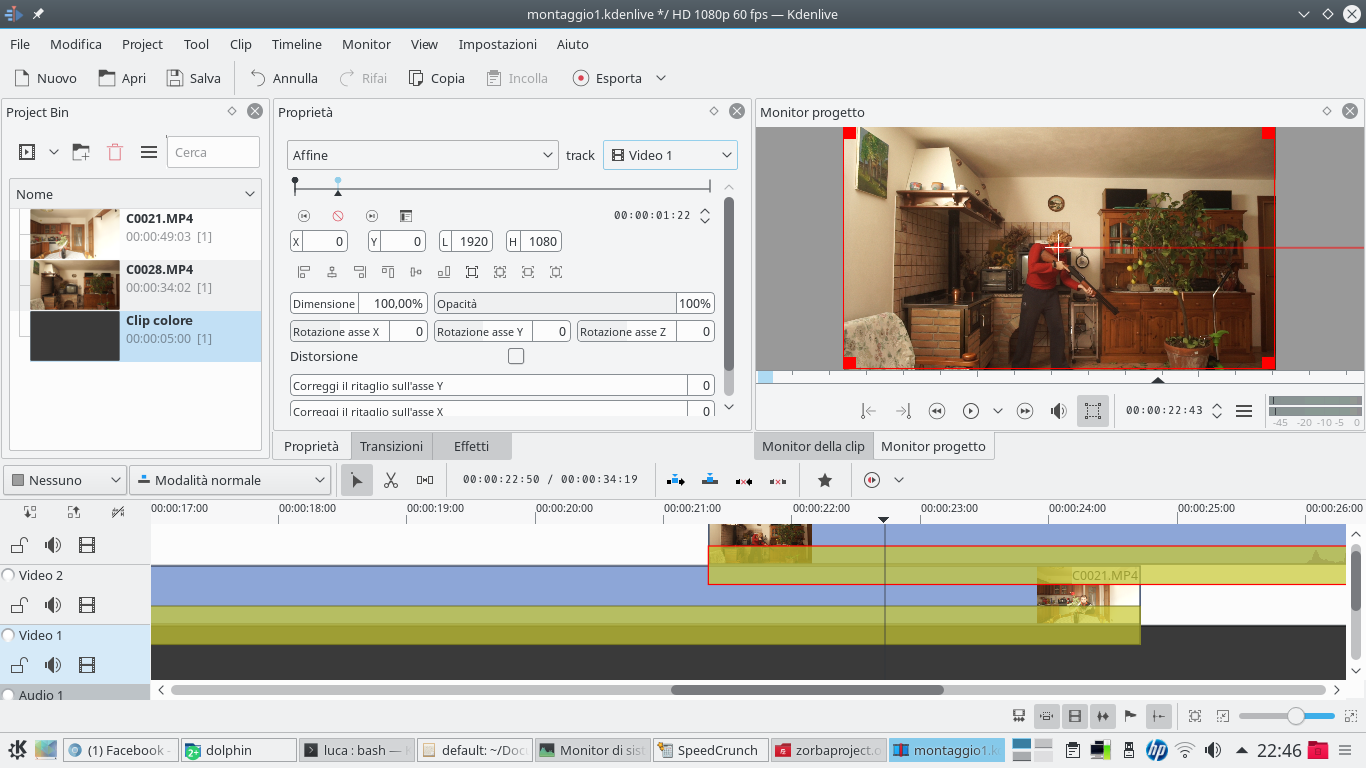 4 THE ZERO POSITION – We move now to the moment when we finished moving the clip Video2 and, in that same position, we add a new keyframe to the transition of the track Movie3 , setting its value X to 0 .
 Distort the perspective
To make the scene more realistic we change the perspective
 1 CORNERS EFFECT – We add to the track clip Video2 an effect Corners . Let’s position ourselves where we begin to move the clip to slide it off the screen, and add a key frame of the effect with feather alpha equal to 0 .
  2 HERE ARE THE CORNERS – We then move to the moment the animation of the clip of the Video3 track begins and, always working on the effect corners , let’s add a new keyframe. Here we begin to move the individual corners of the clip to distort the perspective.
  3 THE PERSPECTIVE – The first distortion must be very light, only a few seconds have passed. Then we move to the position where the movement of the clip ends Video2 , and we add another key frame of the effect, but greatly changing the perspective.
  4 THE SECOND CLIP – Now let’s set a type effect Corners also to the track clip Movie3 . In this case, we move to the point where the clip has stopped moving along the screen and set a key frame of the effect.
 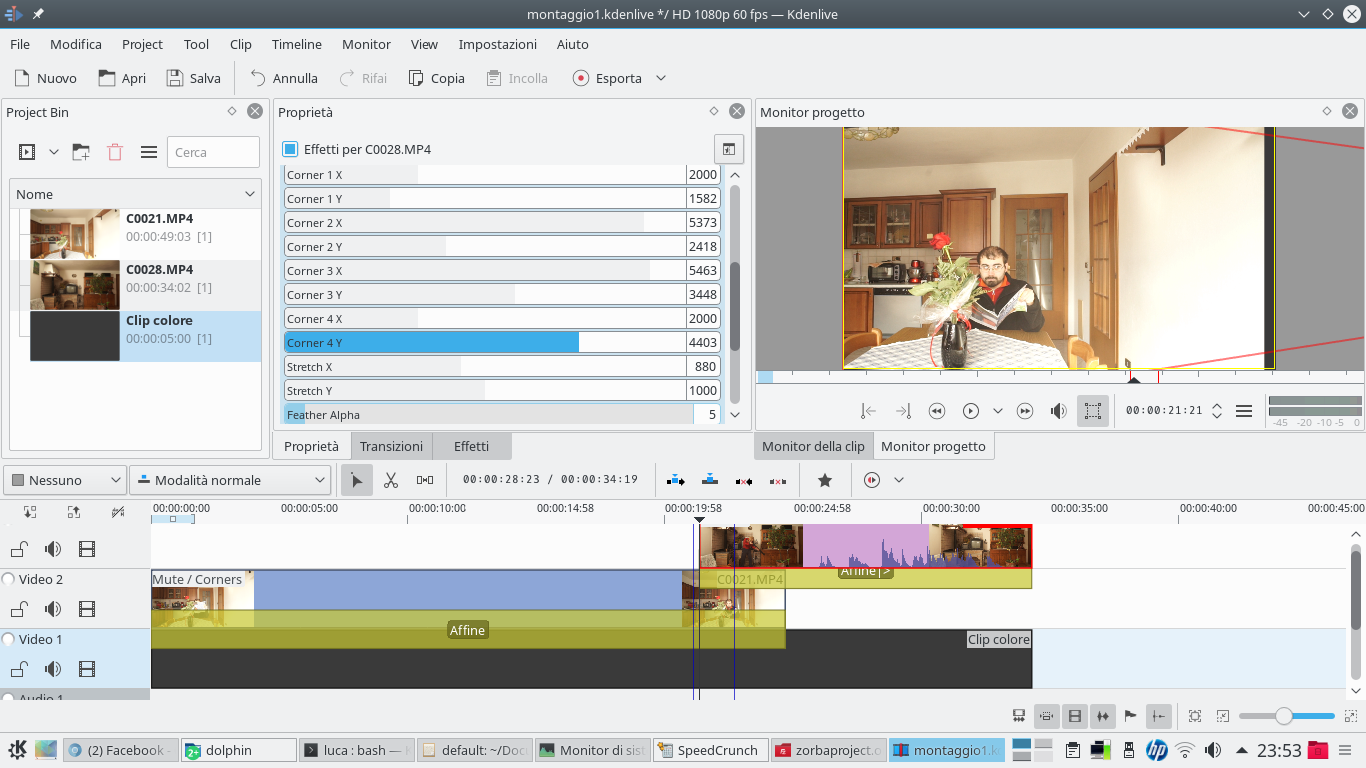 5 OPPOSITE DIRECTION – Going back to the beginning of the track clip Movie3 , add a key frame and modify the positions of the 4 corners so that the perspective moves in the opposite direction to that of the previous clip.
  6 COLOR OF THE WALL – Now the animation is ready: if you want, you can even superimpose a new track with a piece of wall that covers the space between the two clips, animating it with a transition of type Affine .

