Thanks to the effects of Kdenlive we can build a hologram, like those seen in all the greatest science fiction films. All we need is a video of who will represent the hologram in front of a green sheet.
In all science fiction films set in a more or less remote future, various futuristic objects are seen, such as teleportation devices or telecommunications with holograms. In fact, it is often difficult for current writers to imagine what the world will be like and what technology we will have between dozens and dozens of years: if for the authors of Back to the future we should all have flying cars but no flat-screen TVs, it is obvious that to do forecast is not easy. But holograms are something actually realistic, more than anything else, because they already exist: they are only very expensive, and it seems that for now only one of the candidates for the French presidency could afford them (Melenchon, who led a demonstration in two cities simultaneously thanks holograms). But it is likely that over the next few decades the price will drop and it will be possible to make 3D video calls. In other words, even if at the moment the “domestic” holograms are still science fiction, they are not such an unrealistic forecast, and they can prove to be an excellent idea for those who want to make a science fiction film that has a background of truth. Inserting a fake hologram in one of our videos is a not too complicated operation, but requires some precautions. First of all, you will need a movie of the “original” scene, that is, the one where you see the hologram projector: this movie will function as the background of the effect. Another film will be positioned above this background, the one that will represent the hologram itself: simply a shot of our actor in front of a green cloth. With the “chromatic key” effect we can make the green cloth disappear, perfectly superimposing the actor on the background, as if it were coming out of the projector. However, it is obvious that a simple overlay cannot be enough: first of all, we will have to use a light-type overlap mode, in particular “Hard light” is recommended. In this way the hologram will appear to be made up of light, therefore like a real hologram. To facilitate the idea that the hologram comes from the projector, we can draw light rays, to appear (weak, of course) like a cone that comes out right from the projector and that surrounds the hologram. In addition, we will have to add some noise: if the image is too perfect, it is not realistic. Partly because of the mistrust that everyone has towards telecommunications providers, partly because of the awareness that perfect things don’t exist, nobody expects a hologram to really look like having a person in front of him. With Kdenlive we can add two disturbances to make the hologram more realistic: first of all the “grain” effect, that is, a random disturbance of points that appear on the hologram as a sort of rustling of the image. They give the impression that the hologram is actually made up of dots of light. The other effect is called “wave”, and it is a series of waves (which we will set in a horizontal position, to simulate the classic line scan, typical of old cathode ray tube televisions. In fact, holograms work just like a projection, therefore it is intuitive for the public to imagine that any interference in the signal results not as a pixxelated image (as with digital televisions), but as a deformation of the wave-shaped image. As always, you can see the video example at the following address: https://www.youtube.com/watch?v=IhR7XwU0dmI
 The hologram appears above the background movie
 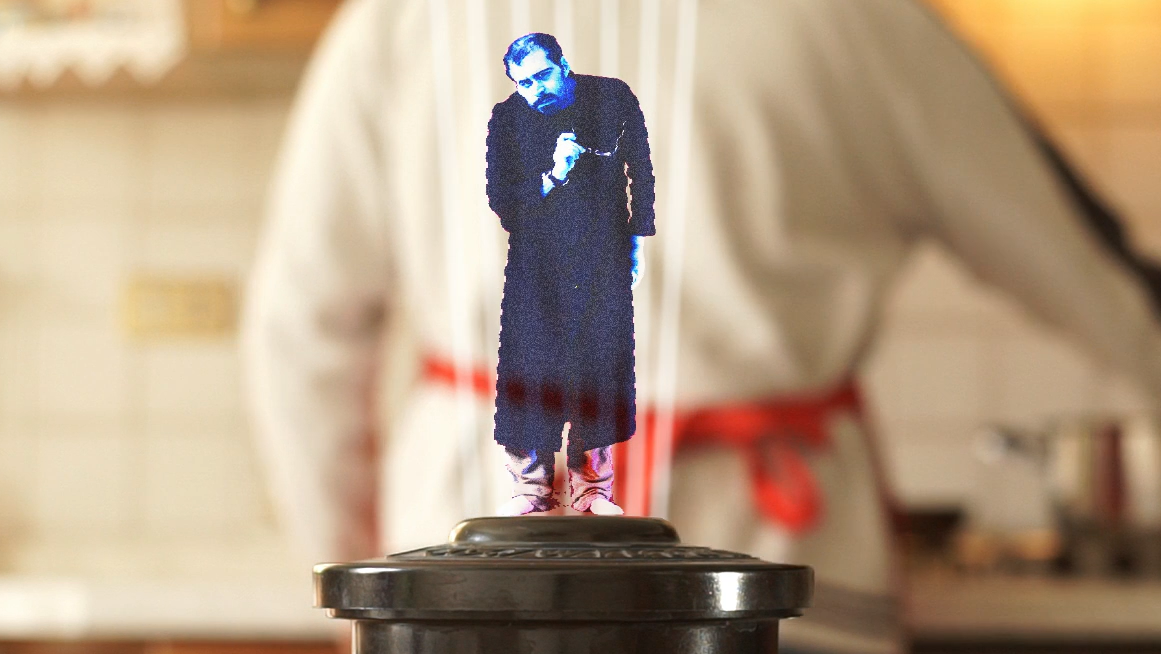 In one detail we notice the distortion in the shape of waves and bright points
 The right point of view
There are some small tricks that can be taken during filming to make the illusion of using a holographic projector the best. First of all, it is good to choose a “normal” lens, for example a 50mm lens on a full frame video camera, so that the image appears as natural as possible. Then, it is a good idea to shoot the actor from below, therefore positioning the camera at maximum half a meter from the ground, because the observation point is always expected to be low. However, if you plan to “project the hologram” from a raised point, such as the ceiling, then you have to take the shot in reverse, from a very high point. In both cases, the forced perspective could make shooting difficult, but just turn the camera 90 degrees and shoot using the longer side of the sensor. The image can then be rotated with the effect Rotate and shear in Kdenlive.
Choose a frame from the projector
We select a frame from the original video where we see what the holographic projector will look like
 1 THE BACKGROUND CLIP – Let’s start by creating a new project in Kdenlive containing the background clip and that of the actor who will act as a hologram. We place the background in the track Video1 , the lower one, cutting it if necessary.
 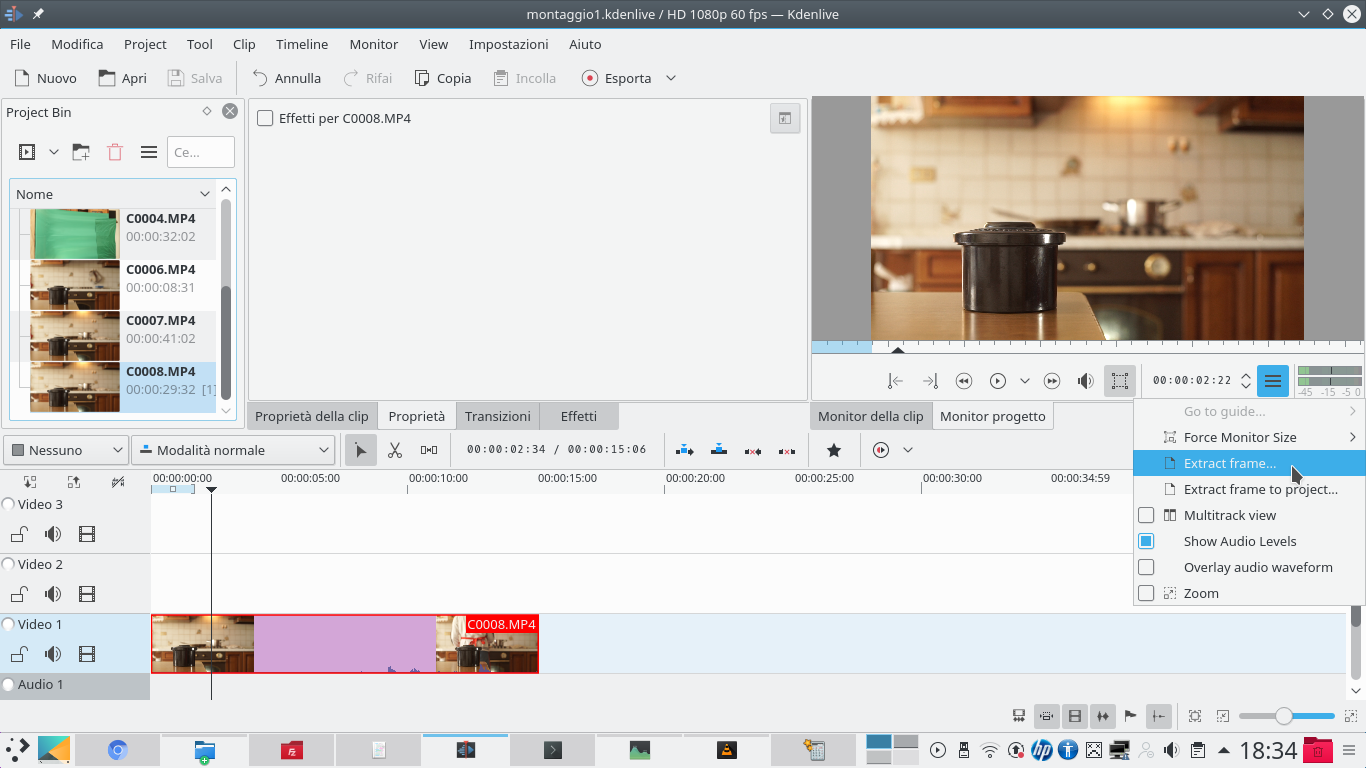 2 FRAME EXTRACTION – Moving on the timeline, we choose any frame in which we see the object that will function as a projector for the hologram. At that point just press the options button in the project monitor and choose Extract frame .
 Some changes with GIMP
We use the photo editing program to draw light rays from the projector
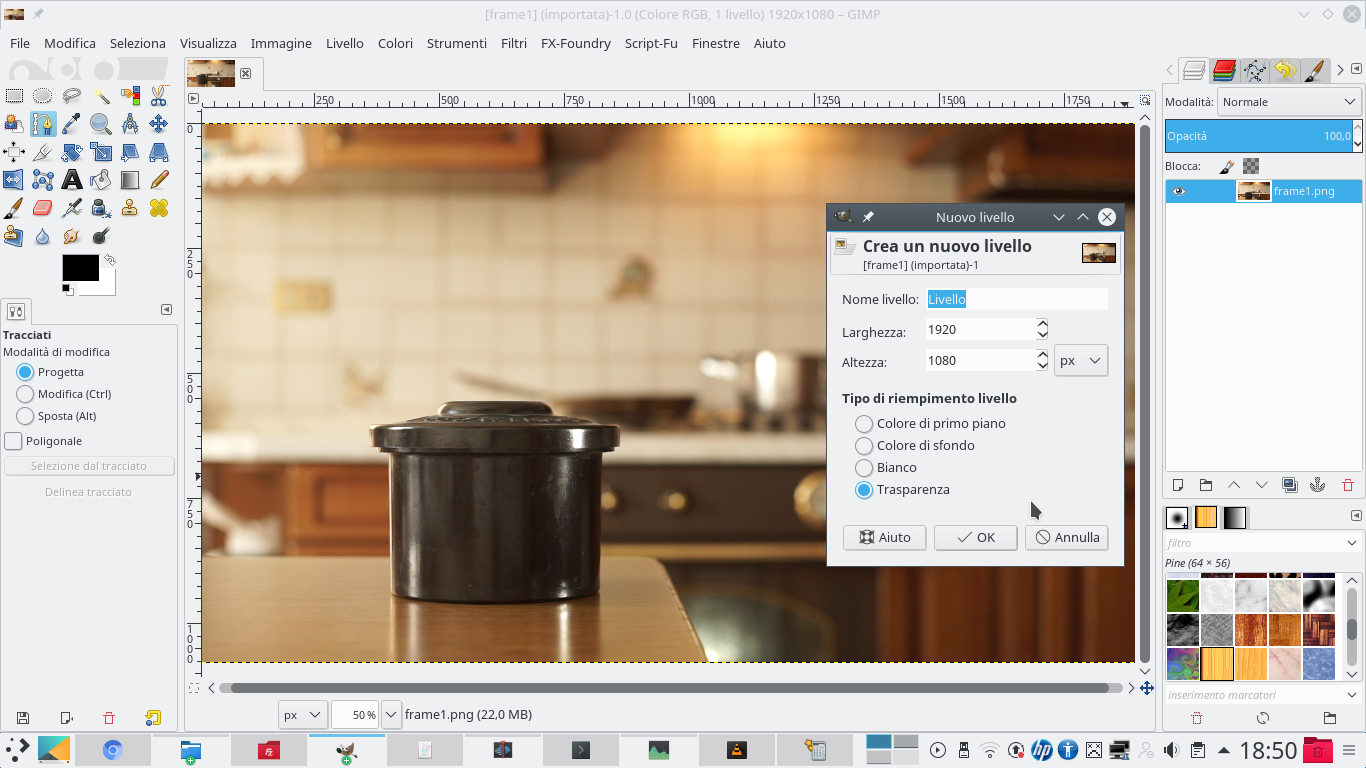 1 NEW LEVEL – After opening the frame in GIMP, we need to add a new layer, with a transparent background. We can do this by clicking on the appropriate button in the level panel. And this new layer must be positioned above the image of the frame.
 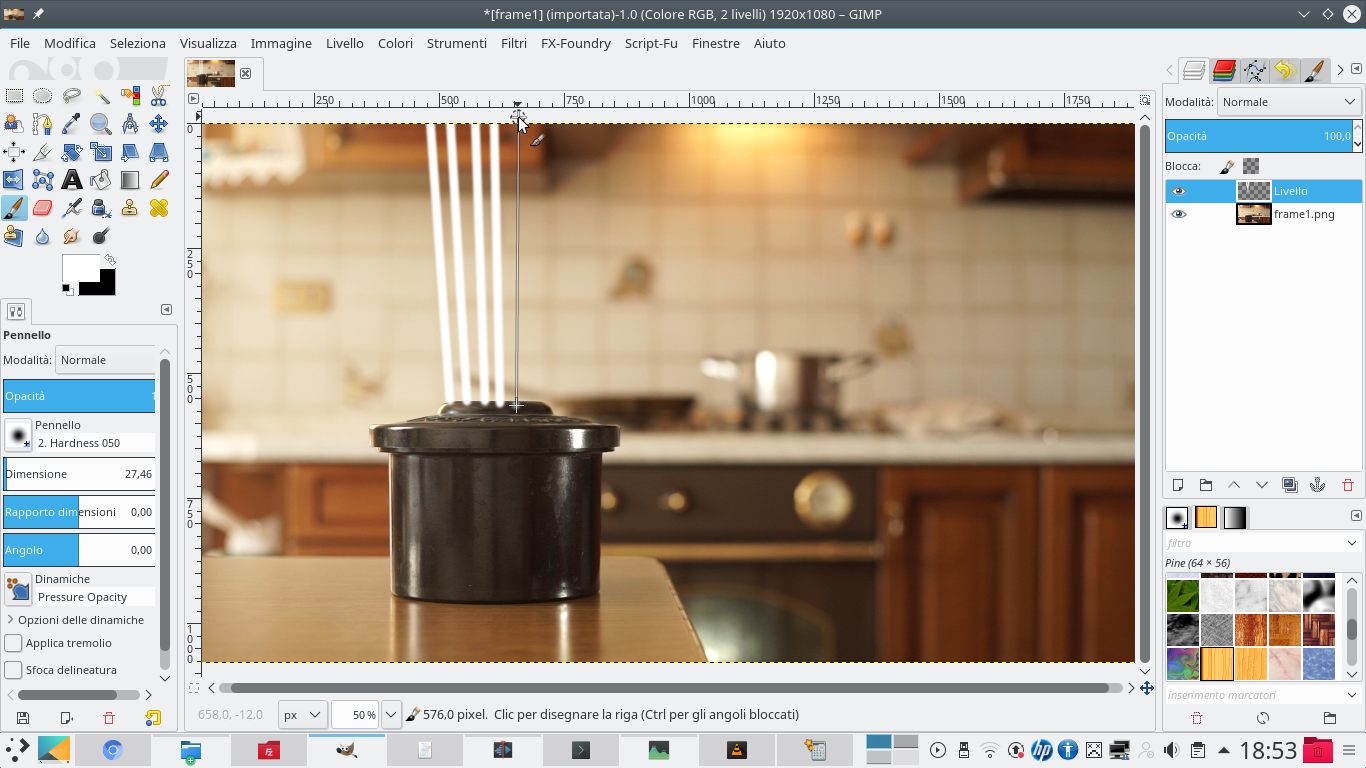 2 LINES OF LIGHT– Let’s take the tool Brush , setting a very soft stroke on the edges and the white color. With the size we prefer, we begin to draw the lines that will be the rays of light: just click on a point and then hold Shift .
  3 CONTOUR CLEANING – Using the tool Lazo , select the excess part of the white lines and delete it by pressing Delete . In fact, the lines must not cover the projector, otherwise it does not seem to come from it.
 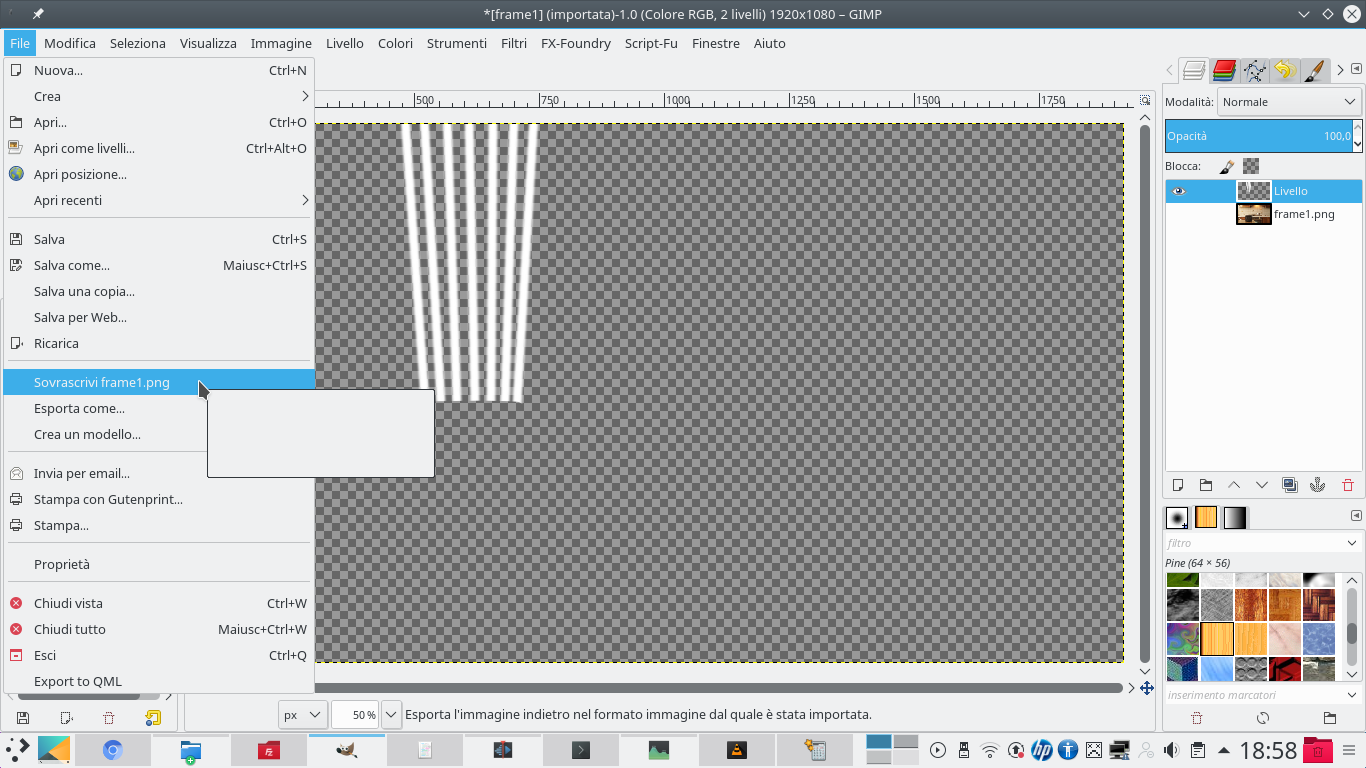 4 EXPORT – We hide the frame by clicking on the eye-shaped button next to its layer. Only the various lines we have drawn should be visible. Now we can export the image, possibly even overwriting the original.
 Overlapping clips
We use Kdenlive to superimpose the “hologram” actor on the light rays and on the original clip
 1 AS STRONG LIGHT – Returning to Kdenlive, we can insert the image just created in the track Video2 , or the intermediate one. Between the two existing clips we set a type transition Composite and transform , with compositing Hard light .
 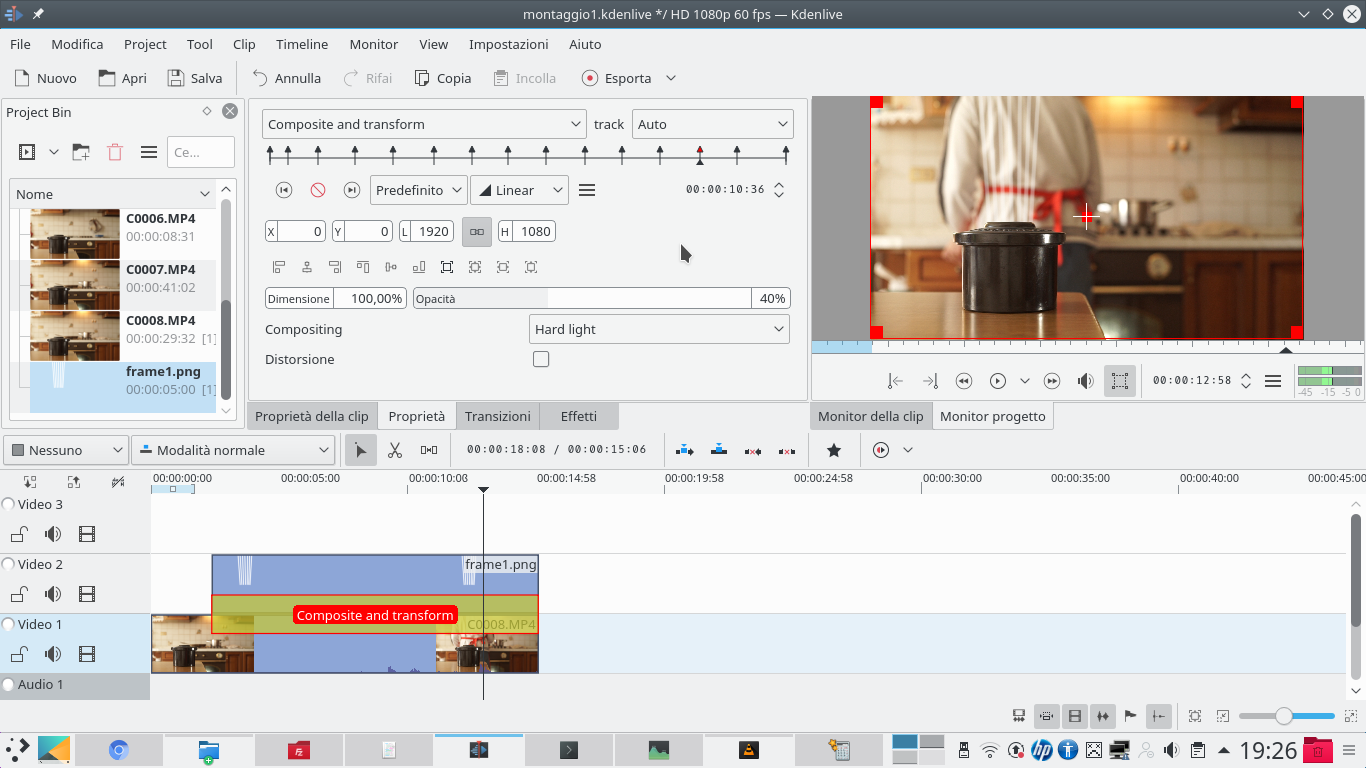 2 SEMI-TRANSPARENCY – Working on the transition, we can add keyframes to swing the opacity , for example going from 40% to 50%. Opacity must never be too strong, precisely not more than 50%.
 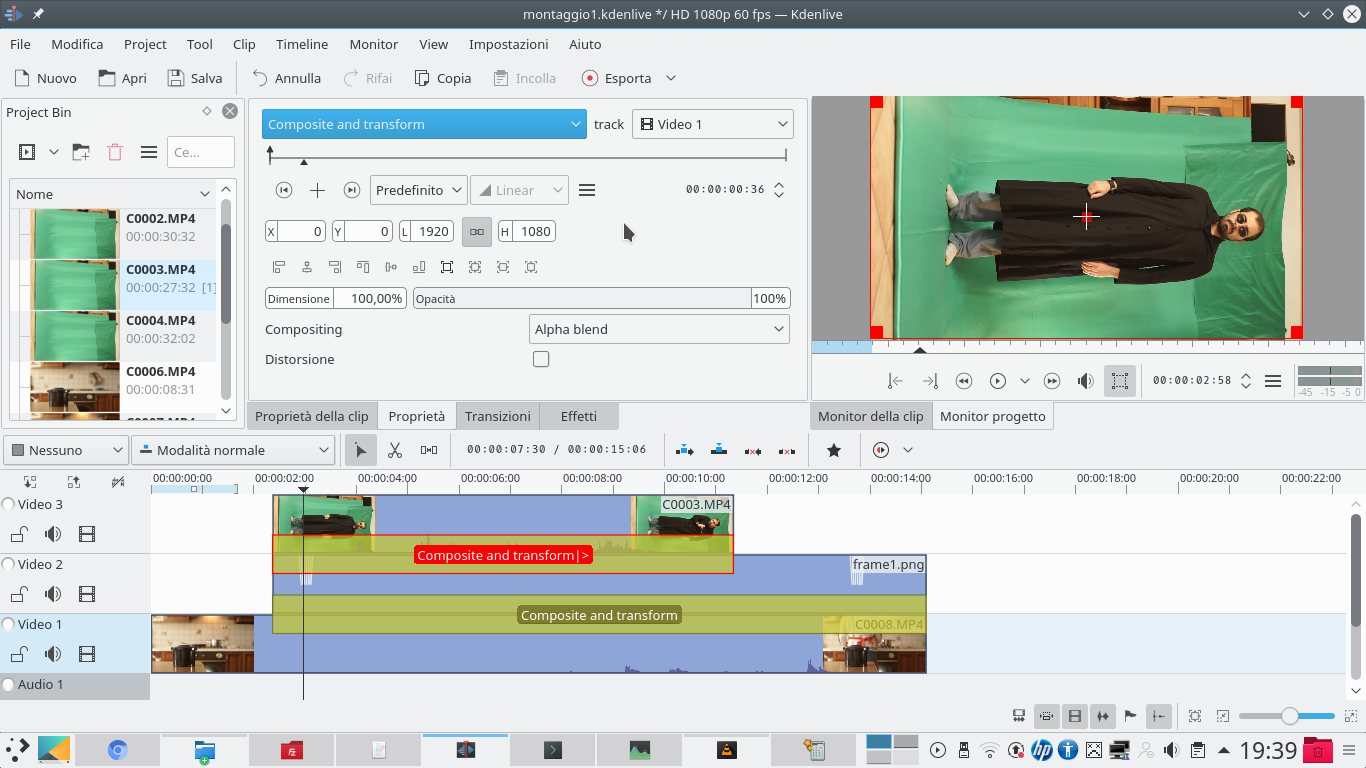 3 ACTOR CLIPS – In the track Movie3 we must insert the clip containing the actor, the one that will represent the hologram. The clip must have a type transition Composite and transform , which must refer to the track Video1 .
  4 ROTATION OF 90° – We need to add an effect like this to this clip Rotate and Shear . With this effect we can correct the rotation on the X axis, bringing it to -900 (or 900 ) so that the actor does not appear reversed.
 The image becomes a hologram
By applying a couple of effects, the actor’s video clip can look like a hologram
 1 CHROMATIC KEY – We can add the effect to the clip containing the actor chromatic key , in order to delete the background on which it was taken: just select the color of the sheet and set an adequate variance (only the background must disappear, not the actor).
  2 CUT THE CLIP – The effect will also be needed rotoscoping , to cut out the contours of the actor by omitting unnecessary parts of the image. In particular, it is good to cut the actor’s feet a little, so he will seem to come out of the projector.
  3 STILL STRONG LIGHT – Now we can go back to the transition of the actor’s clip and set its compositing mode to Hard light , like the one used for rays of light. Here we have to choose an opacity of around 80% because the actor must be visible.
  4 BLUE LUMINESCENCE – If necessary, we can correct the brightness of the actor by adding an effect to the clip Curve , and drawing an upward curve to make the image bright. With the effect Hue shift set to 200 we can give a blue tone to the image.
  5 WAVE DISTORTION – It will probably also be necessary to adjust the saturation with the effect Saturation increasing it a bit, around 300 , to make the image look less natural. Finally, we can add horizontal waves to the image with the effect wave .
  6 BRIGHT DOTS – By clicking on the stopwatch-shaped button, key frames of the effect can be set: we can change amplitude from 5 to 2 at the beginning of the clip, to make the image appear. In addition, we can add a disturbance with the effect Grain .

