To obtain a look similar to the great Hollywood productions, the colors of the film can be corrected to give a dramatic look to the scenes. It can be done manually, but also using LUTs, presets that can be downloaded from the web.
One of the aspects that most of all allows you to distinguish an amateur movie from a professional one at a glance is the quality of photography. And not only as regards the use of lights and shadows to bring out or hide parts of the scene in order to underline the plot of the film, but also for the color. Many amateur movies tend to have flat colors, all similar to each other and tending to gray. It is partly due to the use of low-end cameras, but partly also due to the lack of a correct color correction. To get the classic Hollywood look, in fact, an expensive camera is not enough, and indeed often it is not even much needed. The fact is that in large productions the colors of the images taken are never left as they come out of the sensor, but are corrected to give drama to the scene. The trick is always the same, and is divided into two phases. The first is that of shooting: at that moment you have to set up the video camera to shoot the greatest possible range. By now, many semi-amateur cameras (around 500 euros, as a cost) offer excellent results and allow the selection of the gamma curves. The gamma function is used to decode the luminance (ie “real” brightness, with the image projected on the screen surface) of an image on screens that do not project light linearly. In a nutshell, it is a correction mechanism for light intensity, because the value that is recorded by the sensor (or projected by the screen, depending on how you look at it) does not have a linear correlation with the real brightness. The correlation has precisely the shape of a curve, and depending on how you draw it, different results are obtained. In particular, there are some types of logarithmic curves specially designed to maximize the chromatic and luminous range. On Canon devices it is called C-Log, while on Sony it is called S-Log. They are not usually set by default, but in the configuration of your video camera you can choose the various gamma curves, therefore selecting the logarithmic ones. The reason why they are not the predefined curves is that they are not designed to give a definitive image, but on the contrary to provide an image with the greatest amount of bright and chromatic information, so that you can then correct the colors during video editing. And we come to phase number two, that is, postproduction. Having images produced with gamma curves that guarantee a wide luminous range, the colors can be changed with Kdenlive to obtain the desired result. There are various methods to correct colors digitally: it can be done manually with special effects, or automatically using a LUT, Look Up Table. It is a file with presets that can be loaded to give the movies a distinctive style, thus automatically correcting the colors and brightness. As always, you can see the example video at the following address: https://www.youtube.com/watch?v=NUHK4GMSbjM
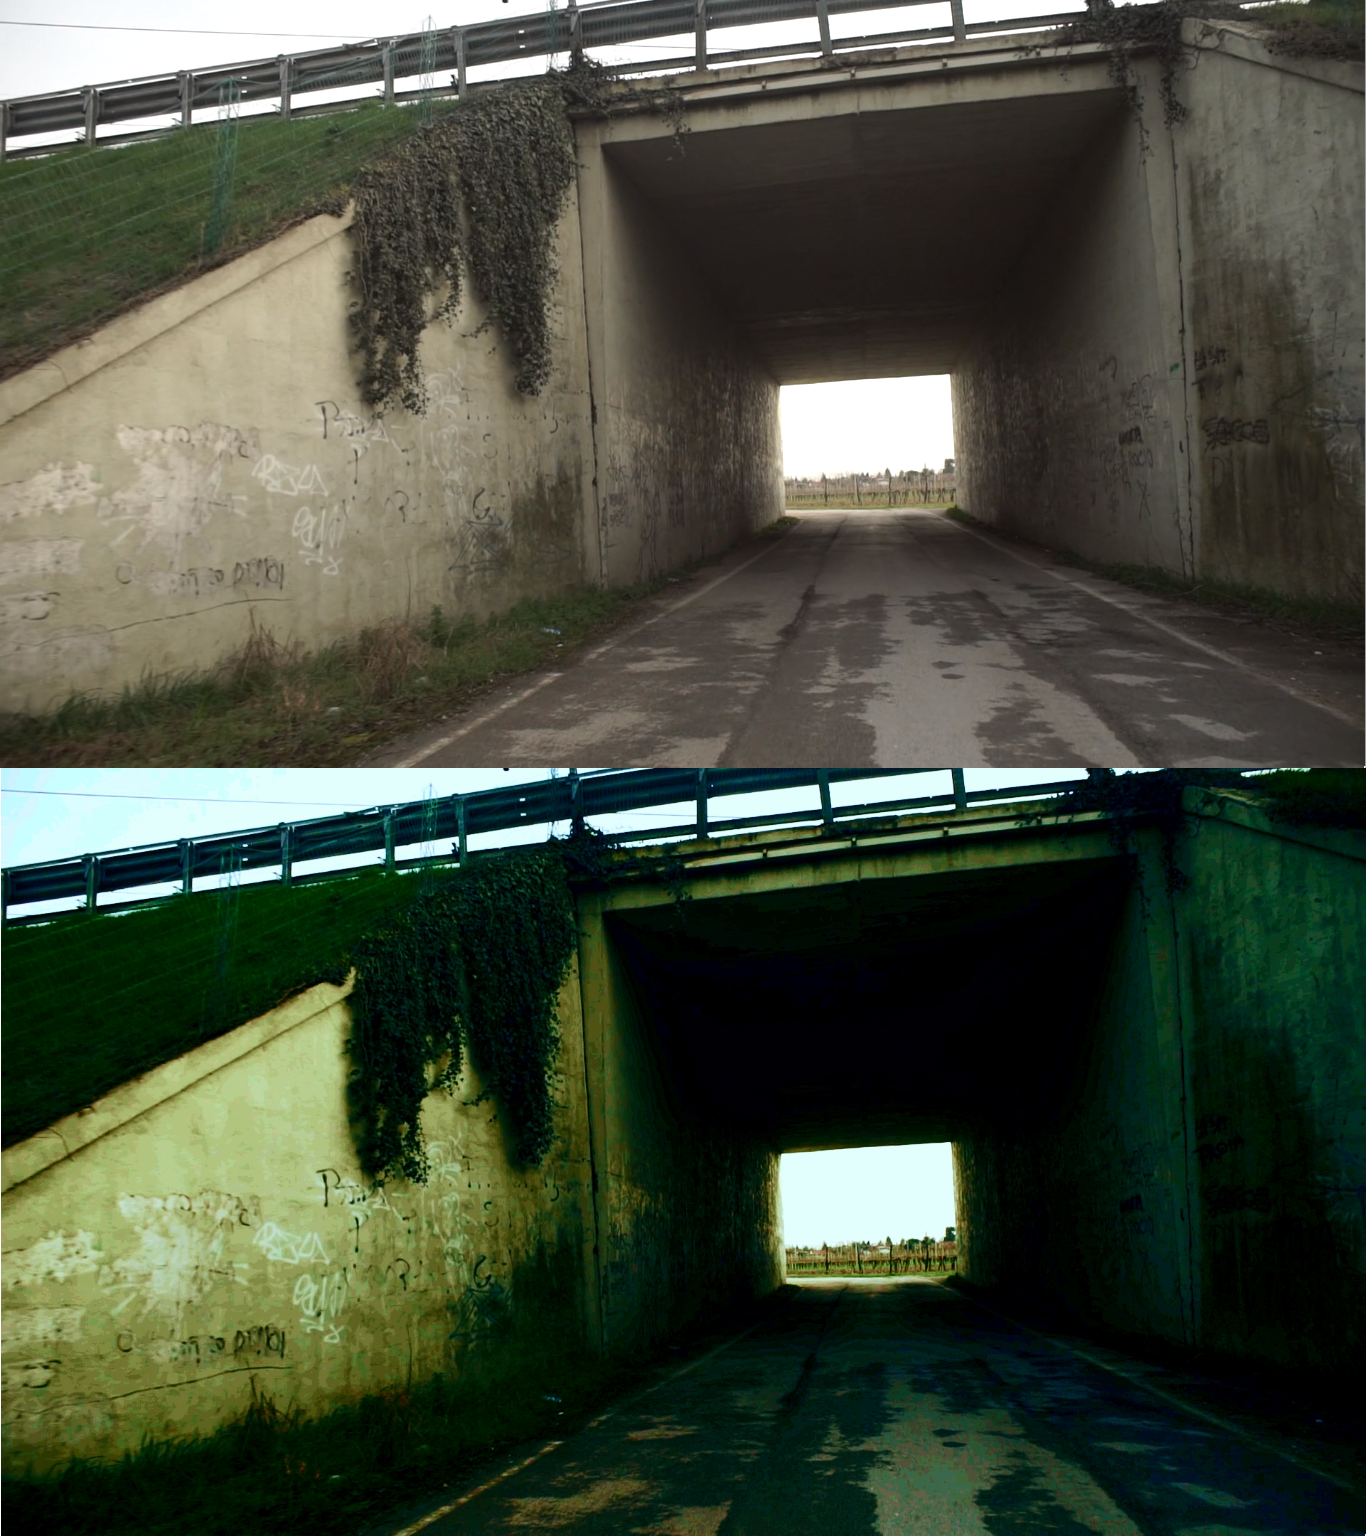 The colors are made more dramatic
 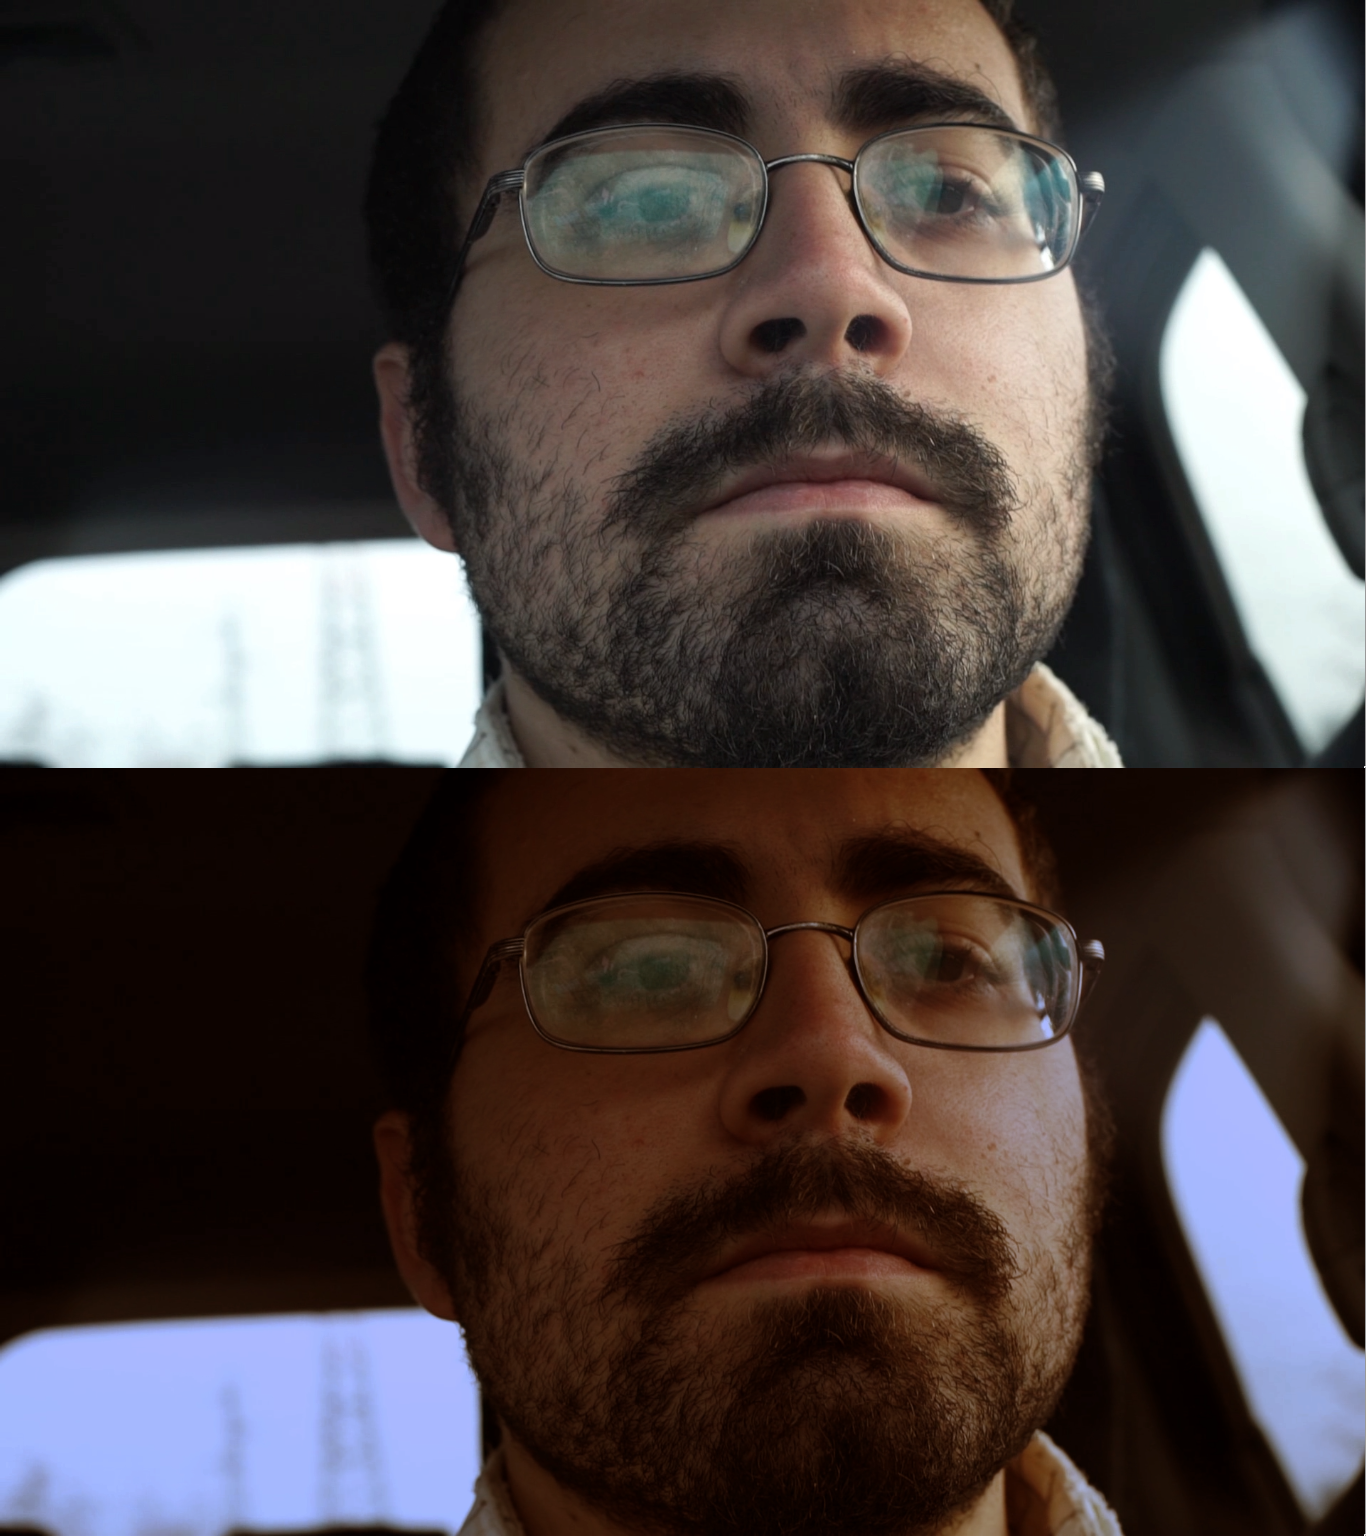 The image is colored with the blue / orange pattern
 Where to find LUTs
One of the good things about LUTs is that they are fairly standard: as long as you have a.cube or.3DL format, most programs can open these files. And this also includes Kdenlive. Therefore, the same LUTs that are produced for other software (such as Adobe Premiere or Lightroom) can be used. There are many LUT packages, some free and some paid, are easily found on the web. For example, the sit or https://luts.iwltbap.com/ offers a hundred LUTs for $ 25. A valid aspect of this site is that it allows you to test the LUTs online by uploading a frame and observing the effect, before buying them. Some free LUTs are also available.
Retrieve .cube files
LUTs are simple text files, they take up little space
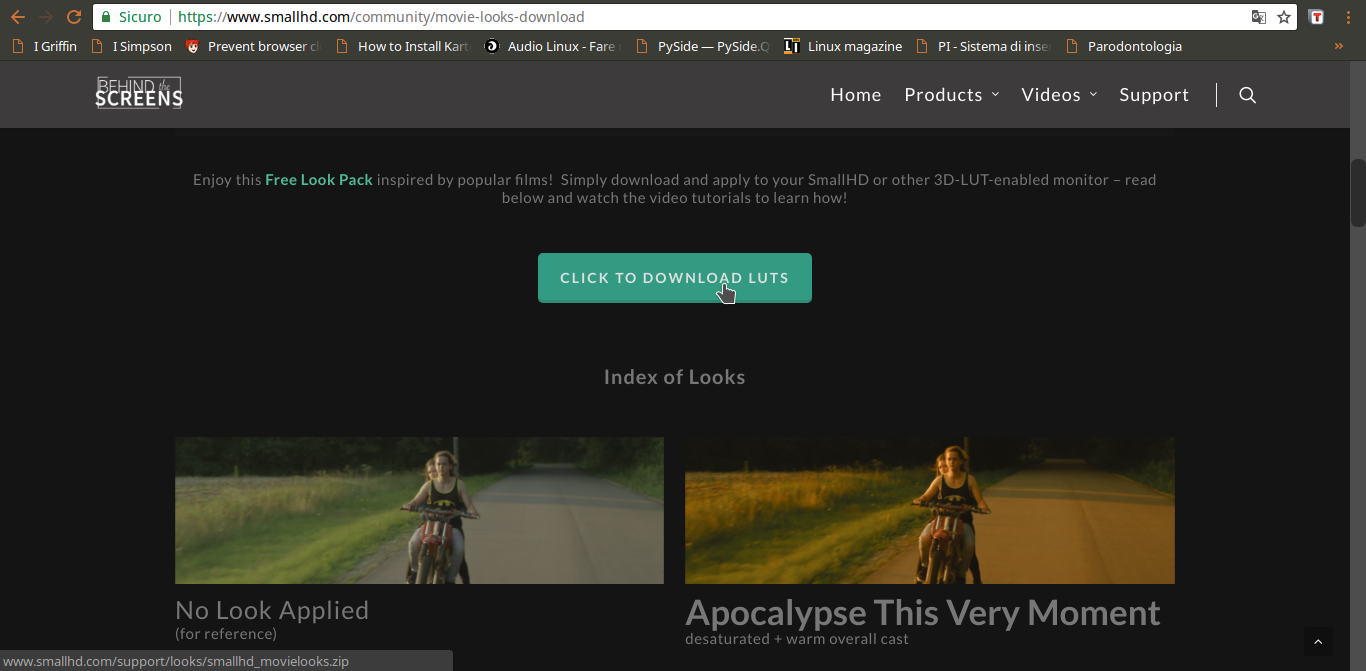 1 FREE LUTS – On the web you can find many LUTs ready to use and completely free, typically in format .cube or in a generic xml. For our example, we rely on the files that can be downloaded from the address https://goo.gl/OeIFkr
  2 SEVEN CUBE FILES – Download the zip file, just extract it into a folder: each of the files, which is then a simple text file, represents a Look Up Table. Those of the example were developed inspired by famous films (whose titles are parodied in the file name).
 The camera settings
Choosing the right encoding results in higher quality movies
 1 SONY PRODUCTS – On a Sony camera you can get the best quality by selecting the XAVCS encoding format, then choosing the profile with the highest possible bitrate (50M or 100M depending on the model) from the settings.
  2 S-LOG PROFILE – You can search for the item to set the gamma curve Profile picture in the menu and choose one from the list, then clicking the right arrow to configure it. The range can be set to S-Log. Usually the profile PP7 it is already preconfigured for S-Log.
 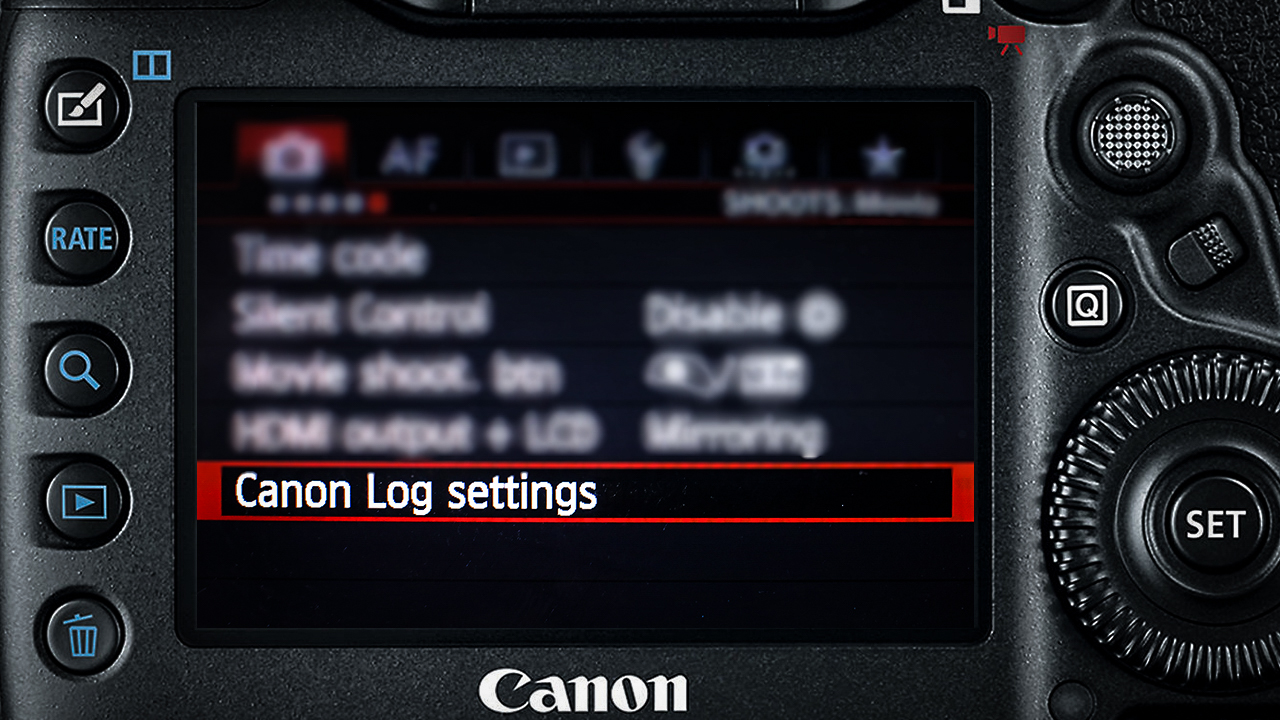 3 CANON PRODUCTS – You can also adjust other details to adjust the display according to the desired result. Also on Canon cameras there is a gamma curve with a logarithmic shape.
  4 CANON LOG ON – To enable it, just find the option Canon Log settings in the menu. You have to set it to on , and possibly adjust the hue saturation as for Sony cameras, even if in general it is better to leave everything as it is and adjust them in post-production.
 Apply the Look Up Table
Using the appropriate effect, the LUT is applied to a clip
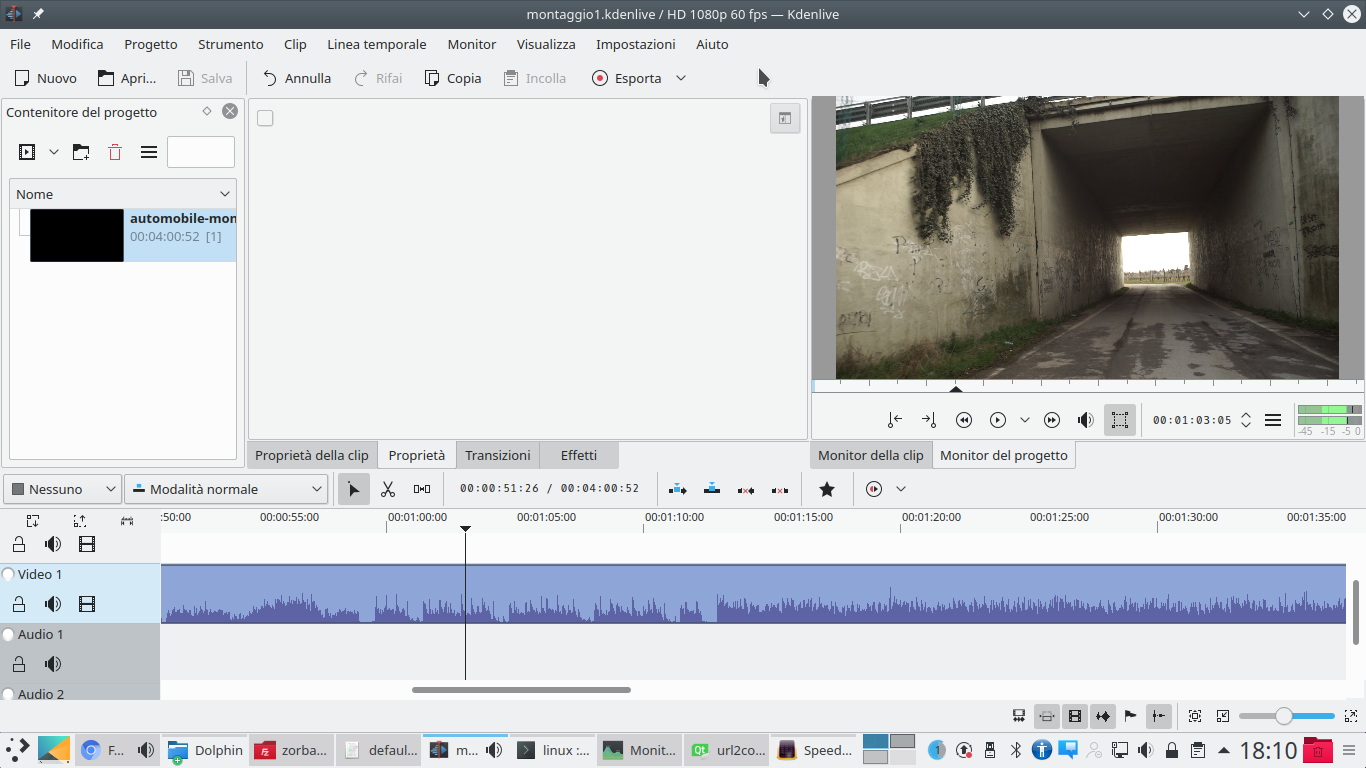 1 THE VIDEO CLIP – Open Kdenlive, of course you have to import the clip you want to work on, by dragging it into the timeline and making the necessary cuts. You don’t have to insert LUT files directly into the project.
  2 THE LUT EFFECT – Then you need to find the LUT effect to apply. There are several, the majority of which are maintained only for backwards compatibility but not for any result. The right one is Apply LUT , in the section Color correction .
 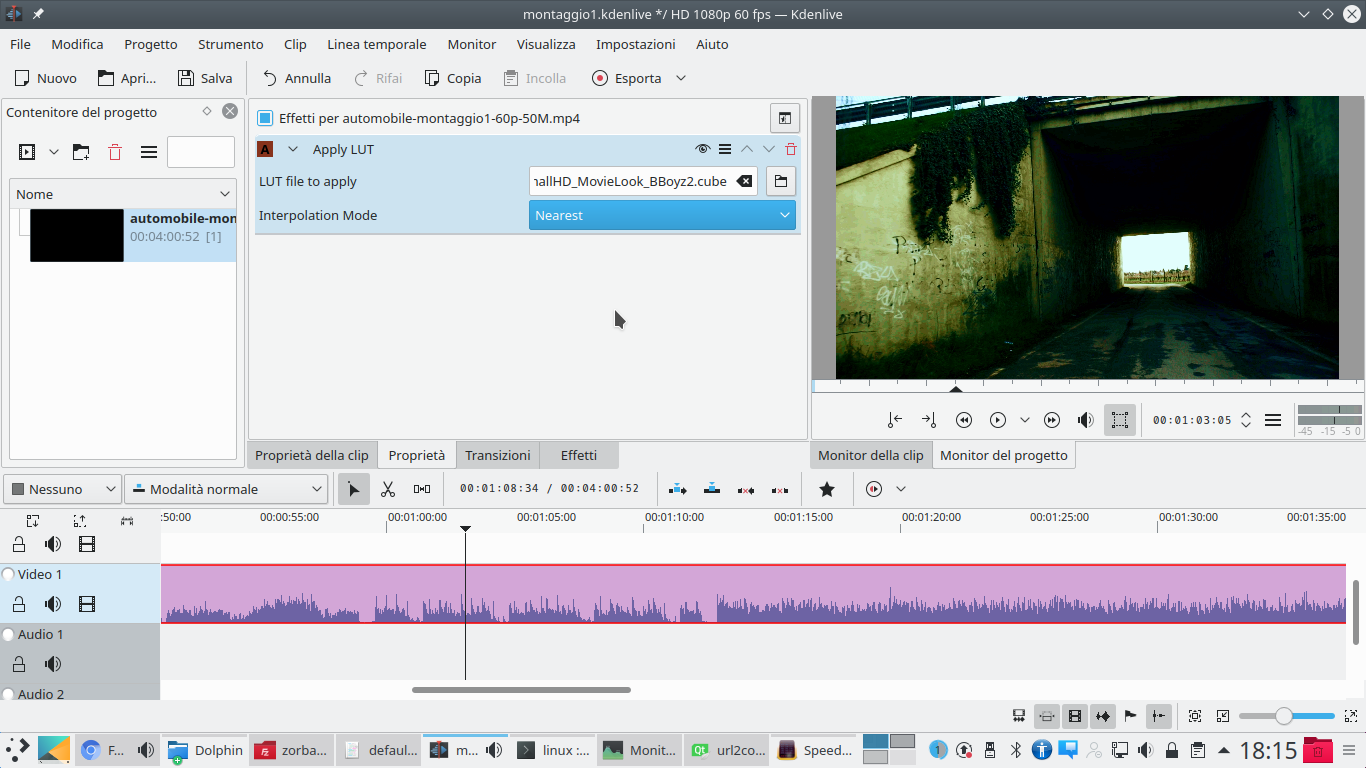 3 WHICH FILE? – Inserted the effect on the clip, in his Property indicate the file you want to apply. Of course, you can change the selected file later if necessary. The interpolation mode can always remain Nearest .
  4 BALANCING – Wanting to adjust the lighting, for example col 3-point balance , you need to insert the effect above that of the LUT. This allows you to correct the image before it reaches the LUT, then obtaining homogeneous results with other clips.
 Manually adjust the clip
In addition to the LUT, other effects can be used to manually correct the colors
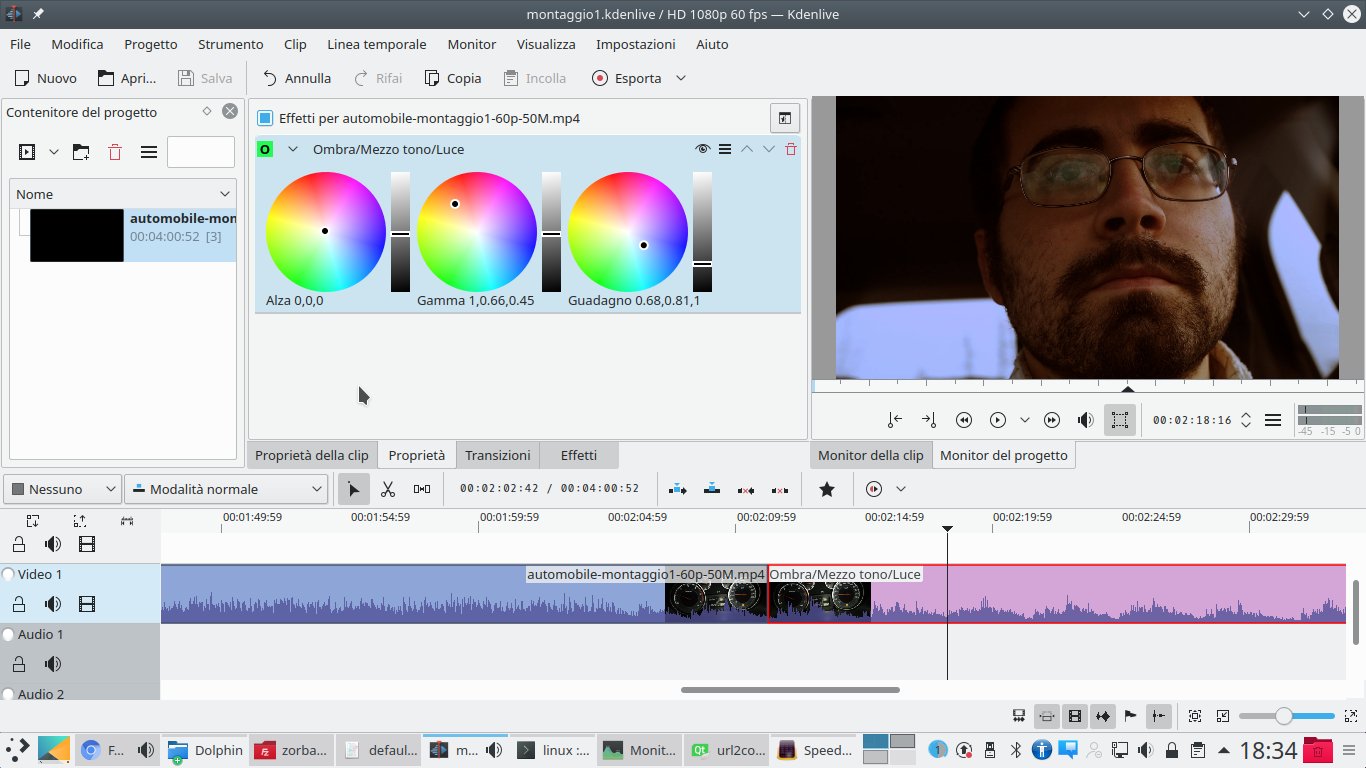 1 WITH THE THREE LIGHTS – Another interesting effect for color manipulation is Shadow / Half tone / Light . This allows, precisely, to manage the three parts of an image separately, adjusting color and brightness.
  2 CHANGE OF SHADES – This allows, for example, to color the background in blue and the actor in orange, a classic Hollywood setup. A faster but less detailed alternative is Hue shift , which shifts all shades towards red or blue.
  3 SATURATION – After changing the coloration of the image, with one of the two effects that we have presented, you can saturate the color differently depending on the brightness by drawing a curve On the canal Saturation .
  4 CHROMATIC CURVE – Of course, curves can also be used to correct hues in a specific direction. To improve a sunset you can use a curve on the canal Red raising the halftone values.
  5 THE SECOND CURVE – Under the curve that shifts everything to red, another can be added to the channel Hue . With this, a special curve can give the image yellow reflections, thus bringing the image between orange and gold color.
  6 LEVELS OF LIGHT– Some LUTs can make the image too dark in certain scenes. In those cases, the best solution is to insert the effect over the LUT Layers . By adjusting the input and output levels, some areas of the image can be brought out of the darkness.

