We can transform objects into characters by adding a face to them, making them interact with other characters or using them as narrators. Let’s try to give a tree a face using Kdenlive.
If cartoon fairy tales, such as those produced by Disney, have left a mark on the common mentality, it is the idea of personifying animals or inanimate objects. It is an idea that can be applied to different cases: to tell a story involving objects, one can think of transforming them into narrators. It’s worth in a fantasy or an action movie, and maybe even a documentary. In addition to a classic comic sketch, where in the end everything is allowed. And the best way to personify an object is to give it a human face. For example, you can equip a tree with a face, and have it tell the story. Obviously, the ideal solution would be to create a three-dimensional model of an actor’s face and animate it with Blender, superimposing it on the original image of the tree. The problem with this method is that it is very demanding, above all because reproducing the features of an actor can be difficult if he is not already very experienced with 3D modeling. And all these efforts would be a waste if you want to do just a few seconds scene in a low budget video. Alternatively, you can resort to Kdenlive and some small tricks with the composition of the images. It all starts with a good image, a photograph or a video, of a tree. For convenience, the video clip should be shot with the camera fixed, so you don’t have to track the movement. Then you need a shot of the actor’s face, possibly in the foreground and well lit. The actor must be filmed against a monochromatic background, usually green, so that he can easily remove it later with Kdenlive using the chroma key technique. First of all, it will be necessary to cut the actor’s face, even manually, to get only his face. This can then be superimposed on the clip, but using the mode Overlay . This mode, by adequately adjusting the transparency of the image, allows to maintain the texture of the bark of the tree on the actor’s face. This way you can pretend that the actor’s face is really part of the tree. To improve the yield, it is important to change the color tone of the actor’s face in order to make it look as similar as possible to that of the bark of the tree, and also in this the effects of Kdenlive come in handy. The image obviously also needs high contrast, to make sure it is more like a sculpture or a protuberance of the tree’s wood, and not simply a photo pasted on the bark. To obtain a better fusion, the shaded margins are set at the contour that it was decided to cut out from the actor’s face, so as to obtain a slight fade on the edges and make it more difficult to understand where the real tree ends and where the actor’s face begins. As always, you can see the example video at the following address: https://www.youtube.com/watch?v=VlW4njdEt_0
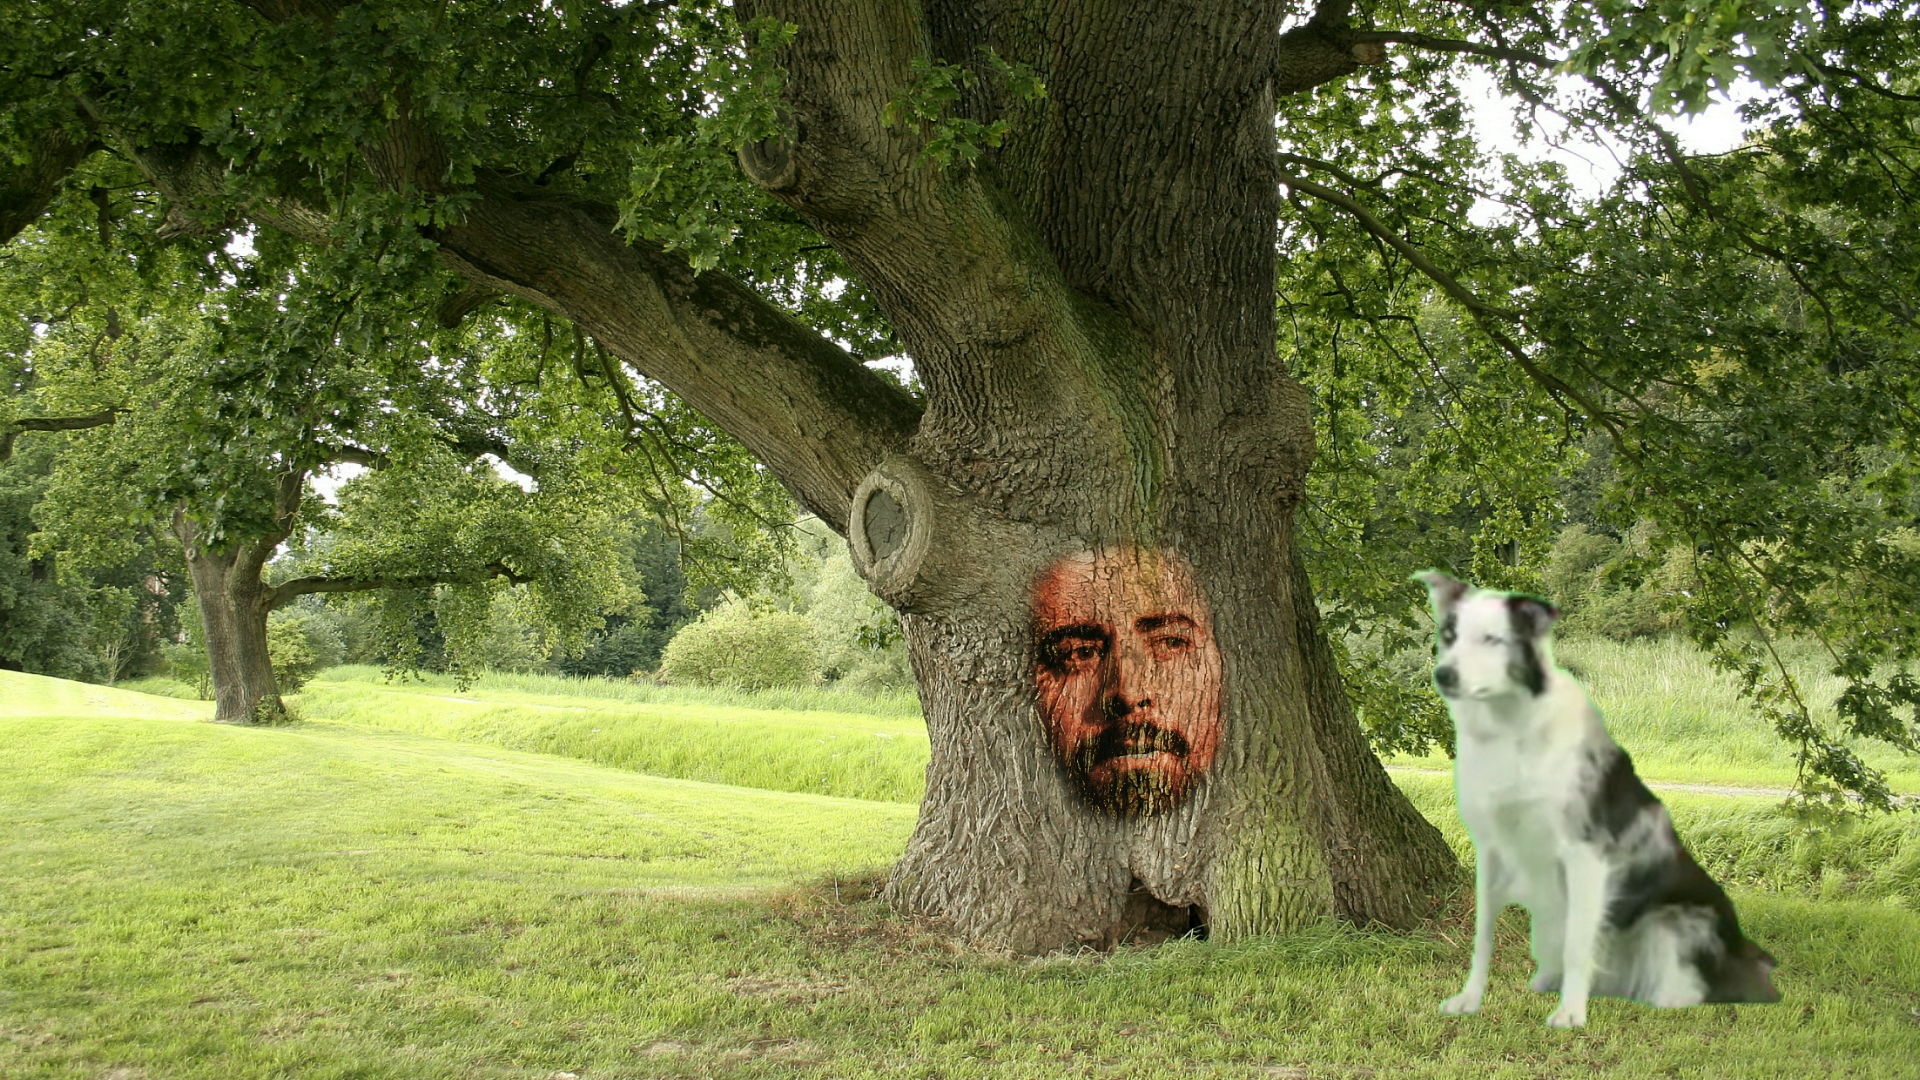 The actor’s face has been merged with the bark of the tree
  As long as the actor moves little, the result is credible
 Which light for the actor
To illuminate the actor it is important to think about the type of lighting that the bark of the tree on which we want to make his face appear should receive. In any case, an almost grazing light from above allows you to have very clear shadows, similar to what a raised bark would get from the Sun. Even the green background must be well lit, in order not to risk having too many shades of color. Ideally, it would be good to cover the sides of the actor, such as the neck, hair, and possibly even the ears, with clothes of the same color as the background cloth, to make them disappear automatically with the chroma key. If it is not possible, it is important that the actor remains as still as possible, so it will not be necessary to follow his movement to manually cut the face.
The two video clips: the tree and the actor
We prepare the tracks for the tree and for the face of the actor that will be superimposed
 1 TWO VIDEO CLIPS – To begin with, we need the clip with the actor and the one with the tree. The clip of the tree can also be a photograph, perhaps downloaded from the web, the important thing is that it has a resolution at least equal to that of the video.
  2 A BLACK CLIP – A black clip will also be needed, we can add it simply by clicking on the menu Project / Color Clip and selecting the black color. This clip can be immediately placed in the lowest video track, the Video1 .
 Cut out only the face
We begin to cut only his face from the actor’s clip
 1 TRACK VIDEO 2 – We insert the clip with the tree in the intermediate video track, the one called Video2 . Using the handles on the sides, we lengthen the clips so that they have the same duration as the clip with the actor (we can still correct the duration later).
 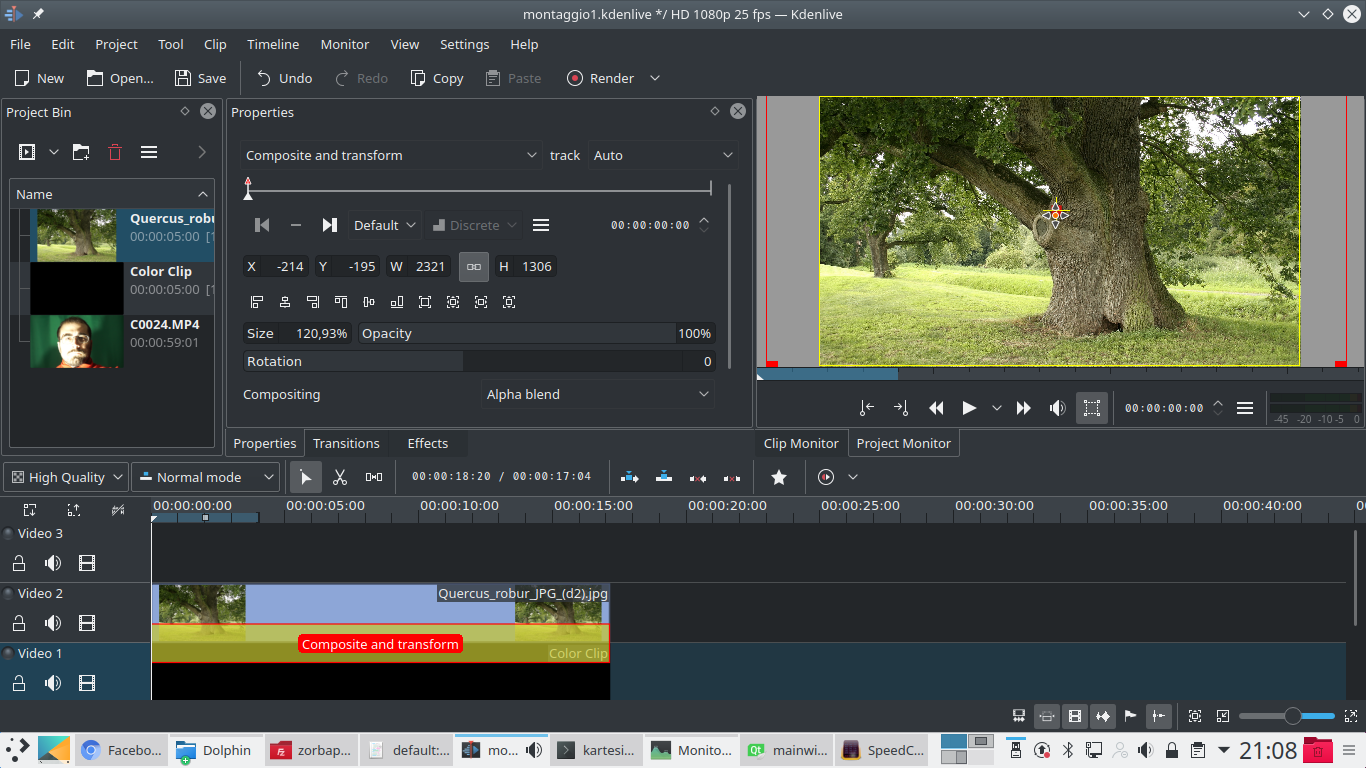 2 THE COMPOSITION– We add, between the clip with the tree and the one with the black color, a transition of type Composite and transform . We extend the transition for the duration of the clip and scale the size so that the tree covers the entire frame.
  3 CLIP CUT – Now we can put it in the track Movie3 that is, the one above, the clip with the actor. Using the tool scissors we cut the clip where necessary. Then we resize the other clips so that they are all the same length.
 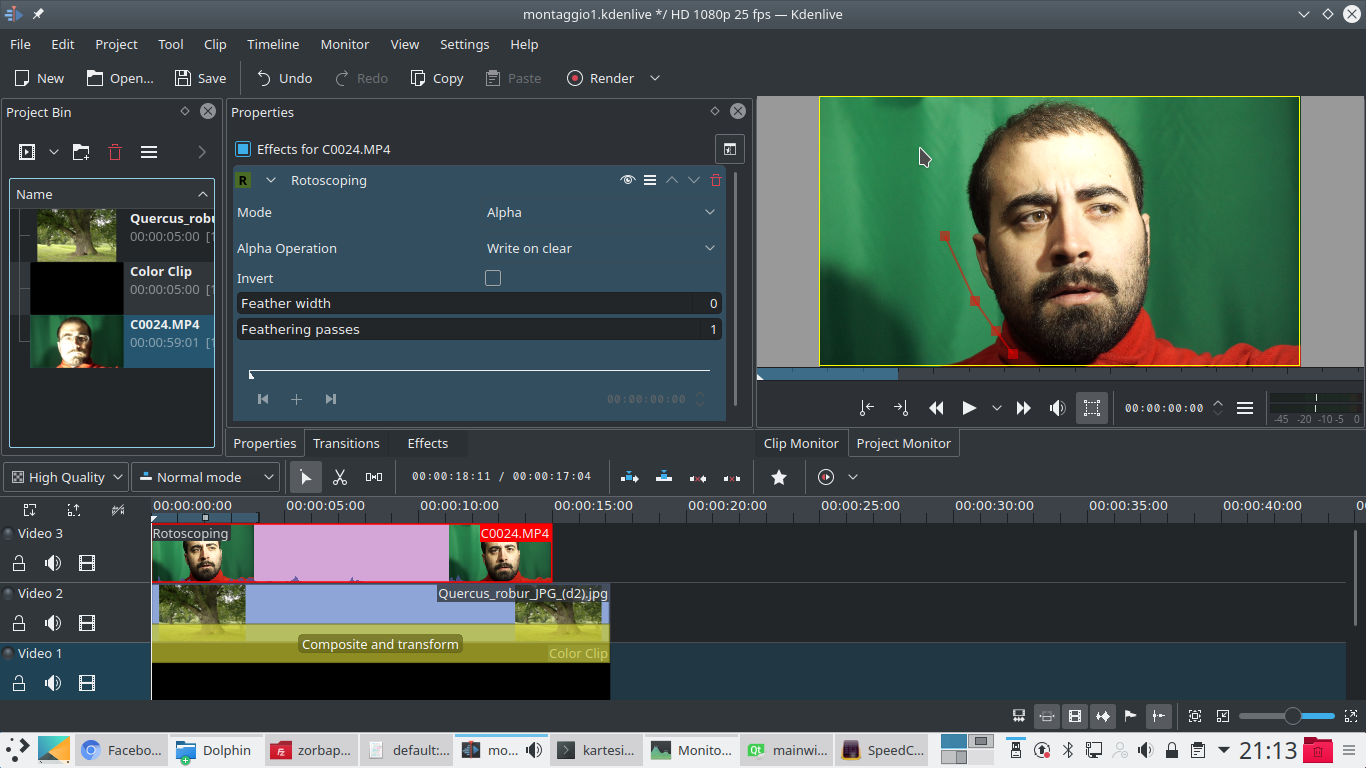 4 THE ROTOSCOPING – Let’s add a type effect to the actor’s clip rotoscoping , cutting out his face as much as possible. Just draw the outline of the face with a series of points, you don’t have to be too precise for now.
 Adjust the light
We make the face black and white, increasing the contrast
 1 THE CHROMA KEY – Now, let’s apply a type effect to the clip with the actor Chroma Key . Selecting the background color, and a suitable one variance , we should see the background disappear. This offers us a clear contour of the face.
 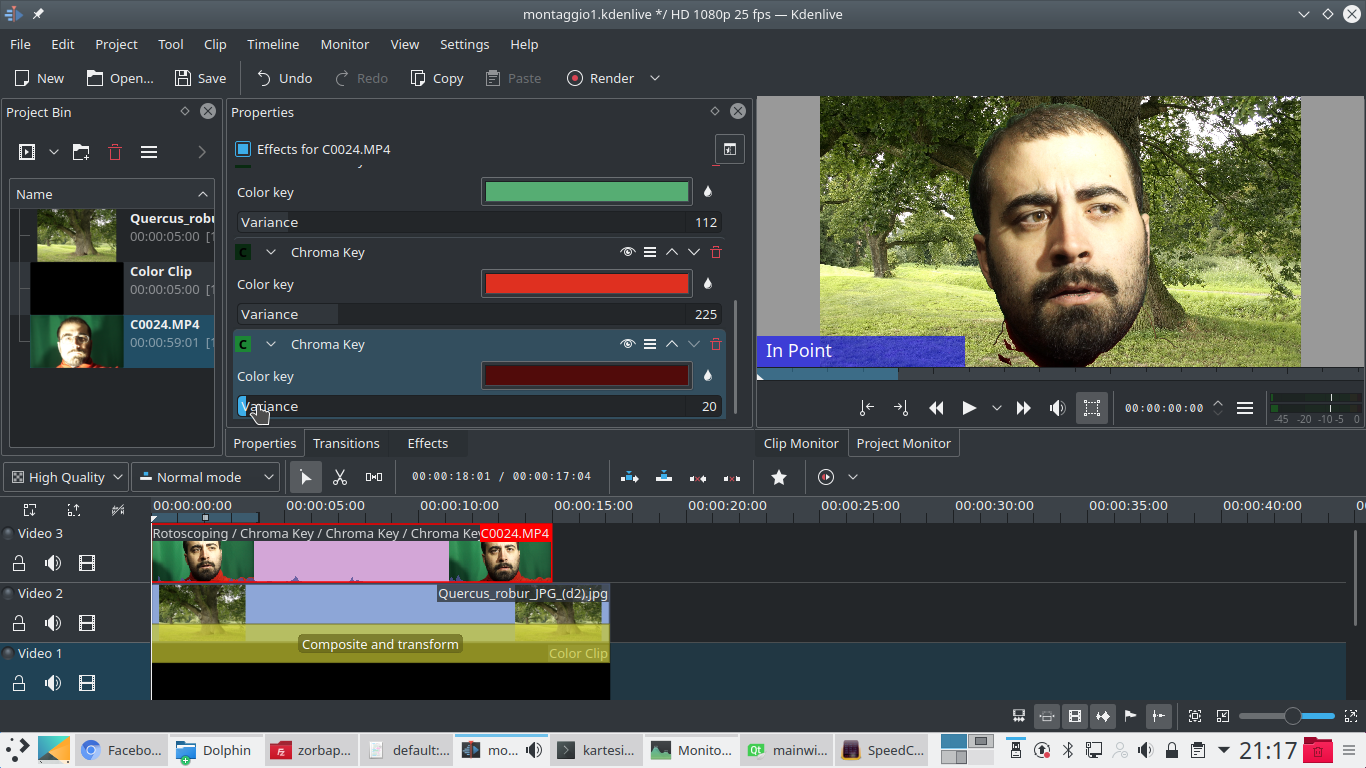 2 EVEN MORE THAN ONE – You can then add other Chroma key effects, to make other parts disappear (for example, the shirt worn by the actor). Rather than inserting a single Chroma key by increasing the amount too much variance , it is better to use different effects for different color shades.
 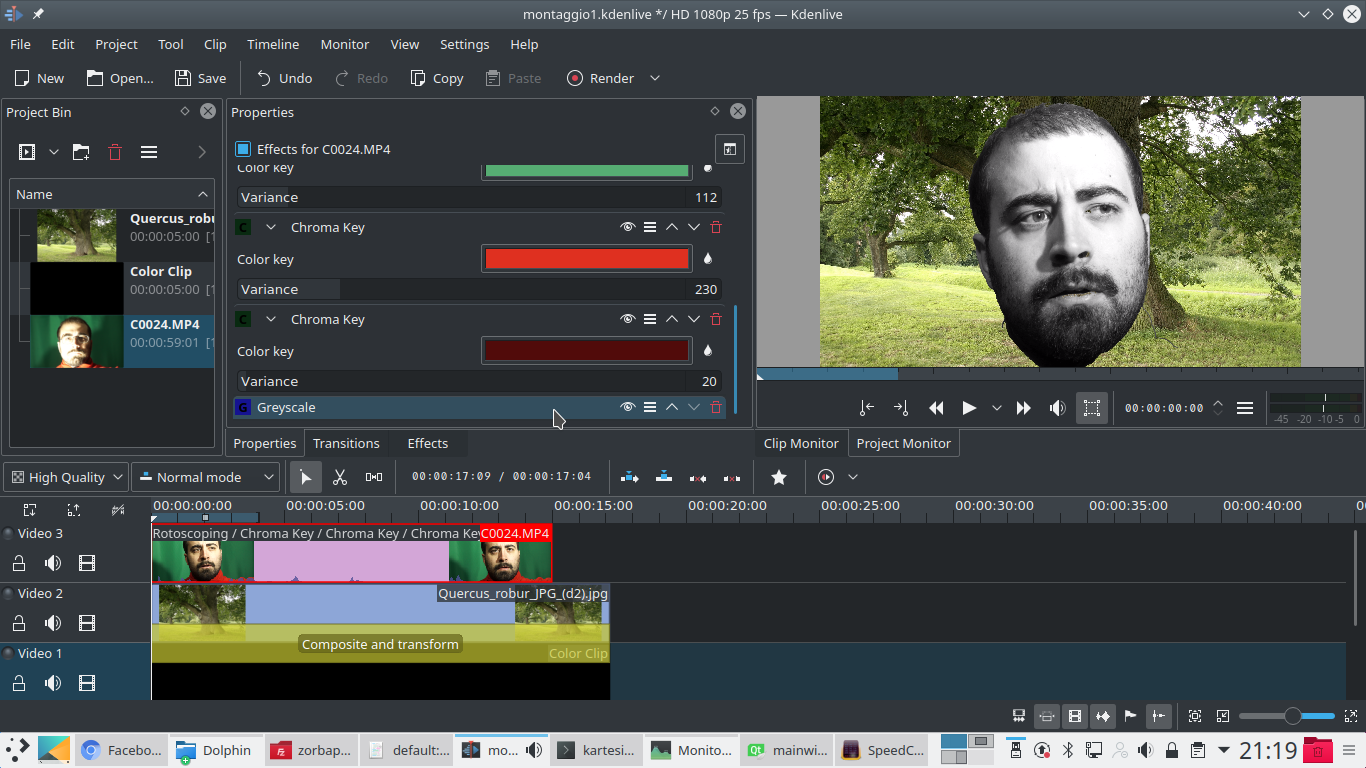 3 IN GRAY TONES – We are only interested in the play of light and shadow on the actor’s face, therefore not in his colors. For this reason, we add an effect to the actor’s clip greyscale , which transforms the image into gray tones.
  4 LIGHT AND CONTRAST – To adjust the contrast, we can use a type effect Curve . This is the classic brightness curve: to increase the contrast we just need to raise the lights and lower the shadows, drawing one S astride the diagonal.
 We choose the right color
Let’s give the face a color similar to that of the tree
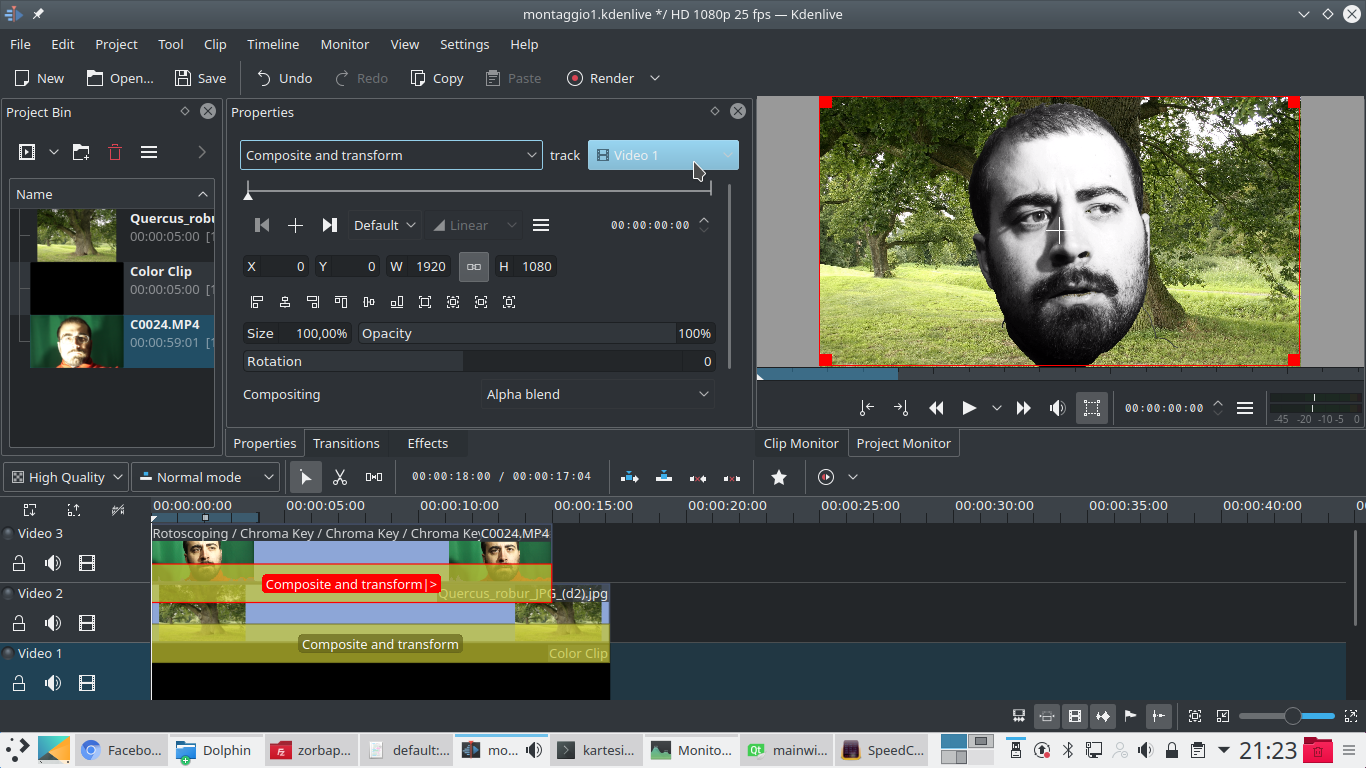 1 OTHER COMPOSITE – We insert, between the actor’s clip and that of the tree, a transition of type Composite and transform . The transition must refer to the track Video1 , that is, that of the black clip, so as not to be deformed.
  2 RESIZE – Using the handles in the Project monitor we can resize and move the actor’s face until it is perfectly positioned on the tree trunk. However, you can adjust the position later.
  3 OVERLAY METHOD – The method of compositing of the image must be Overlay . This allows a fusion of the actor’s face with the trunk of the tree. In addition, the opacity must be lowered, about 80% or less.
  4 RED COLOR – Let’s add the effect to the actor’s clip Colorize , so as to give it a tone similar to that of the trunk. We must choose a hue low, because it tends to brown, and a saturation and brightness such as to make the face appear only slightly lighter than the trunk.
  5 THE RIGHT FORM – We can now go back to changing the effect rotoscoping that we had added to the actor’s clip at the beginning: by moving the points it is possible to better cut the shape, for example by making the hair disappear, in order to blend it better with the trunk.
 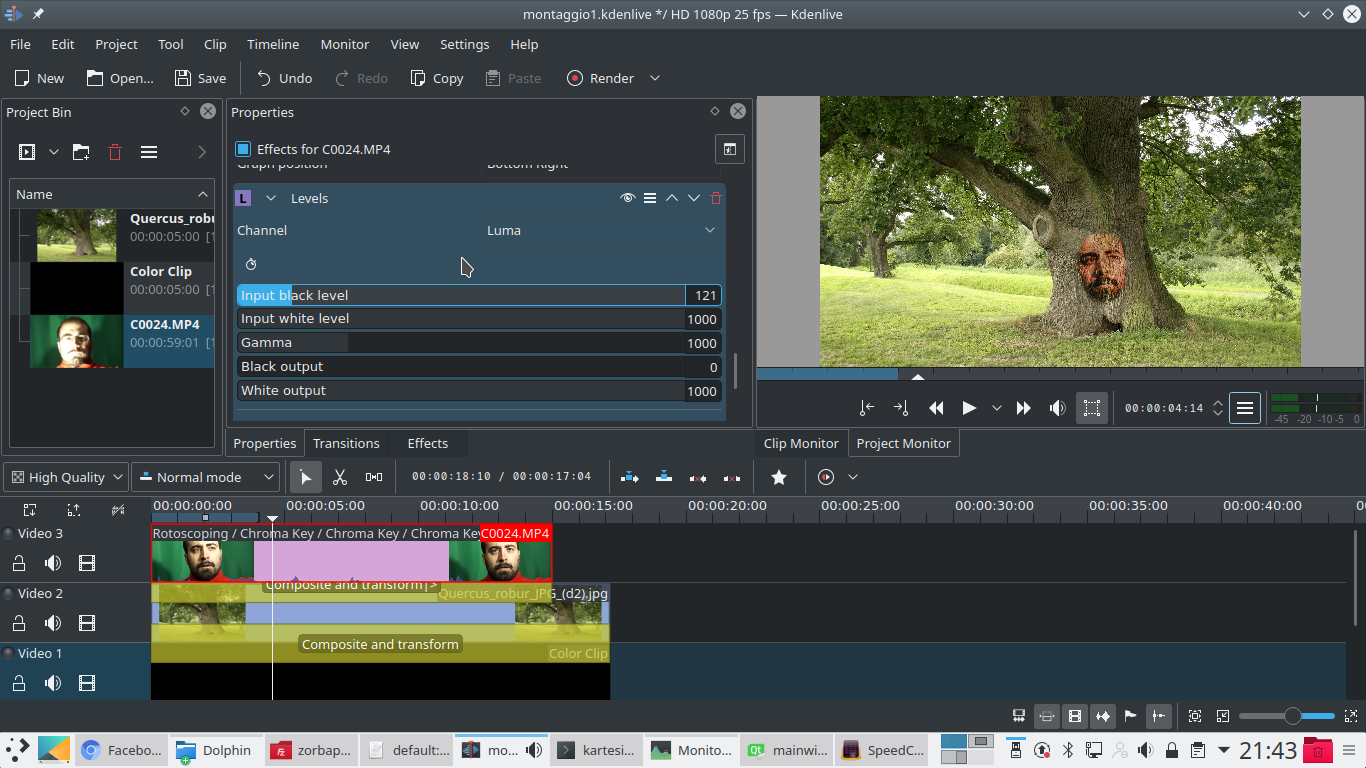 6 LEVELS OF LIGHT– In the end, to regulate in detail the play of shadows, which must make the actor’s face appear in relief, we can add an effect to the actor’s clip Levels , to adjust light and dark tones separately.

