We simulate an old slide projector with Kdenlive, using the overlay modes and playing with the brightness of the scene. The perfect solution for a teacher or scientist role.
When making a video to explain something, it can be a good idea to fall into the cliché of a slide show. It is a great way to appear teachers in a school, or professors at the university, or more generally people who explain something with some authority. It is also a clear sign reminiscent of the 90s, despite the fact that the projectors are still in circulation. In short, a scene with a projector is perfect for immersing viewers in a specific environment. It is a symbol so iconic that it does not require explanations. The only problem is that today the projectors are not very easily found, and above all it is not easy to produce slides. Printing services still exist, but they are very expensive because it is a niche technology. You could simulate a slide projector with a digital video projector, but even these are not so common and have a certain cost. In addition, giving the images of a digital projector the appearance of a slide projector is not that simple. It is, however, much easier to do everything in post production, using Kdenlive to make the slides appear as we want. The starting set must obviously be a fairly dark scene, with a light source that simulates the projector, aimed at a white background such as a wall or a curtain. Then, with GIMP, we will produce a version of the background that is in complete shadow. We could also actually do this, simply by turning off the light and taking a photo of the unlit background. But, should it not be simple, just use GIMP to create the “dark” version of the background. In Kdenlive we can then improve the luminous halo of the projector by obtaining the classic rectangle with shaded edges, since the projectors never have a round shape. Then, you can use it in Multiply mode to superimpose the image we want to use as a slide on the illuminated background. Using this mode, in fact, you get a result very similar to that of an actual slide, with lighter tones that tend to transparency and therefore to take the color of the background and the light beam. Then you have to recreate the classic movement of a slide: it enters from above and always comes out towards the top. Using the keyframes of Kdenlive’s transitions, 4 steps are enough to create the animation. Obviously, the work must then be finished by covering the part of the background that is located above the luminous rectangle, to avoid that the image of the slide may appear there during the entrance or exit animation. This completes the effect, especially if combined with the recognizable sound of the projector trolley that moves to make a new slide enter and exit. To add a further note of realism, just dim the light at the moment of the slide change. You can superimpose the image of the dark background created with GIMP, making it appear only for a few frames between the end of the exit animation of a slide and the entry animation of the next slide. This flashing helps the eye to understand that an exchange of the slides is taking place. As always, you can see the example video at the following address: https://www.youtube.com/watch?v=GueRVbAIhuw
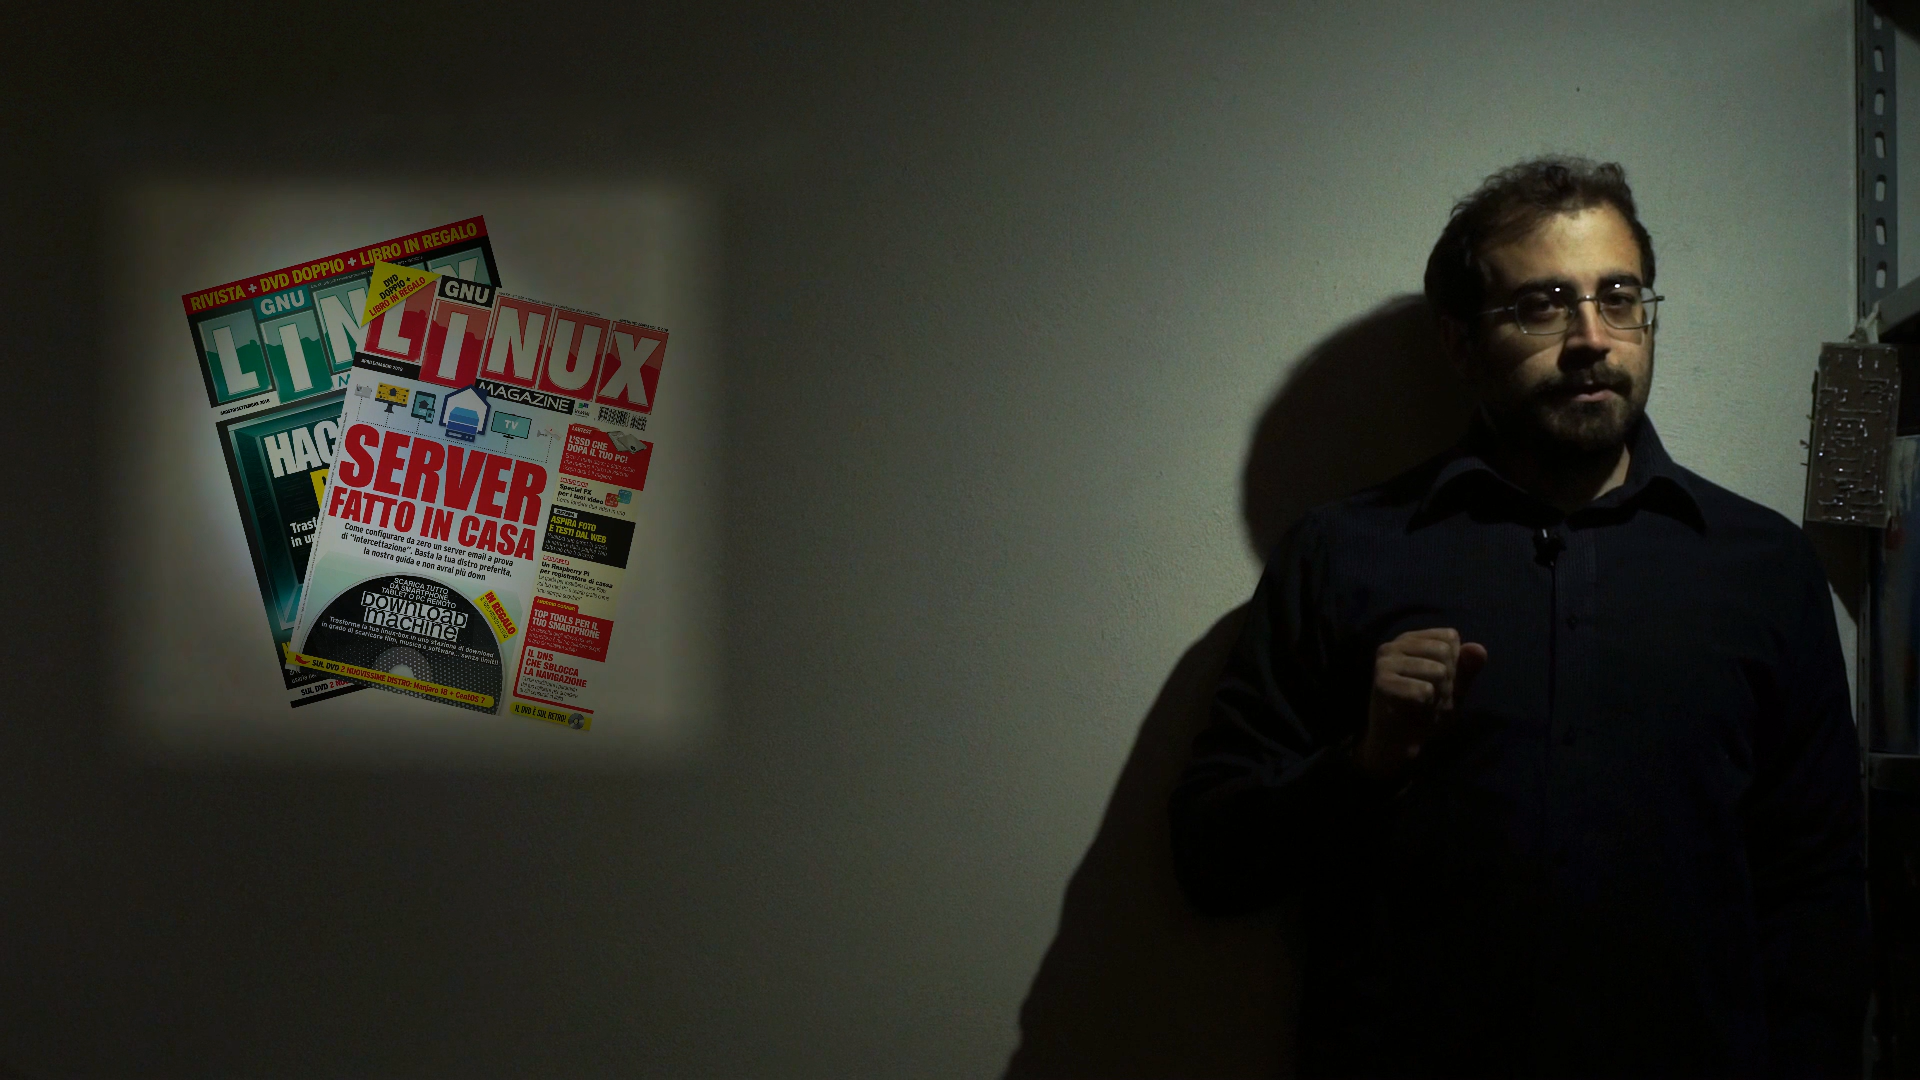 A slide appears on the wall in post production
  In the change between one slide and another, the light disappears
 Simulate a projector with light
How to illuminate a scene with a fake slide projector? First, you need to simulate the projector. The best thing to do is to get a torch that projects a fairly small beam of light. Eventually, you can take a fairly powerful light source and cover it with a piece of cardboard that has only one small hole. Then, however, you also need to illuminate the actor, and normally when making a slide presentation the speaker is not too bright: the room is always in the dark, otherwise the slides would not be seen. The solution consists in illuminating only the speaker with a light diffused enough not to look like a reflector, just do not point it directly towards the actor, but only in a smear, with the center part of the light beam falling out of the frame (better if on white reflective material for filling light).
Prepare the unlit background
We modify a frame to obtain the background without projector light
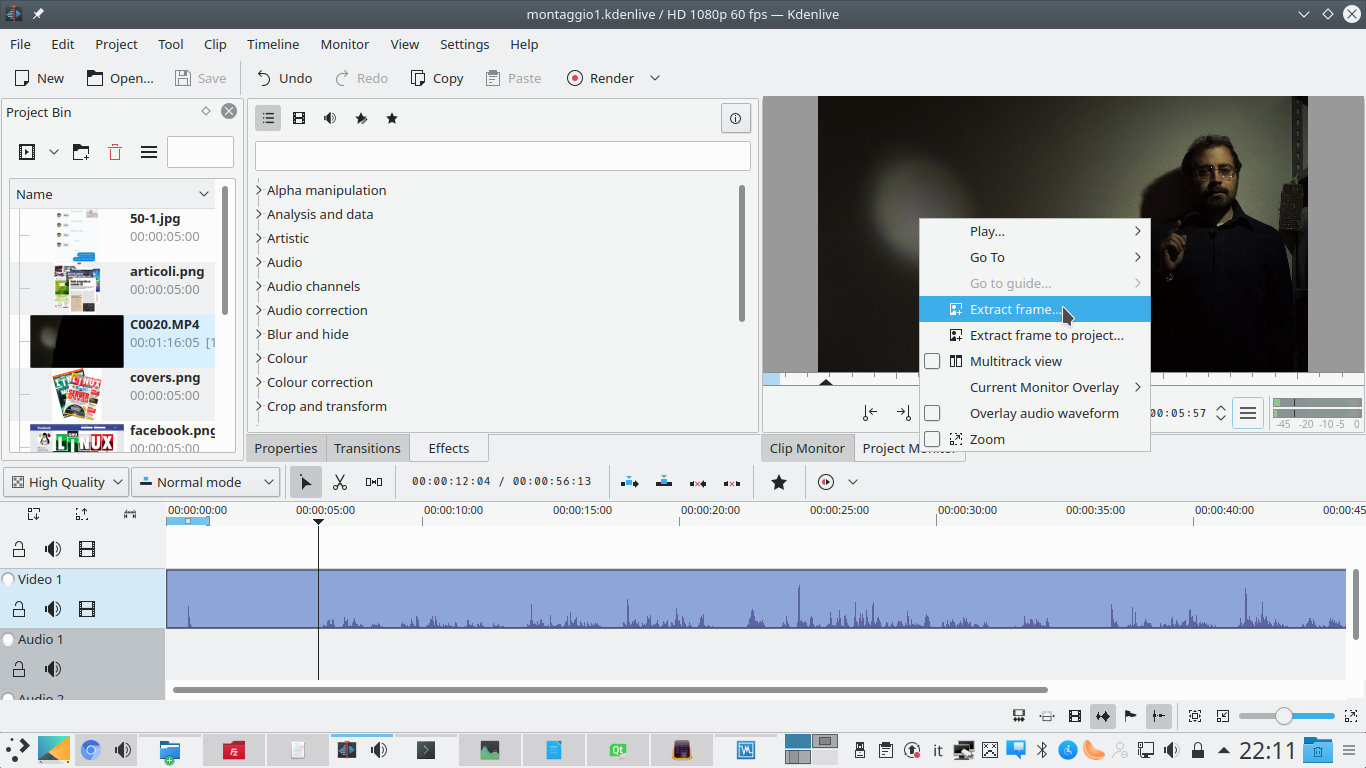 1 PULL OUT THE FRAME – The first step is to import the video clip into the Kdenlive project on the track Video1 . Then you need to go to a place where you can see the background well and click on project monitor by right clicking Extract frame .
  2 COPY AND PASTE – Open the frame in GIMP, we have to hide the halo of the projector light. The simplest solution is to copy over a piece of unlit background, trying to keep the shades of light.
 Projector light
We create a rectangular light area, like in real projectors
 1 THE CORRECTION – To correct the image, which will have dividing lines in the points that we have pasted, we can use the tool patch . Just choose a reference point and then pass it on the edges to make them disappear. The image must be saved.
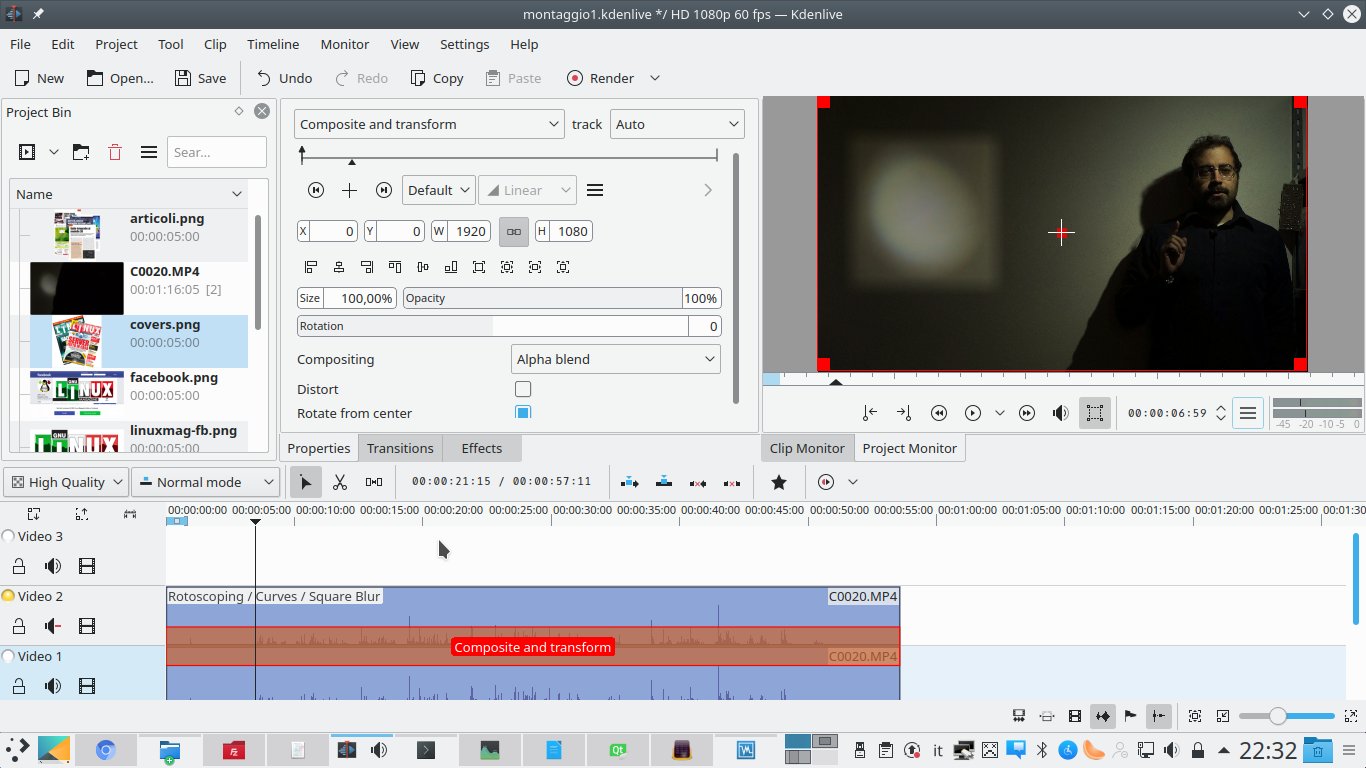
  2 THE ROTOSCOPING– Returning to Kdenlive, the clip with the actor must also be copied to the track Video2 . The effect must be added to this clip rotoscoping , delimiting a rectangle around the projector light, with abundant Feather width (about 20-40).
 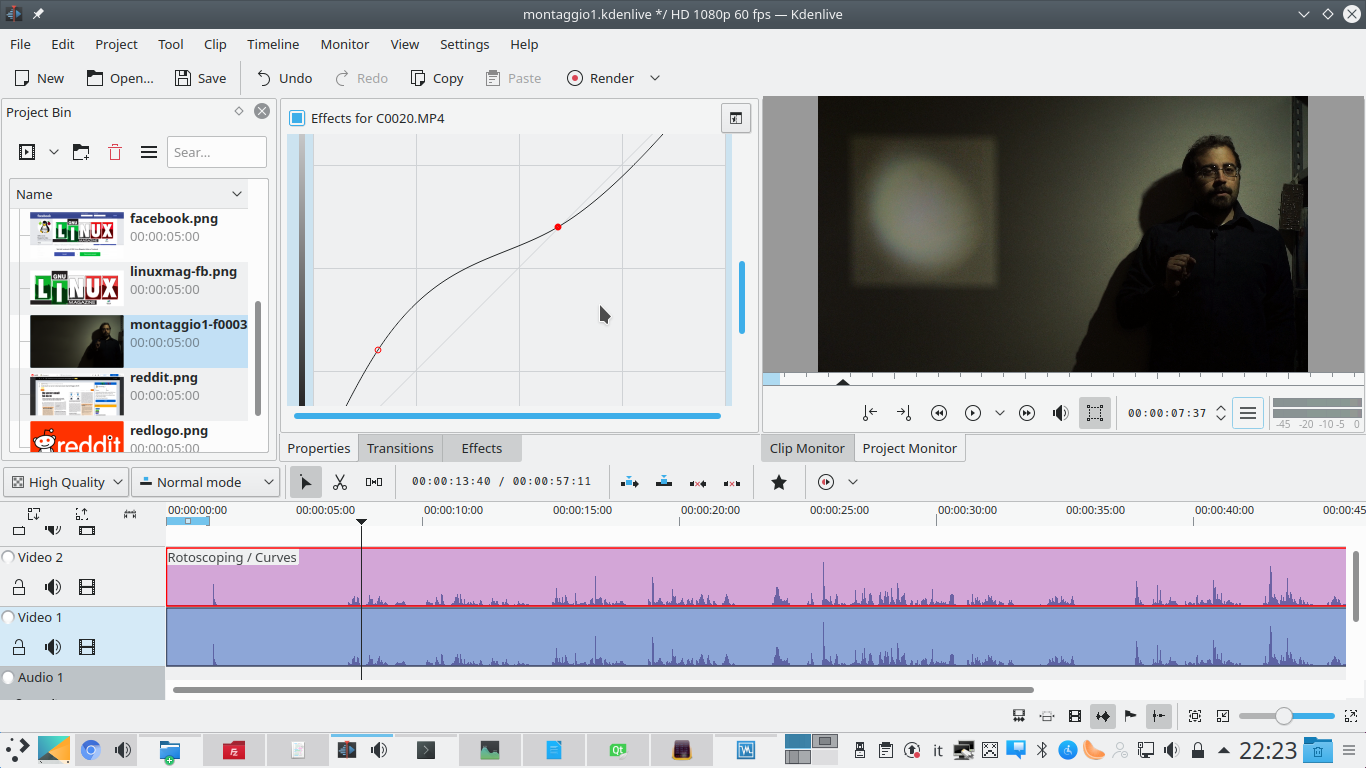 3 LESS CONTRAST – The effect must then be applied to the same clip Curve setting a curve that lowers the lights a little and raises the shadows a lot. Basically, the opposite of what is done to increase contrast.
 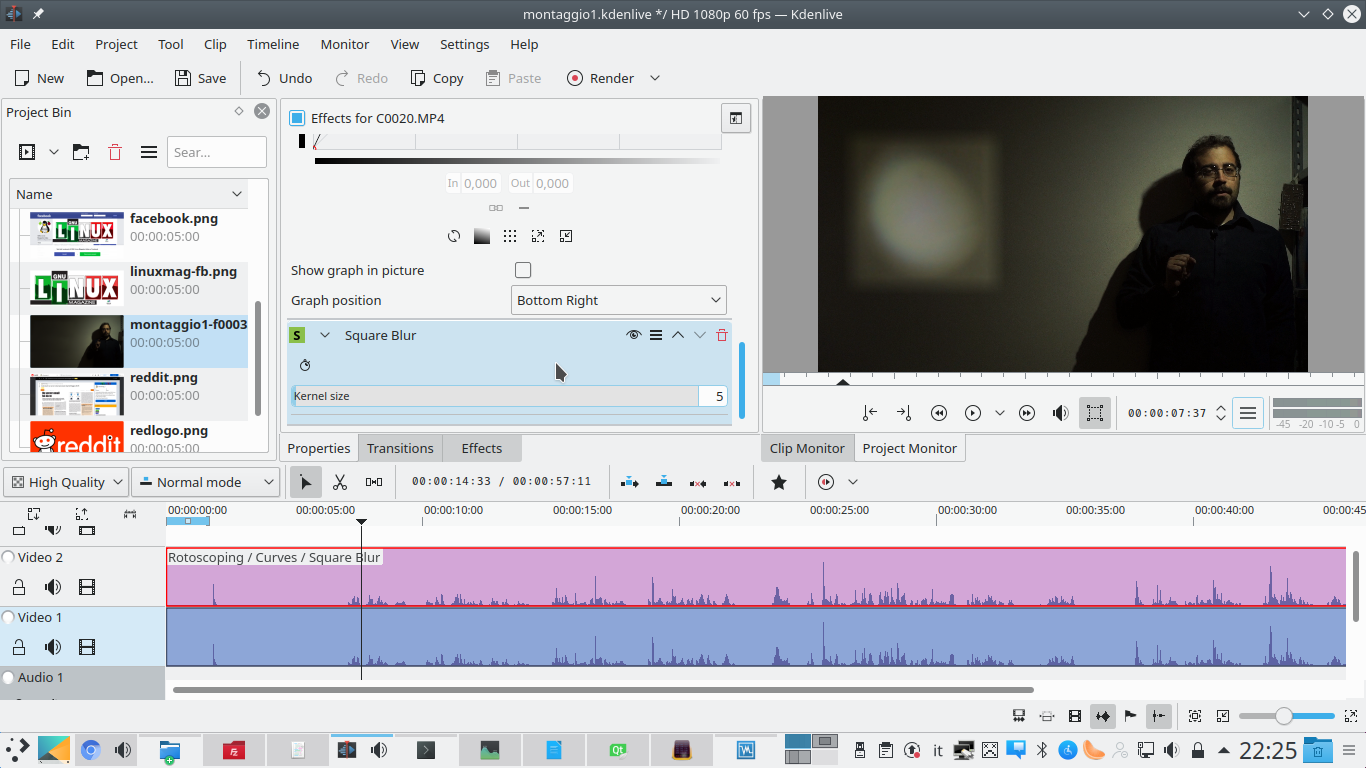 4 SMALL BLURS – To conclude the projector area, it is useful to add a slight blur: just use the effect Square Blur , setting a kernel size low, to the max 5 . This reduces the noise in the shadows due to the increase in brightness.
 Here is the slide
We draw an animation for entry and exit of the slide
 1 THE SLIDE – The clip of the track Video2 must have a type transition Composite and transform that extends to the entire duration of the tracks. Then you can upload the image that will act as a slide in the track Movie3 .
  2 MULTIPLICATION – Even the track clip Movie3 must have a type transition Composite and transform referred to the track Video1 , with Multiply as a type of compositing. Then just place the image inside the projector light rectangle.
  3 ENTRANCE FROM ABOVE – We set a keyframe a few fractions of a second after the start of the clip. Then we go back to the first keyframe and move the image out of the frame upwards, keeping the value of X .
  4 THE SAME EXIT – Similarly, we set a keyframe a few frames from the end of the clip, and one right at the end. In this we move the image up again: now we have the animation of the image that appears and disappears like a slide.
 Retouching the image
We add the top edge and a darkening in the slide change
 1 NEW TRACK – Right click on the track Movie3 and we choose Insert new track to add a new video track above it. This new track will probably be called Movie4 .
 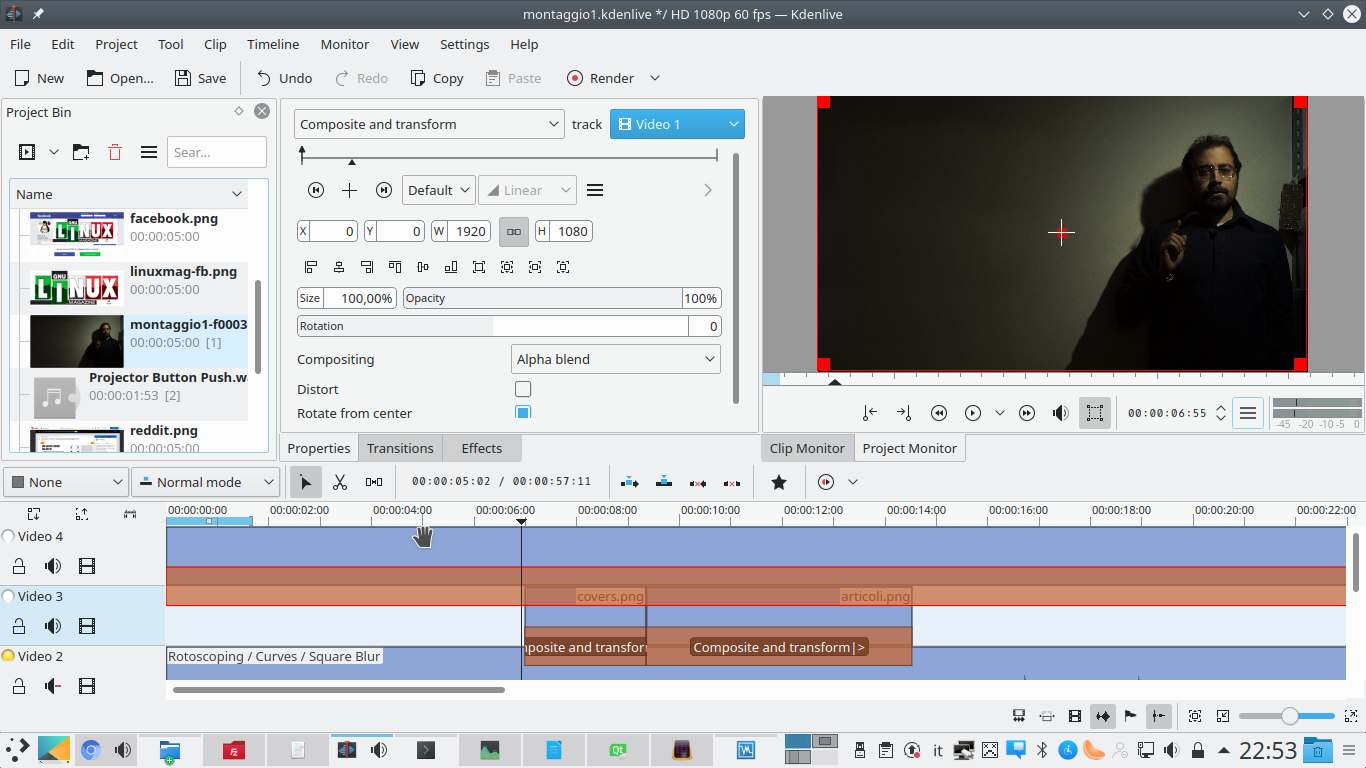 2 WITHOUT THE LIGHT – We insert here the frame retouched with GIMP, extended for the duration of the video clips. Let’s set up a type transition Composite and transform , referred to the track Video1 and methods Alpha blend .
  3 ONLY ONE PART – Let’s add an effect rotoscoping , cutting out only the top of the projector’s rectangle of light, to hide the slides when they pass there. Let’s set one Feather width such as not to notice too much the addition: not beyond 50 , in any case.
  4 ANOTHER TRACK – We add another track still above the others, inserting again the frame modified with GIMP. With an effect rotoscoping cut out the whole side where the projector light is located. Let’s set one Feather Width not to notice the edge.
  5 BLINK – Using the transition Composite and transform referred to the track Video1 we set the opacity to 0 . Just before the appearance of a slide, we create a keyframe with 0 opacity. Then we create one at the moment of the appearance, with opacity 100 .
 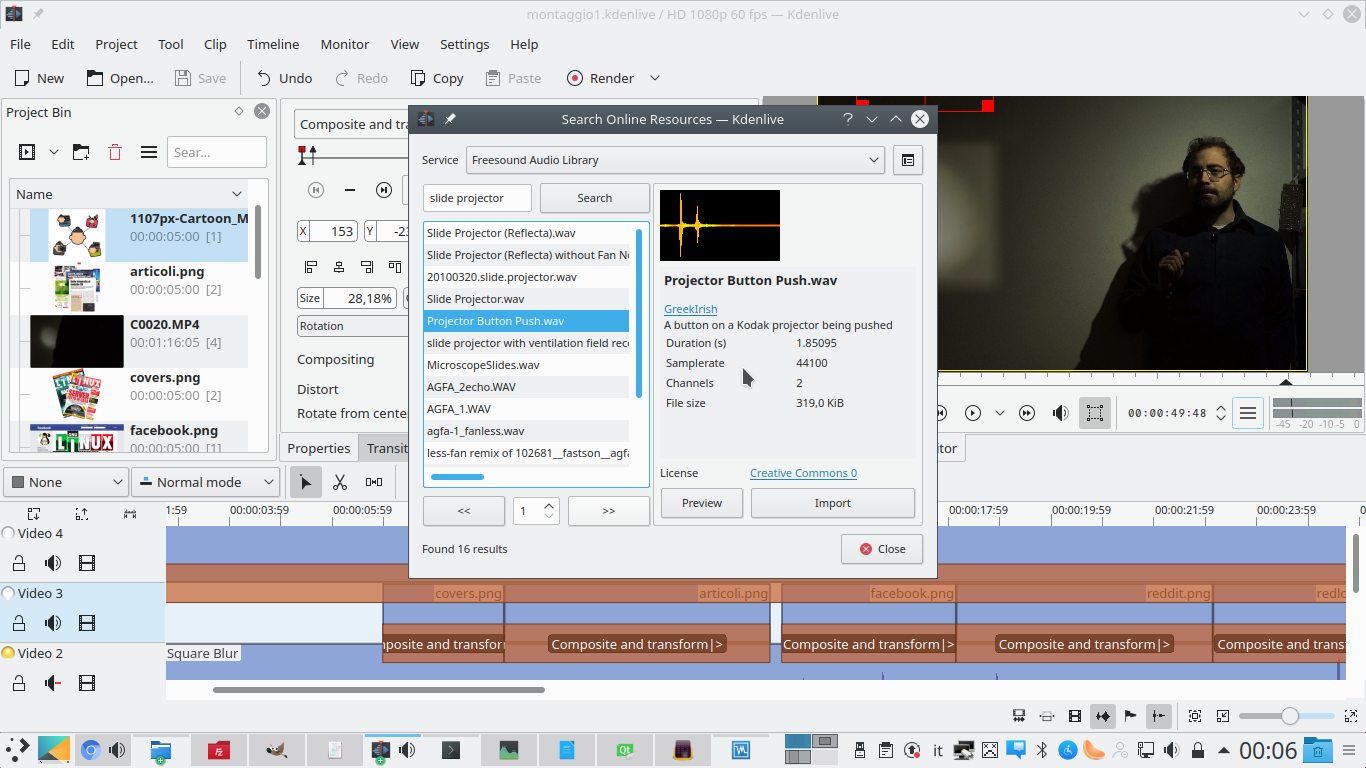 6 SOUND EFFECT – A few frames later we create a new keyframe with 0 opacity. This is for each slide that appears and disappears. Finally, for each appearance you can add one of the sounds found by Freesound ( Project / Online Resources ) looking for “projector slide”.

