Filling a room with water to simulate a flood is not practical and cheap: it is much easier to pretend to be underwater thanks to Kdenlive, superimposing the right stock images
Today as today shooting under water is not so difficult: underwater cases for cameras cost very little, and for the cheapest cameras it is even possible to use a vacuum bag. The problem is when you want to pretend that a particular environment is flooded. For example the room of a building in a post apocalyptic scenario, a cellar after a flood, or in general an environment that is submerged for some reason. Making a scenography in the studio is not too complicated, but you can’t flood a room just to make a shot, it would cost too much. Swimming pools are used in large productions, but independent directors cannot afford to rent a large swimming pool. The only solution is to create the scene in post production, and here Kdenlive comes to our aid. We will need real footage, and also ready-made images on the green screen. The clips depicting fish swimming can be easily found on YouTube, there are many green screens ready for use and released in Creative Commons or in the public domain. In the same way, clips of a seabed can be found: we need complete images, with a shot that goes from the surface of the water to the seabed. But it is better if we are dealing with images in computer graphics, or in any case made on purpose so that the backdrop is only a sort of blue table on which the luminous reflections of the Sun are projected. The more generic the image, the easier it will be to merge it with our real recovery. The filming that we will make will be two: one in the background, and one with the actor in front of a green screen. This will allow us to keep the various levels separate, and insert images between the actor and the background. The clip with the background must be at the bottom, below all the others. Immediately above put the clip of the seabed, but cut so that the light reflections are projected only on the floor of the room that we have chosen for our scene, carefully avoiding the walls and other objects. Then we will insert the actor, who will then be on the bottom. Only at this point we will insert the clip of the seabed again, but avoiding to show again the luminous reflections: this time we are only interested in the classic mist typical of the water, better still if in the clip we have there are rays of light that start from top to bottom. This clip will therefore produce a sort of blue patina in front of the image, and will give that typical look that the images taken under the water have. We can insert fish between the video track dedicated to the actor and that of the backdrop, or between that of the actor and that of the blue patina. In the first case the fish will pass behind the actor, in the second case they will pass in front. To insert a three-dimensional element, we can take the clip of a fish that swims and position it half behind the actor and half in front, so you will see it do a sort of turn around the actor, making the result more credible. As always, you can see the example video at the following address: https://www.youtube.com/watch?v=NC5P-cuDy7g
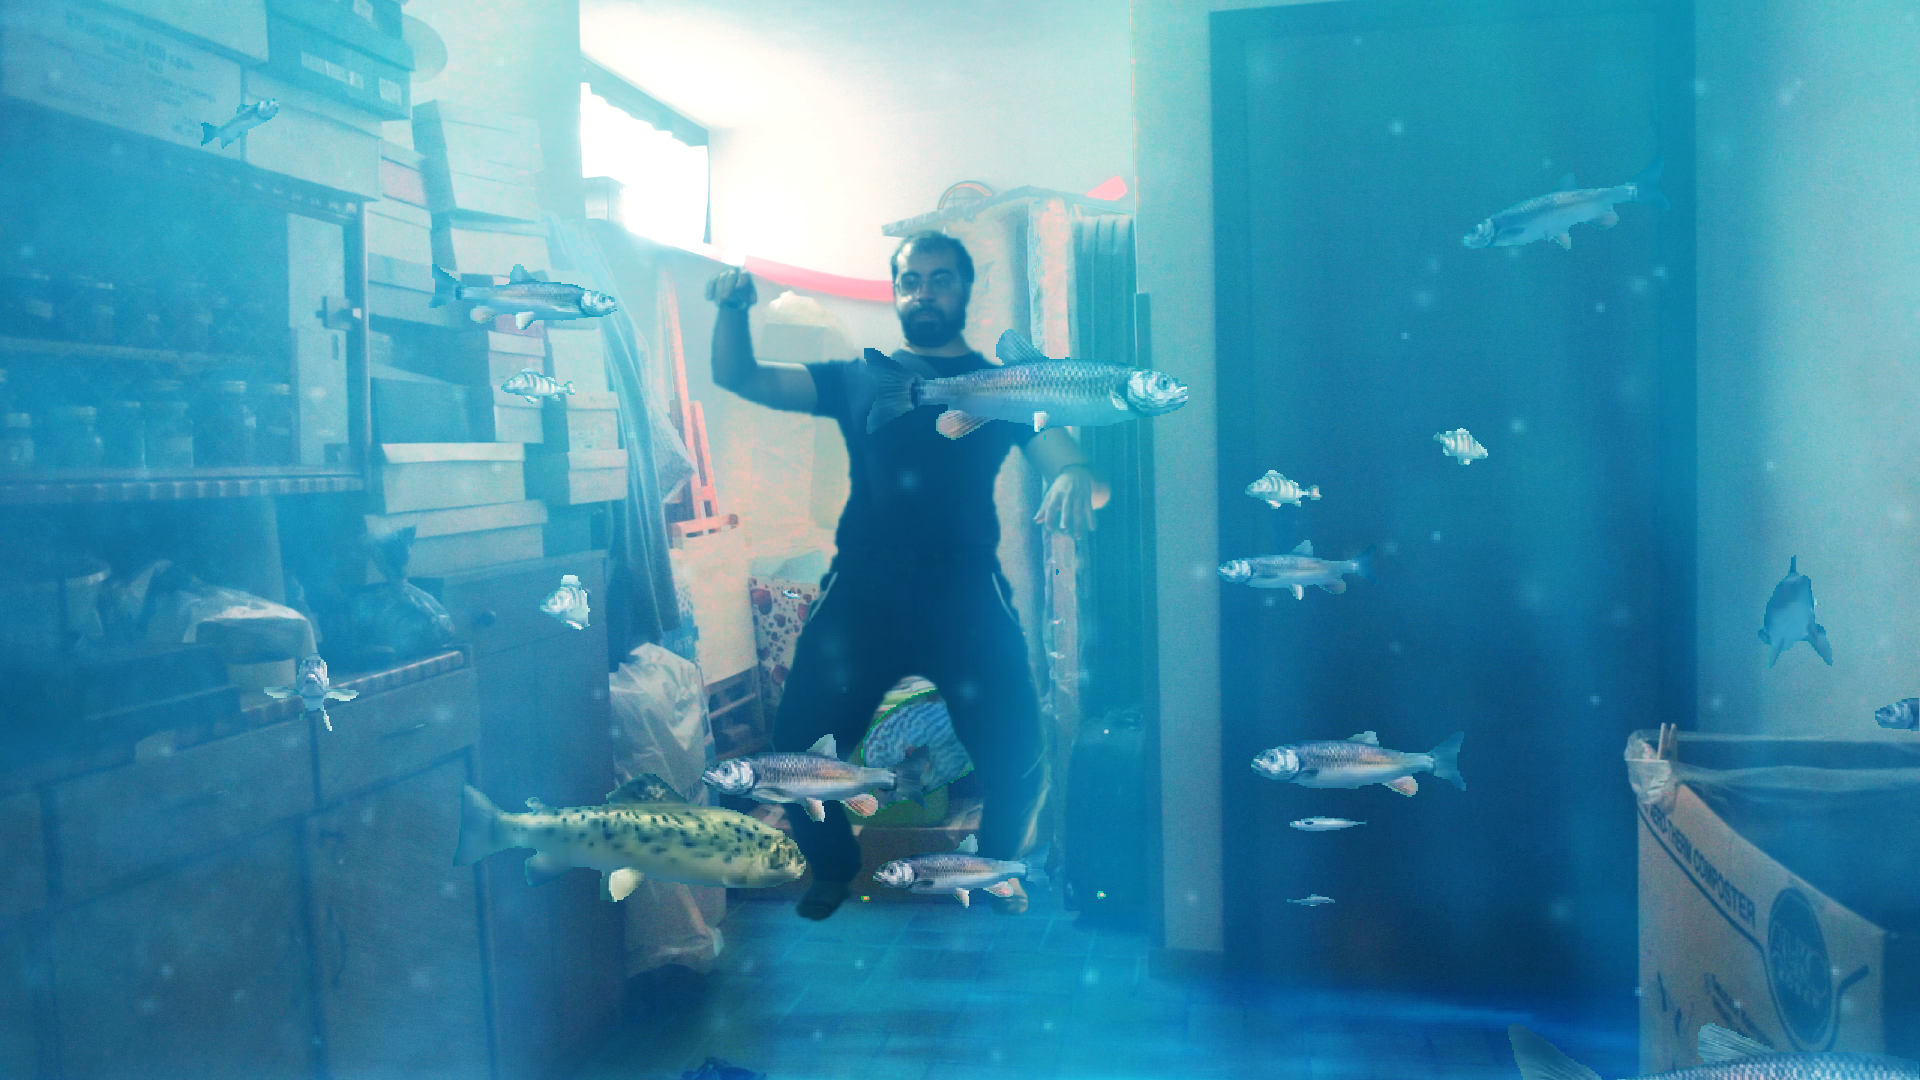 The effect we have achieved
  The scene from which we started is in dim light
 Shooting in dim light
To simulate an underwater scene, it is necessary first of all to have the right lighting: a dimly lit environment is needed, because there is less and less light under water than there is on dry land. In addition, it is good to have a minimum of haze, something that produces light rays. For example, a basement is fine, with windows that allow rays of light to pass through. It is better to make a shot a little darker than usual, then lighting it with Kdenlive, to be sure you can control the darkness. The green screen shot must have similar lighting: the actor must be hit by a light source from the same direction of the window in the basement shot, typically from above, perhaps with a backlight from the floor to simulate a luminous reflection.
The starting videos
We will need archive footage and real footage
 1 THE VIDEO CLIPS – To achieve the effect we can recover green screen footage of swimming fish and a seabed. Just search green screen fish is underwater background green screen on Youtube. You can use cclive to download videos in MP4 format.
 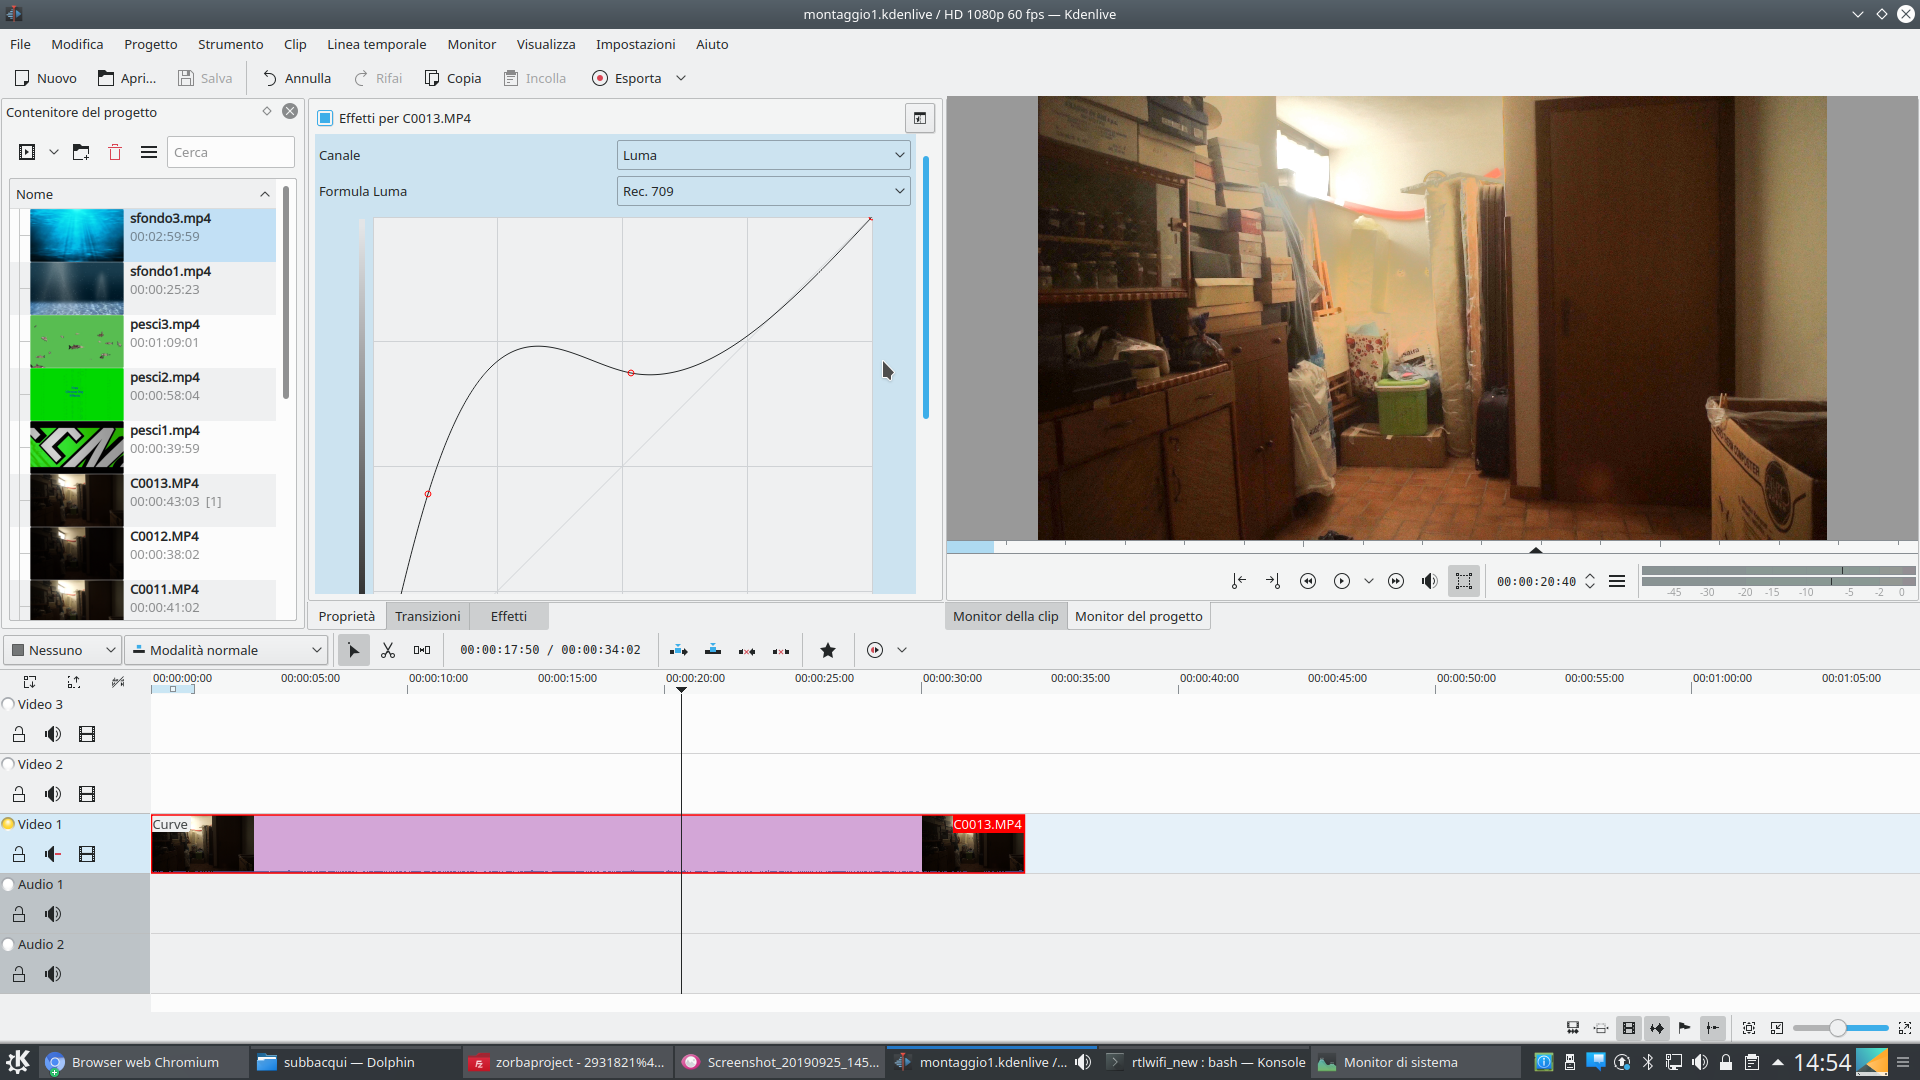 2 LIGHTS AND SHADOWS – Created a new Kdenlive project, we insert the movie clip with our background setting in the track Video1 . Let’s give this clip an effect Curve to raise the shadows in order to make the image brighter.
 We insert the background twice
We use one track for the backdrop and another for a blue patina on the rest of the image
 1 ON THE FLOOR – In the track Video2 you must put a clip of the seabed, where you can see the reflection of the light on the floor. Using a transition Composite and Transform with method Screen we enlarge the image to cover the floor with the reflection.
 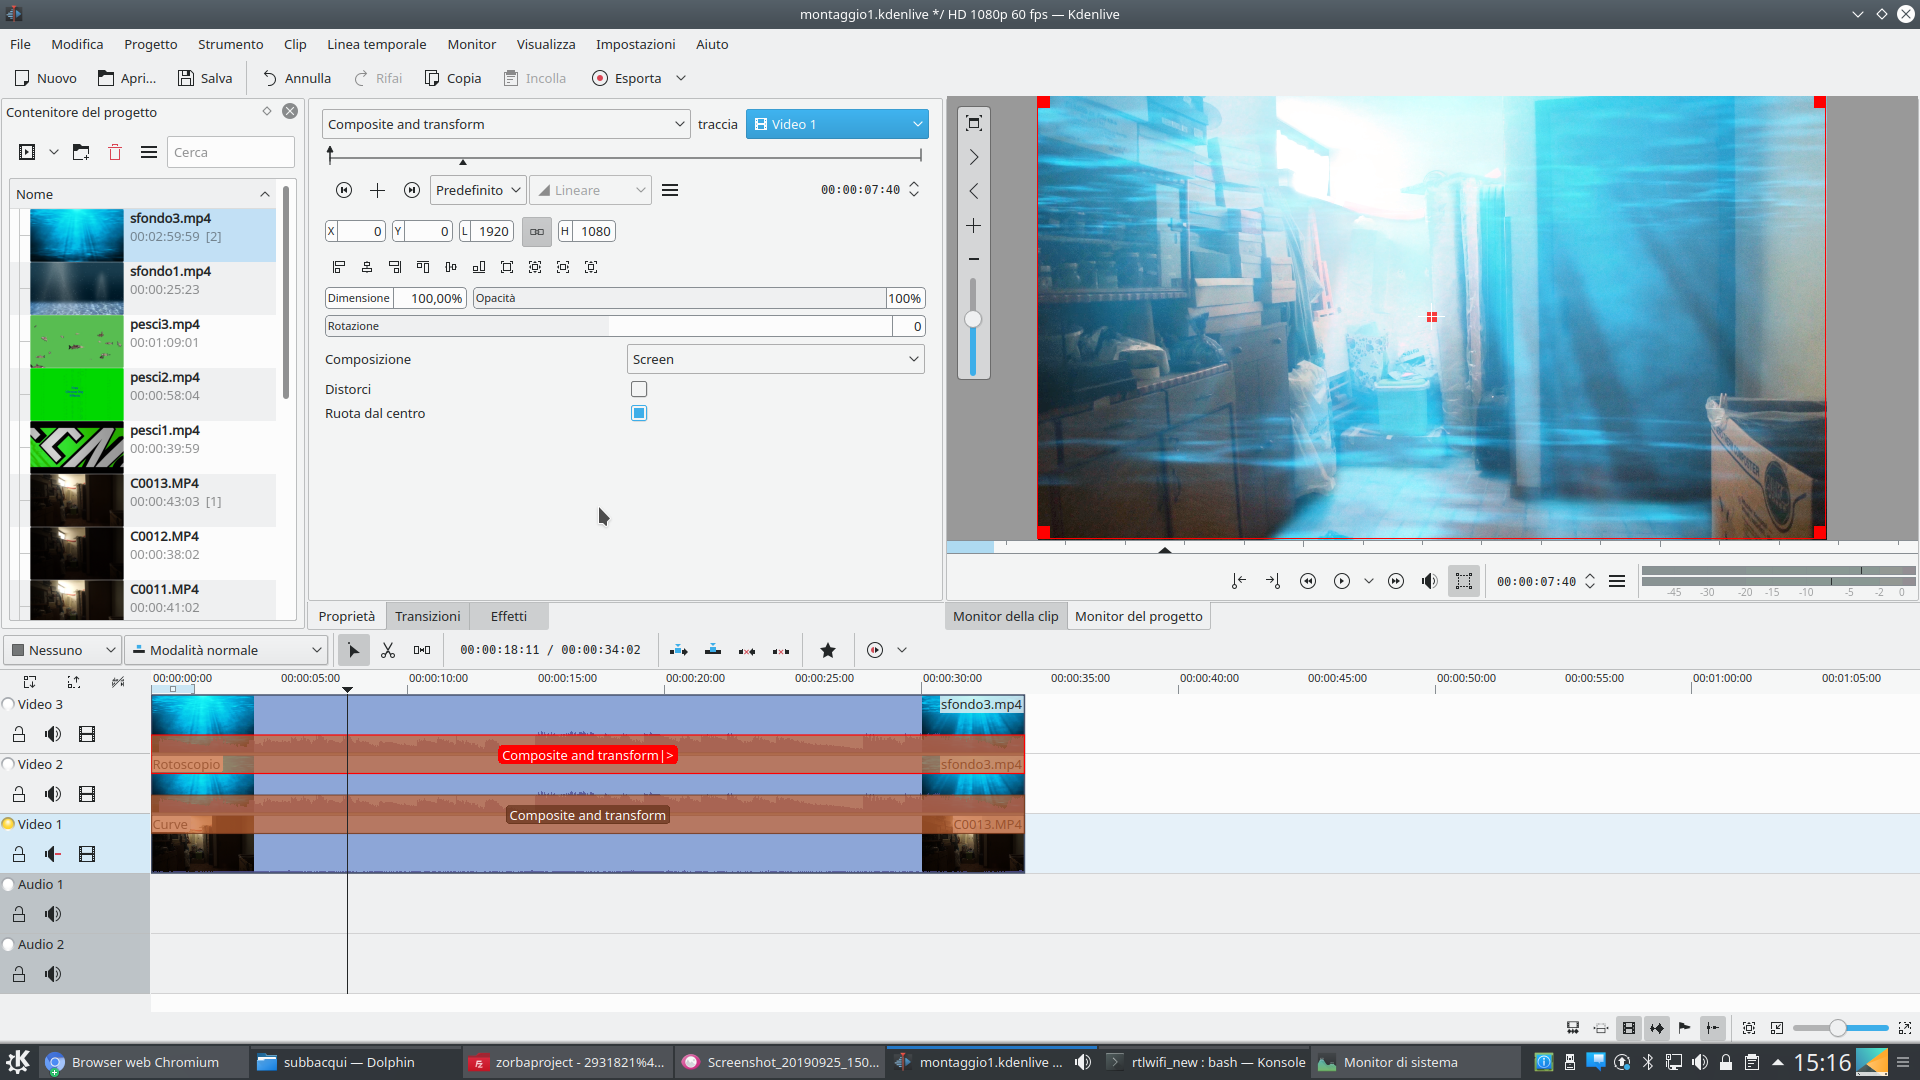 2 THE SAME CLIP– With the effect Roto we only cut out the floor of our scene, and we set feather width at least a 6 . In the track Movie3 we insert the same clip as the seabed. This too needs the same transition.
  3 A BLUE PATINA – The clip inserted in the track Movie3 must refer to the track Video1 . We use the transition to zoom and position the image in order to exclude the reflection of the floor from the frame. So the floor is seen only in the Video2 .
 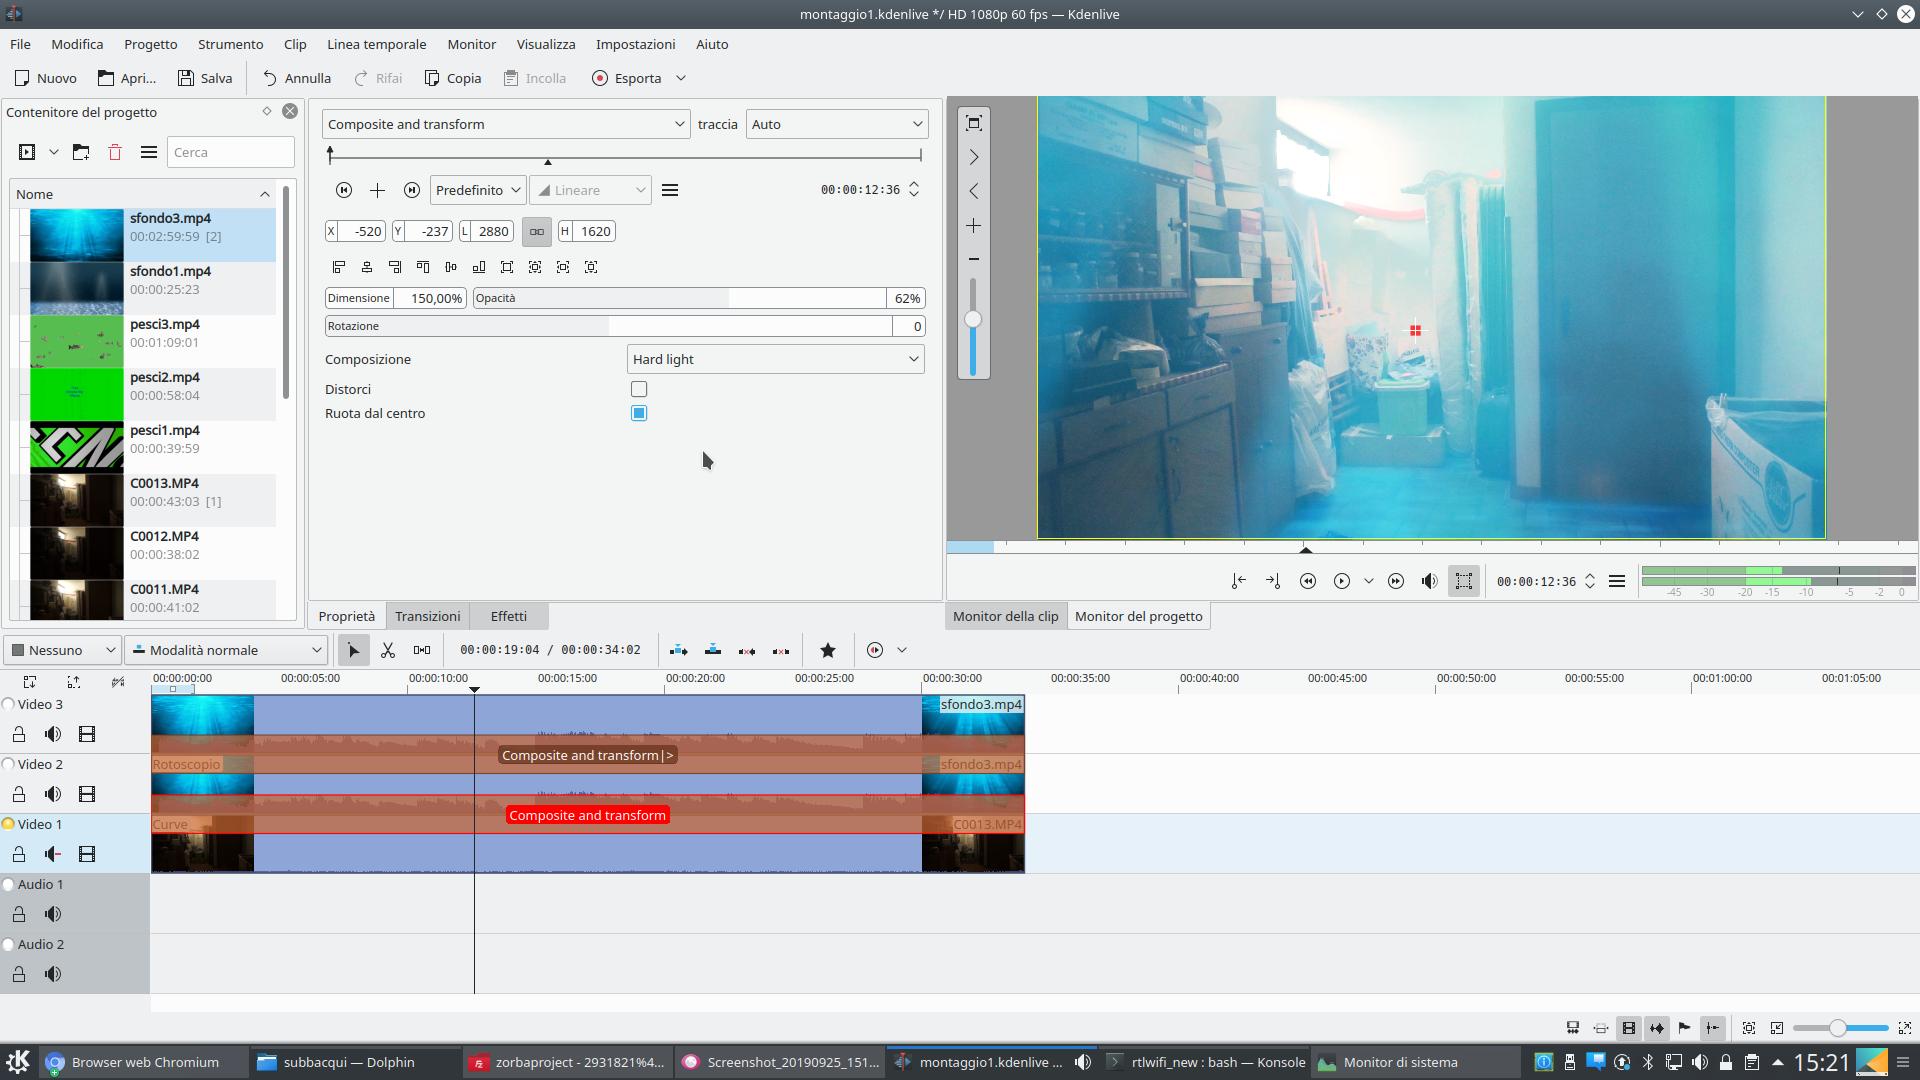 4 STRONG LIGHT MODE – It might be a good idea to reduce the opacity of the transition, so as not to cover the background too much. If the backdrop is too marked, you can blend it better with the scene by changing the method of its transition to Hard light and lowering opacity.
 We insert the actor underwater
The actor’s trace must lie between that of the backdrop and that of the blue patina
 1 HERE IS THE ACTOR – By right clicking on the track name Video2 , let’s create a new track between the Video2 and the Movie3 . In the new track Movie4 we can insert the clip filmed with the actor in front of the green screen.
  2 WITHOUT THE PATINA – Obviously, this clip also needs a transition Composite and Transform referred to the track Video1 . To work more comfortably, it is convenient to temporarily hide the track video Movie3 by clicking on the film-shaped button.
  3 THE ROTOSCOPING – Let’s add an effect to the actor’s clip rotoscoping , to cut out only the rough area in which the actor moves, eliminating all that is external to the green sheet. In order to draw the outline, the edit mode must be activated in the monitor.
  4 THE CHROMA KEY – The editing mode is activated by clicking on the rectangle-shaped button next to the volume button. We then add an effect Chromatic key to the clip, selecting the green color of the sheet to make it disappear.
 Let’s add the fish
We insert other video tracks for the green screen clips of the fish
 1 SHADED EDGE – It is possible that a single chromatic key effect is not enough to make the curtain disappear, but just add other similar effects. We also add an effect Alpha channel operations , with operation Soften and a low value, enough to have a soft edge.
  2 POSITIONING – Using the transition between the track Movie3 is Video2 , we adapt the size and position of the actor so that it is proportionate to the scene we have. The method of composition must be Alpha blend .
 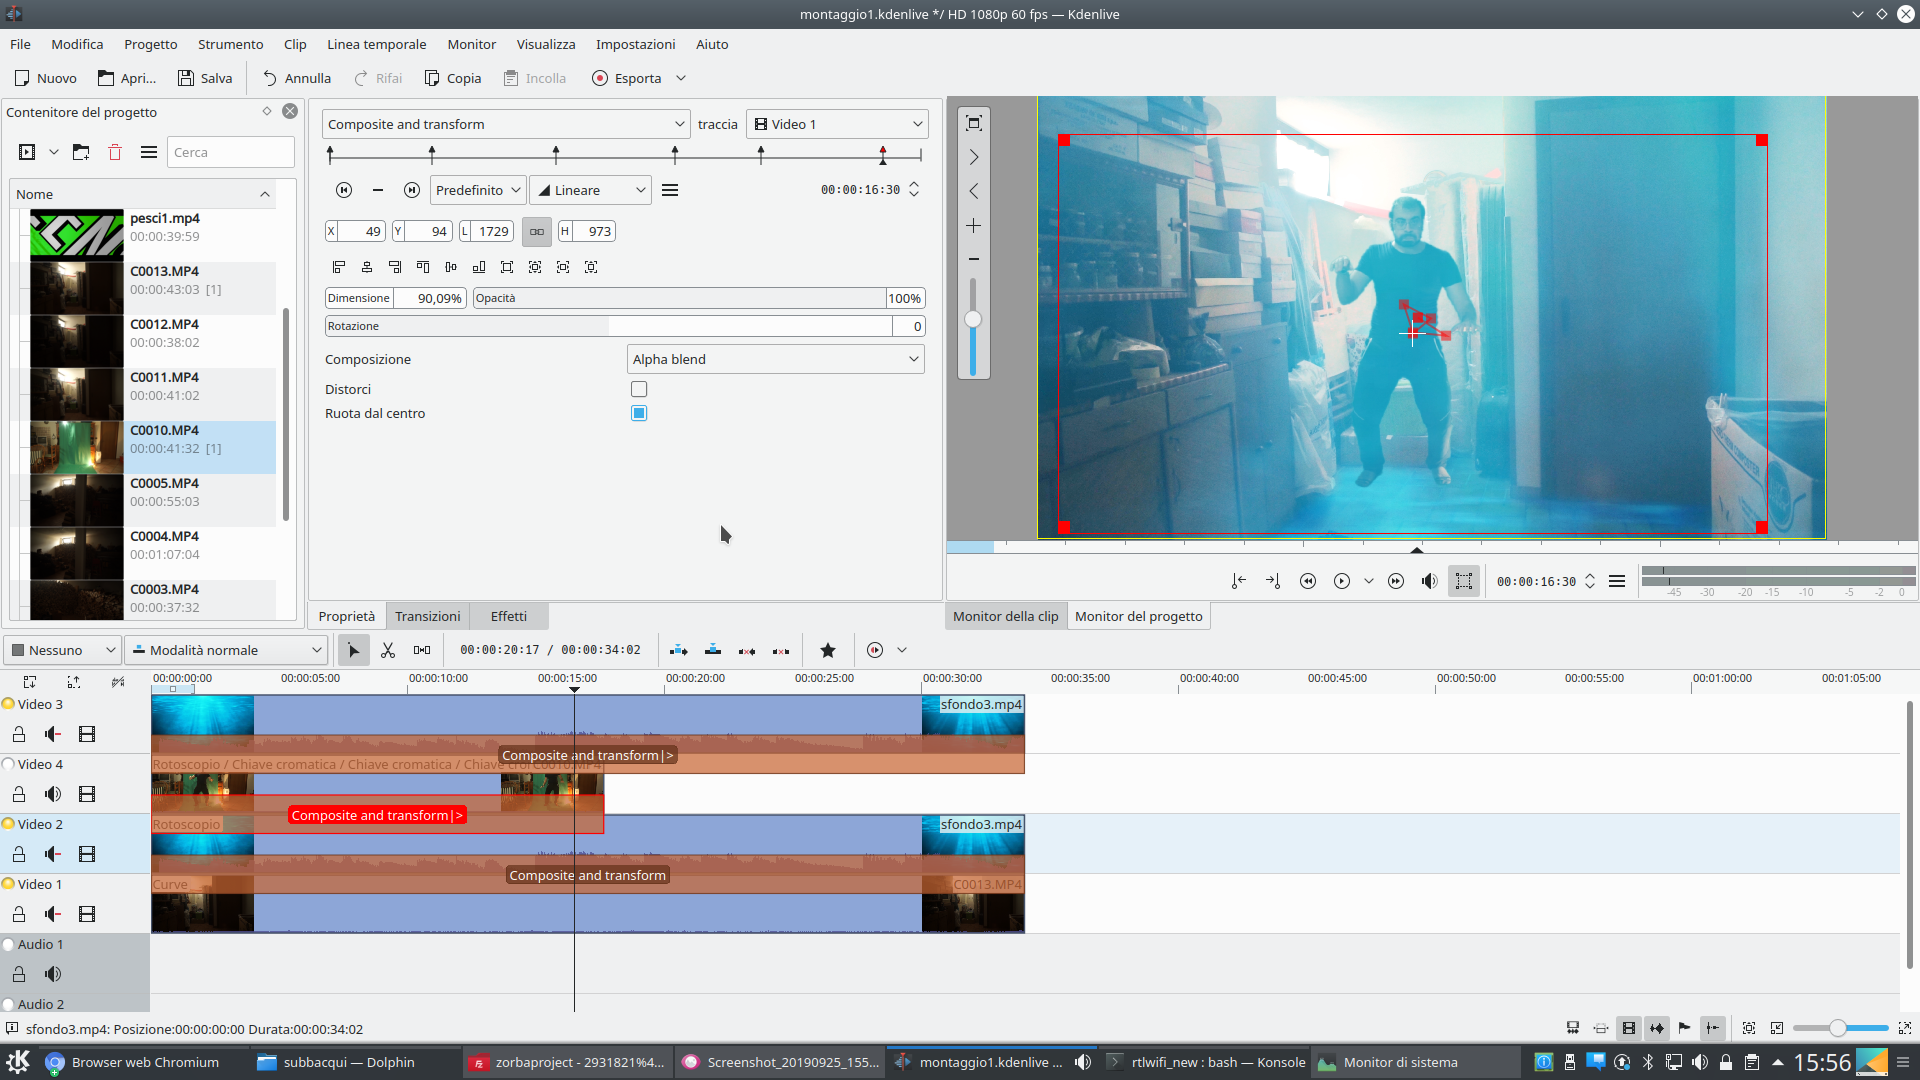 3 THE KEY FRAME – It may be a good idea to make the actor float as if he were moved by the waves: just create a key frame of the transition every 2-3 seconds, moving the actor slightly and possibly resizing it to pretend it goes back and forth.
 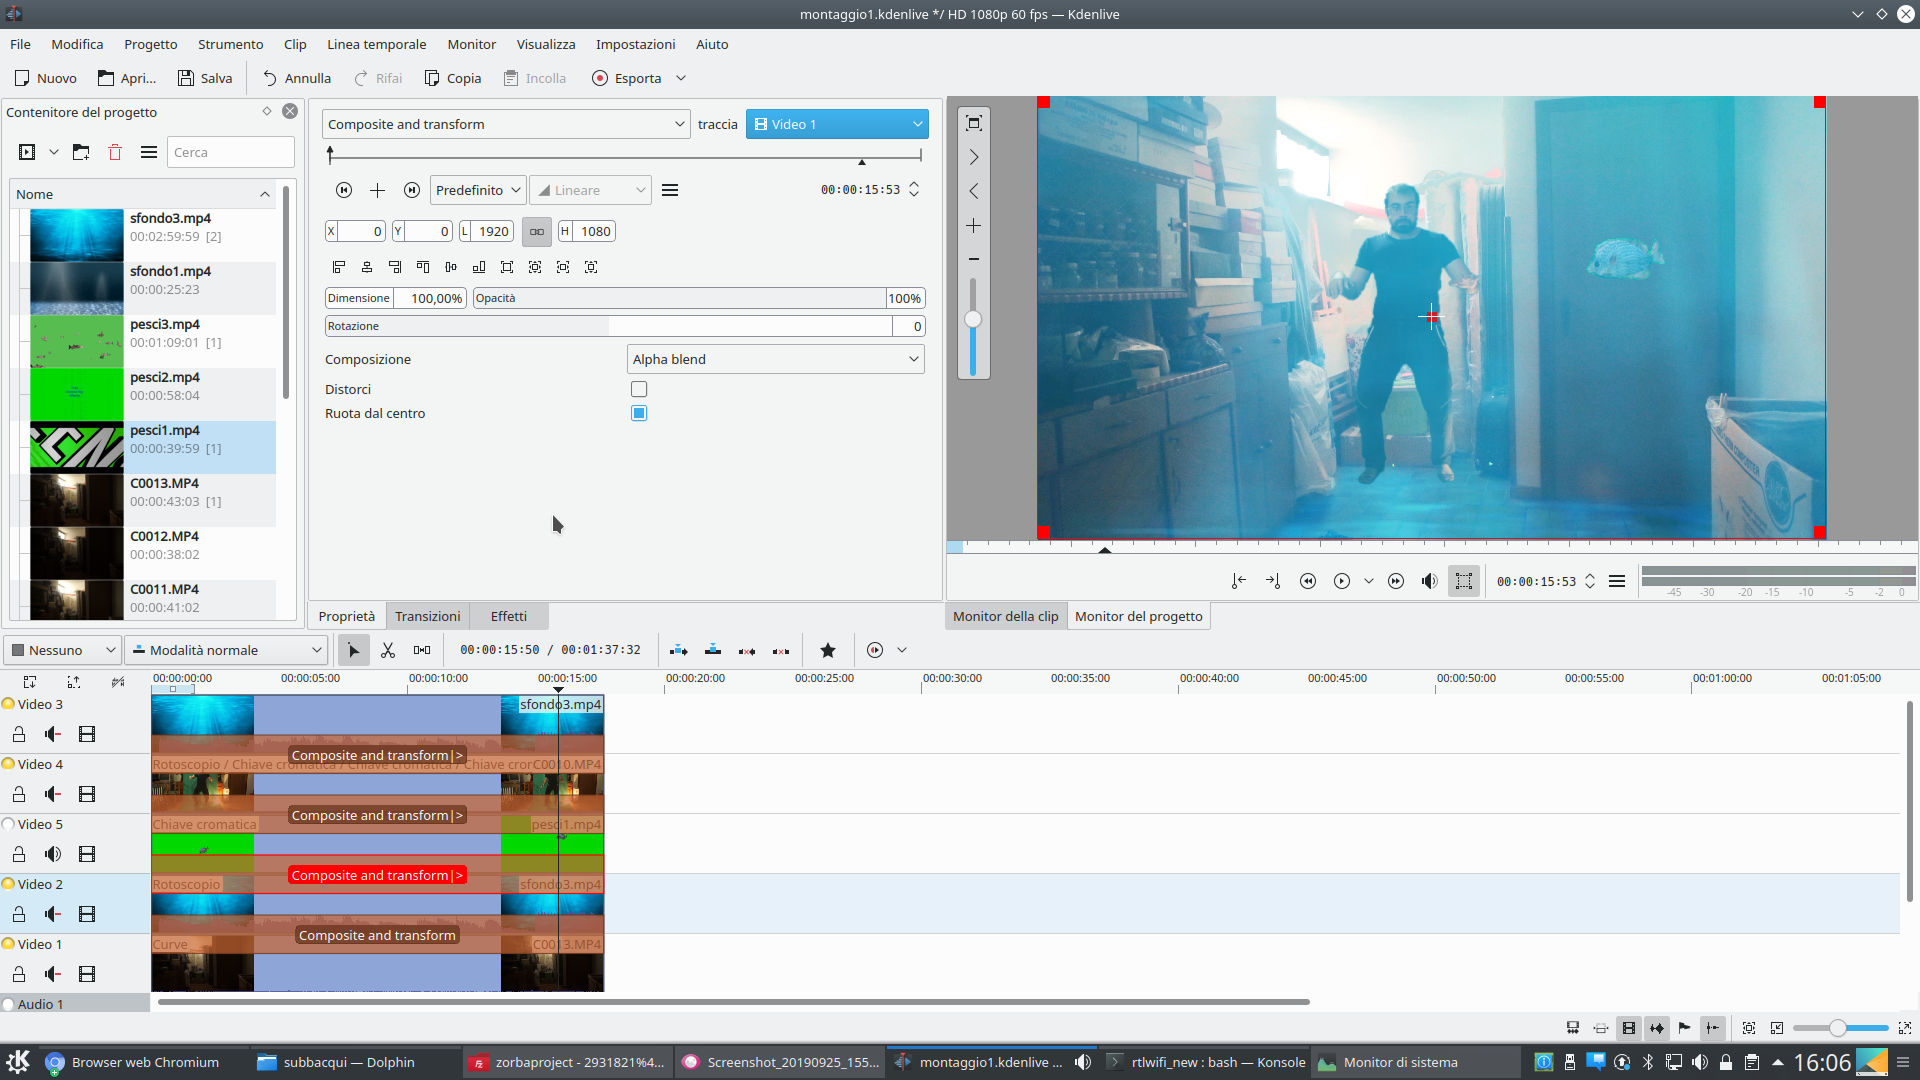 4 NEW TRACK – Let’s create another video clip between the track Video2 is Movie4 . This track will contain the fish swimming behind the actor: we insert a clip on the green screen of fish. Obviously, the clip will have to have an effect Chromatic key to make the background color disappear.
 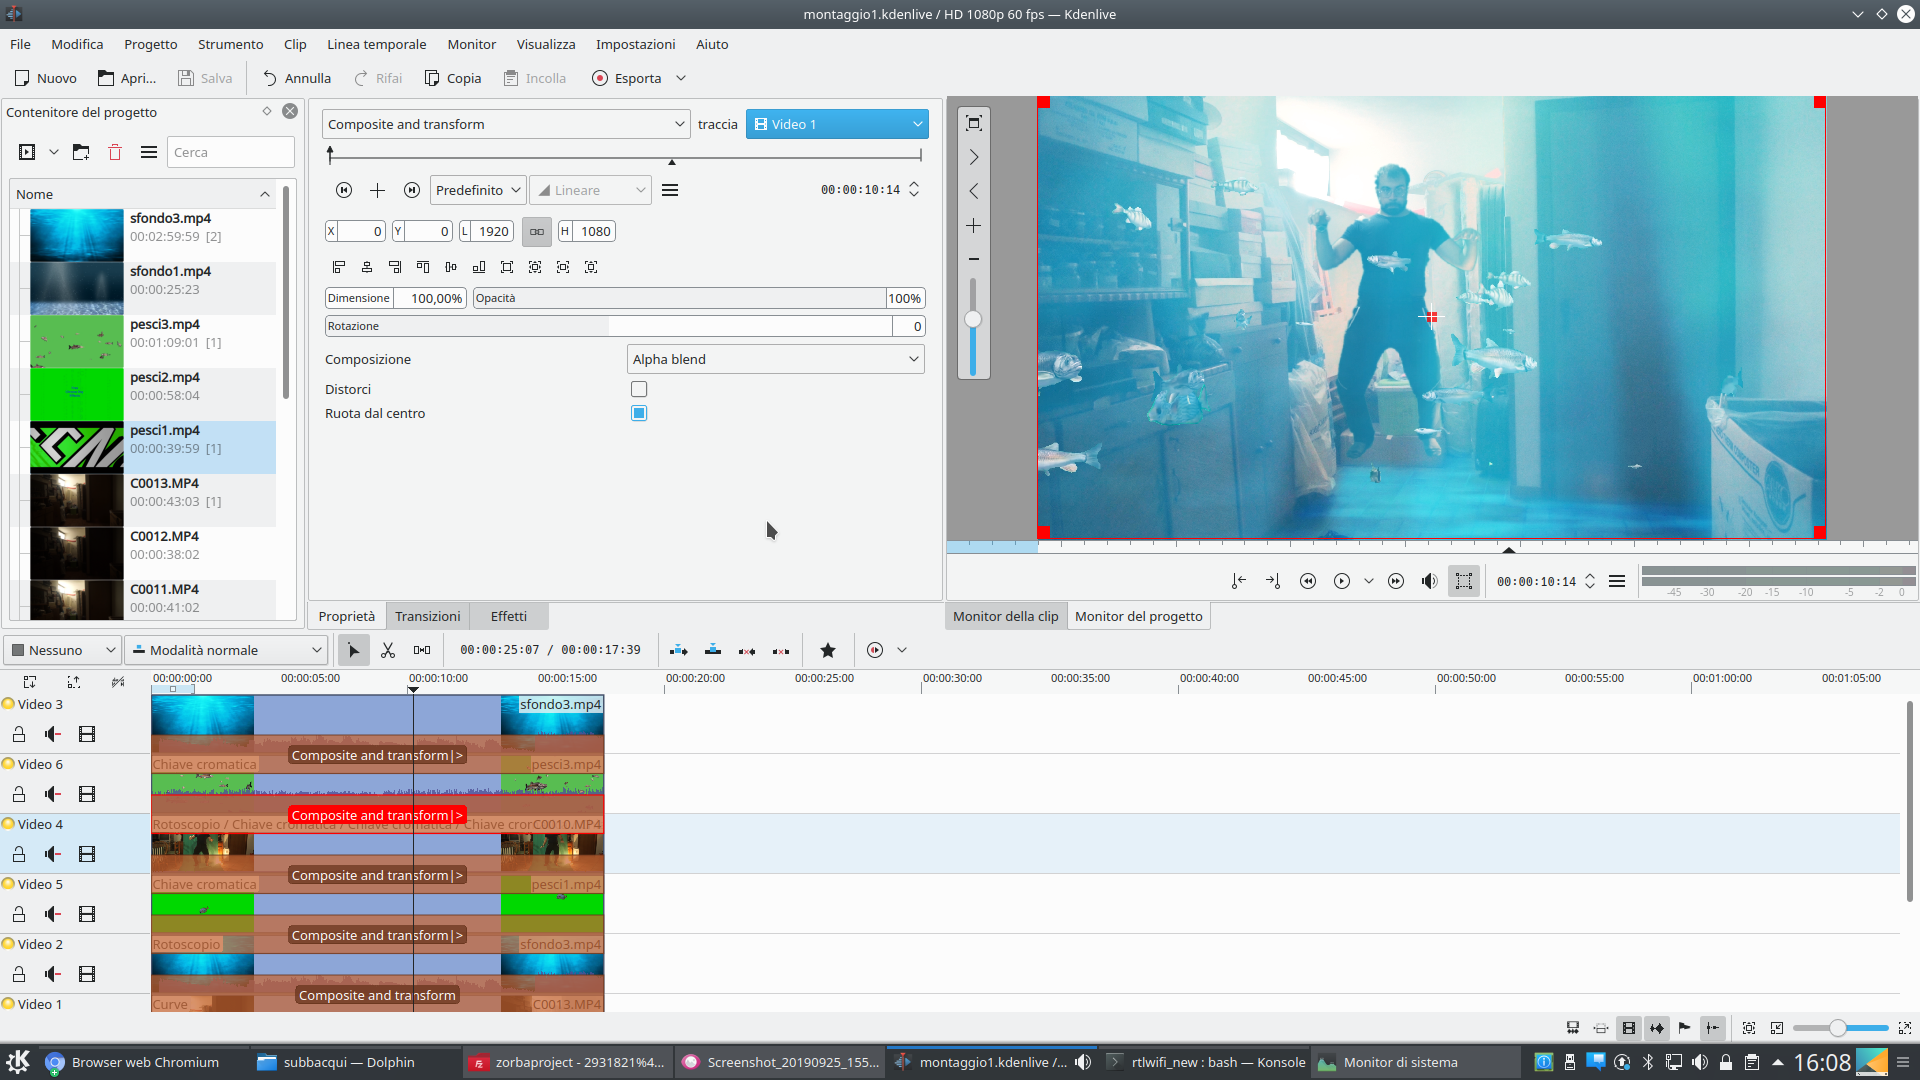 5 IN THE SPOTLIGHT – With the same logic, we add a track between the Movie4 and the Movie3 . In this we will put everything that must pass in front of the actor: any other fish, or underwater plants, such as algae, always using the Chromatic key to remove the background.
  6 OF THE BUBBLES – As a last step, let’s add another video track above all the others. We will add a video clip with air bubbles, and we will overlay it always using the transition Composite and transform referred to Video1 , but with the method Soft light .


Pingback: Nueva página web con tutoriales para Kdenlive - KDE Blog