Amateur films often have a defect: the sky appears white due to the excessive brightness of the Sun. But with Kdenlive we can replace the sky, inserting a photograph with realistic colors in its place.
In all films, especially those of action but not only, it happens that you have to show the subject of the shot against the light, with the sky in the background. The situation occurs when the camera is positioned at the bottom, and therefore takes the actor from the bottom to the top, with the result that often the Sun is behind him. The problem with this situation is that in order to see the actor’s face we have to increase the exposure of the shot: the image therefore becomes brighter and allows us to see the details of the actor or objects in the foreground. But it ends up overexposing the sky: the cameras, in fact, have a fairly limited contrast range (even the most expensive ones do not reach the capacity of the human eye). This means that they are unable to correctly expose both relatively dark objects in the foreground and the sky excessively lit by the Sun. The result is a shot in which the sky appears completely white: the effect is unpleasant, because it makes the idea of a decidedly amateur movie, without attention to detail. And above all not very realistic, since usually with our eyes we can see at least a little blue in the sky (even if we still can’t see the Sun directly). Even with large sums of money, the problem cannot be solved “in the room”: it is a defect of all cameras, even professional ones. So how can we solve the problem? Simple: with post production editing. The solution is to replace the sky with another image. What we need is the original film, in which the actor is seen in front of a white sky, and a photograph of the blue sky, correctly illuminated. We can take the photo ourselves, or search for one on Google Images, or even draw one with Blender or Gimp to obtain clouds with a shape of our liking. And then we need Kdenlive, our video editor. With Kdelive we can replace everything that appears white with the image of the sky, leaving instead the other colors of the film remain original. In this way we are able to obtain a movie that resembles an HDR photo, or a photo made with a wide dynamic contrast range. In fact, we will be able to correctly illuminate both the sky and the objects in the foreground at the same time, keeping lights and shadows faithful to the original shot. Of course, some precautions are needed to prevent colors from fading. Furthermore, we have to make some differences between the half-length or close-up shots, and those shot in the long shot instead: for example, the close-up shots will have the sky slightly blurred due to the shallow depth of field, while those shot with a wide angle lens will have almost the entire image in focus, and we can also avoid that the majority of the image undergoes the bright blue reflection of the sky (a problem that usually does not arise in close-up shooting). As always, you can see the example video at the following address: https://www.youtube.com/watch?v=f12n_zm26iY
 One frame before applying the effect
  The frame with the sky added via Kdenlive
 Speed and movement
In the example movie we use two other tricks that are often useful in action movies, such as those that represent a race or a fight: slow motion and reverse. Today, most cameras can shoot movies at 50 or 60 frames per second. The fact is that the standard display frequency is always 24 frames per second (for YouTube and also for digital cinema films). This means that by shooting the footage at 60fps, we can use the Kdenlive effect Speed up to the value of 40%. And up to 20% if the movies are shot at 120fps. If instead we want to show a jump backwards, it is easier to resume the jump forward, and then play the movie backwards: for this just click on the clip with the right button and choose Clip Jobs / Reverse . We will get a new dummy clip that represents the movie in reverse.
The clips and tracks
We put the movie on the storyboard and add a new video track
 1 OUR CLIPS – To begin with we need to upload both the clips we filmed with the completely white sky and the photographs of the blue sky to Kdenlive. We have to place the movie in the track Movie3 .
 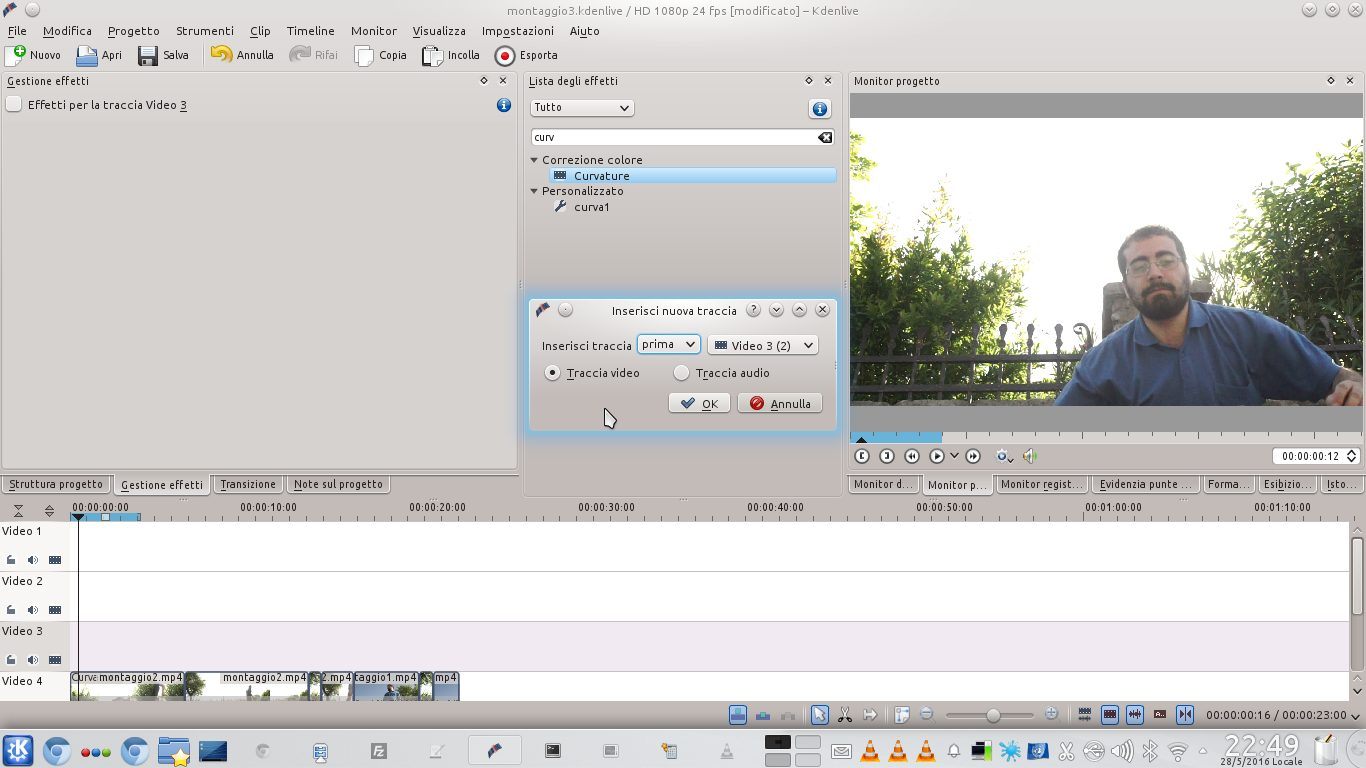 2 NEW TRACK – Now let’s add a new track above the Movie3 (which will thus become the Movie4 ). Just click on track number 3, near its name, with the right button and choose the item Add track .
 See how the sky changes you
We take advantage of the darken transition to replace the sky
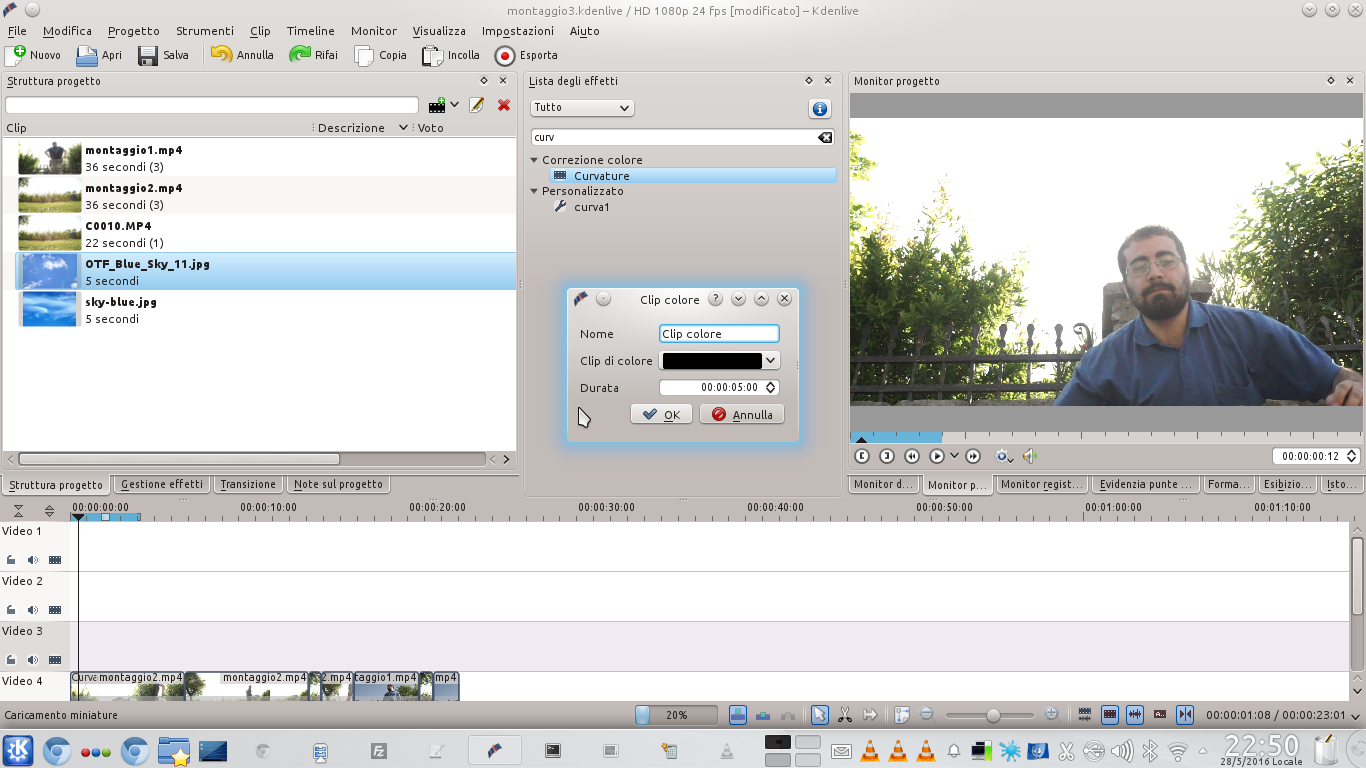 1 ONE COLOR CLIP – We also need a color clip, which we will use as a basis for the sky. We can add it from the menu Project / Add color clip . The color we want to choose is indifferent, both black and white are fine.
  2 OVERLAPPING CLIPS – Now we overlay the movie (which is currently in Movie4 ), the color clip (to be positioned in Movie3 ) and the photograph of the sky (to be included in the track Video2 ). The two overlapping clips must have the same length as the movie.
 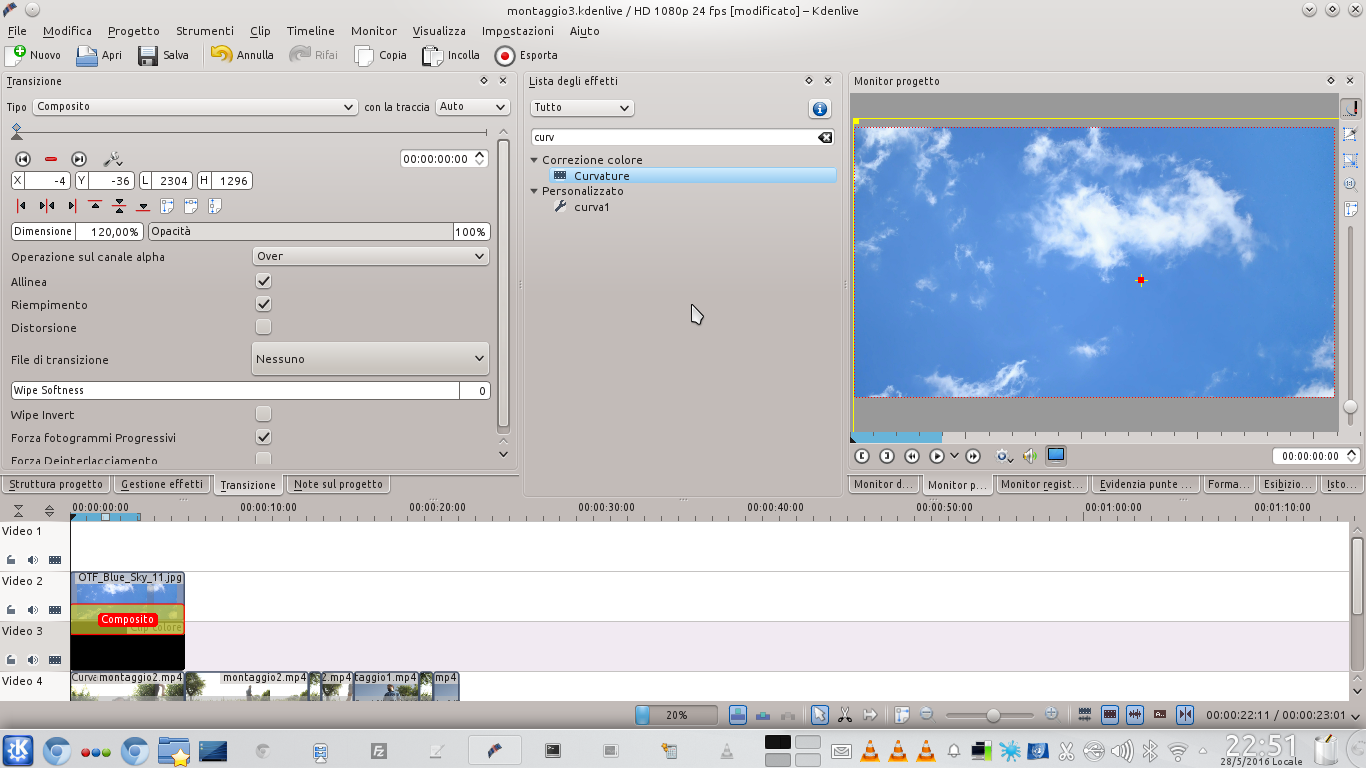 3 THE COMPOSITION – Between the sky clip and the color clip we insert a transition of type composite , setting one dimension the sky to allow it to cover the entire color clip. In this way, the sky is imprinted on the color clip.
  4 THE DARKEST POINTS – We insert a transition between the color clip and the movie darken : this means that only the darker parts of both images can be seen (therefore the blue of the photo of the sky replaces the white of the movie).
 It takes the right light
We correct the brightness of the movie to make it look realistic
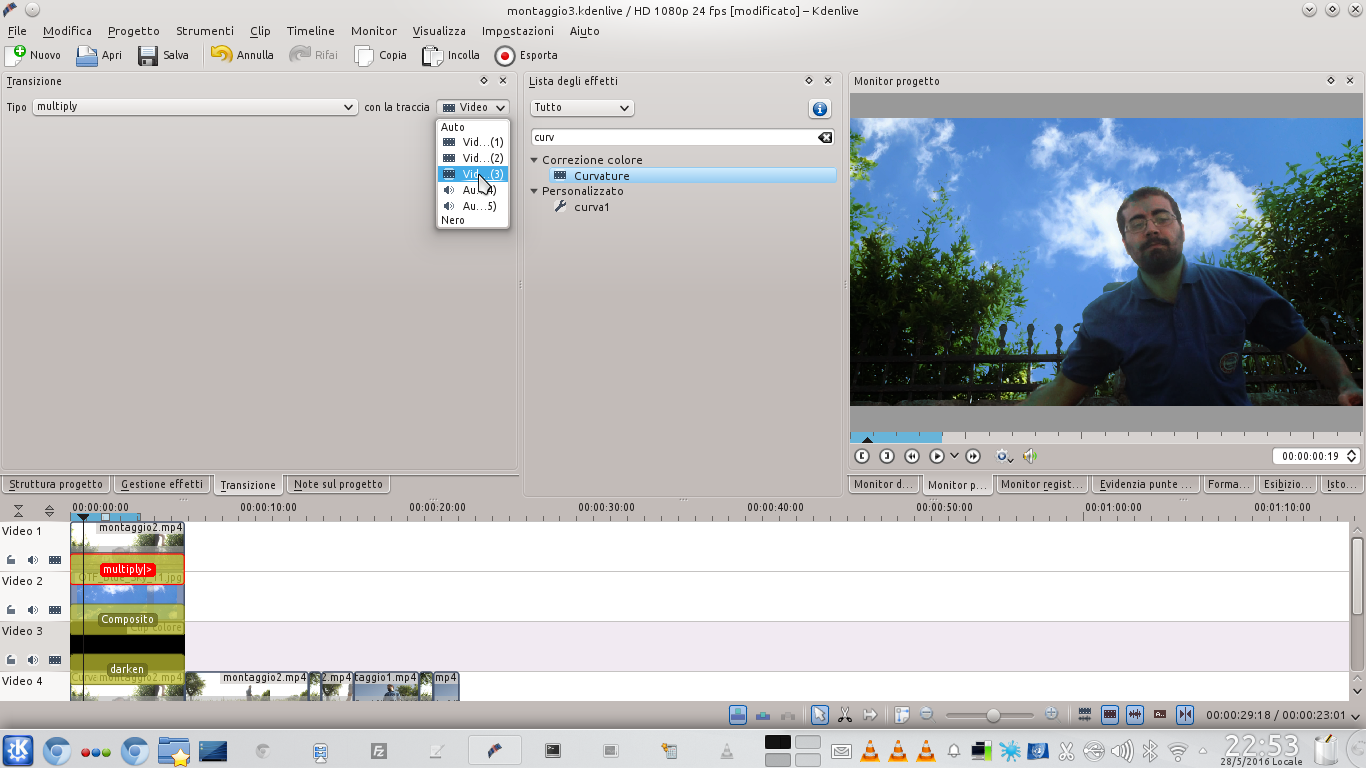 1 MULTIPLICATION – In the track Video1 we add the same movie that is in Movie4 , applying a type transition to it multiply . The transition refers to the last available track (the third in the drop-down menu).
 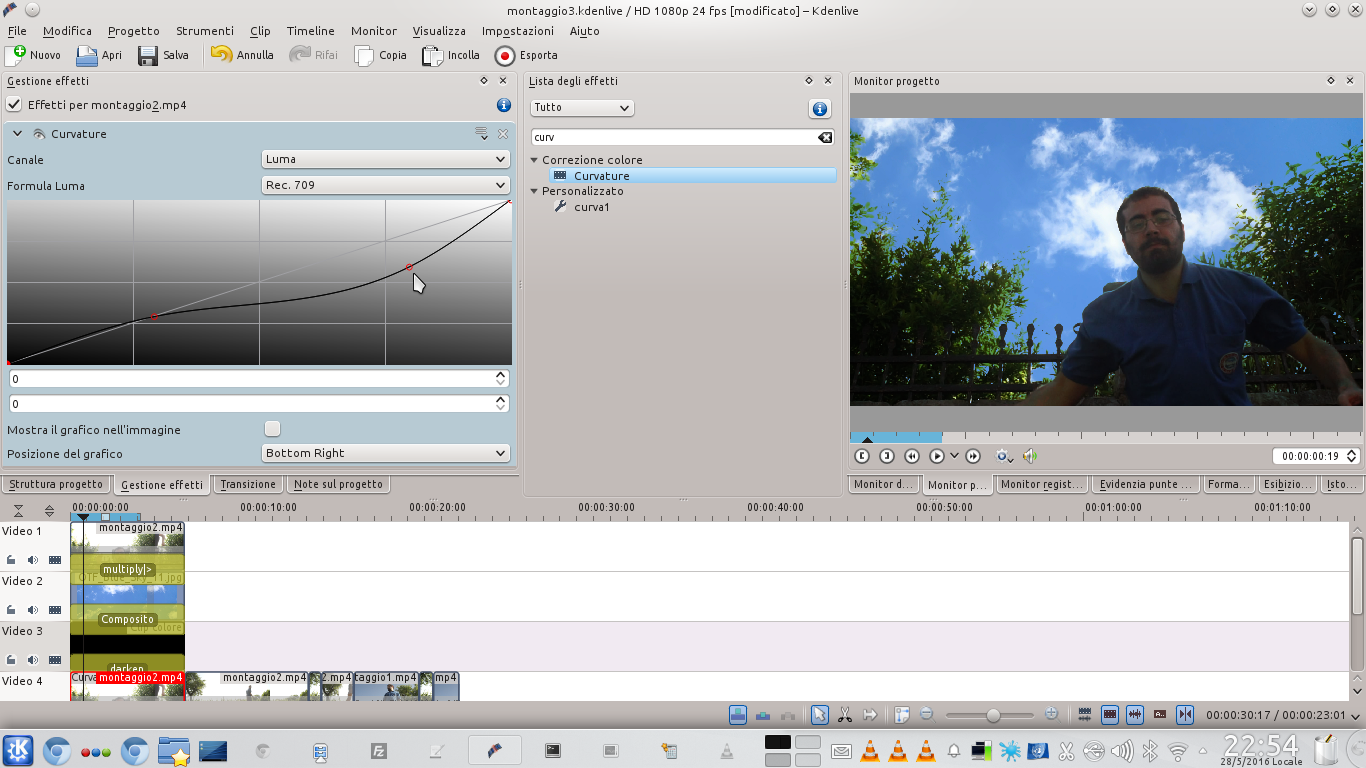 2 THE CURVE OF LIGHT – We add to the movie of the track Movie4 a curvature effect. The curve must be on the canal Luma , and must keep the shadows intact (along the diagonal), lowering both the midtones and the highlights.
  3 RAISED HALF-TONES – Another curvature effect must be inserted in the sky clip: always working on the channel Luma , the curve must raise the midtones enough, however leaving shadows and highlights intact, until the color of the sky is suitable for the rest of the image.
  4 A BLURRING – Still on the sky clip, we can add an effect Square Blur . The kernel size it must be small enough, between 5 and 10 at most. In fact, we just want to blur the clouds a little to simulate a shallow depth of field.
 Long shot scenes
In wide-angle shots, the sky is only for a portion of the image
 1 SAME PROCEDURE – If the shot was taken in long shot, we can follow the same procedure described earlier. You won’t need to add it though square blur to the sky, since the wide angle shots have a great depth of field.
 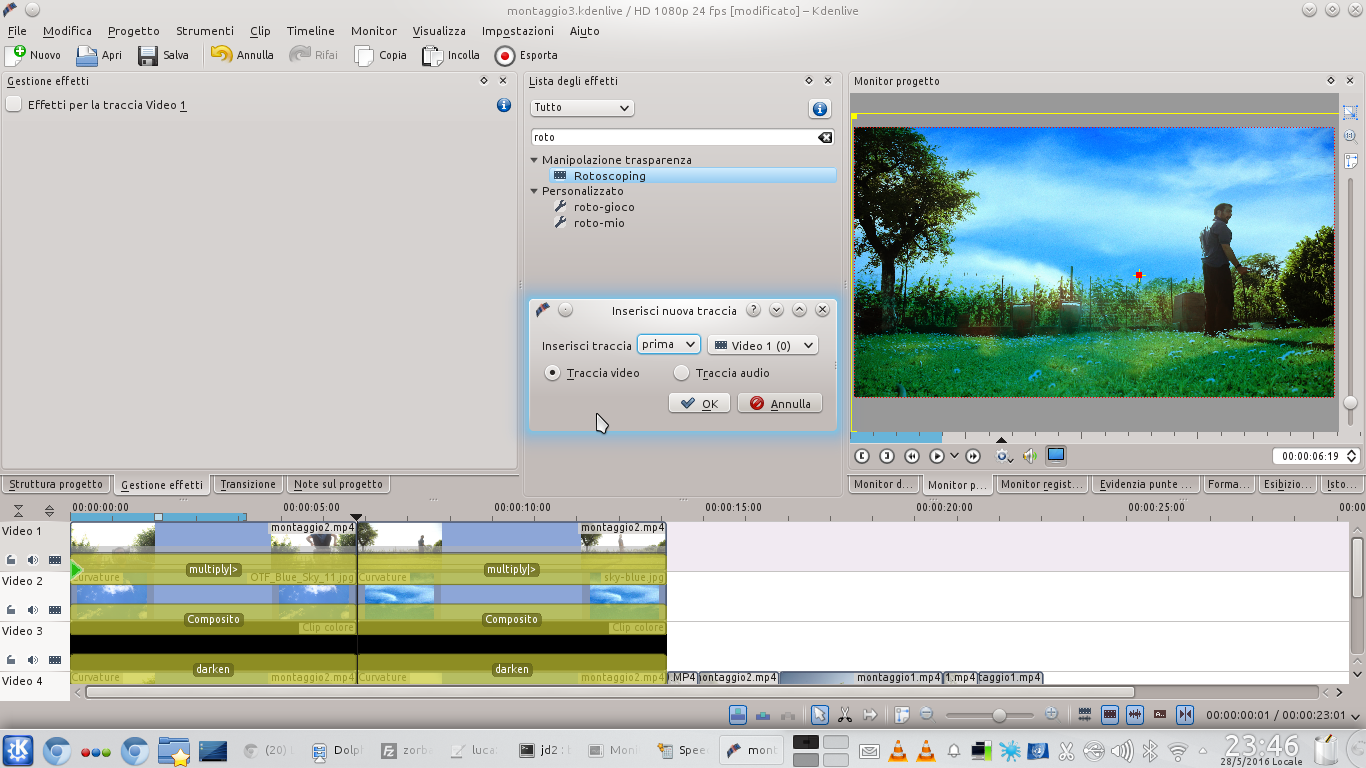 2 A NEW TRACK – However, there will probably be a large area of the image that should not be affected by the sky. To solve the problem we add a new video track before Video1 .
  3 STILL THE MOVIE – In this new track (now called Video1) we insert the same movie that is in the current ones Video2 is Video5 . We add a composite transition referring to the track Video5 , the last in the list.
  4 THE ROTOSCOPING – We insert in the track clip Video1 the effect rotoscoping . In the project monitor we draw the outline of everything that should not be involved from the sky (for example the ground). Feather width should be set to 50 , while feather passes to 2 .
  5 LESS BRIGHTNESS – Finally, we always add to the track clip Video1 an effect Bends . The effect should be applied on the channel Luma , and the curve must be drawn so as to lower the halftones until the color of the terrain conforms to the hues of the rest of the image.
  6 ON EXPORT – Finally, we can export the movie by clicking on the button Export . Let’s make sure to set a high bitrate (for the MP4 it must be at least 12000, preferably 40000), in order to support all the color nuances of the sky and the ground.

