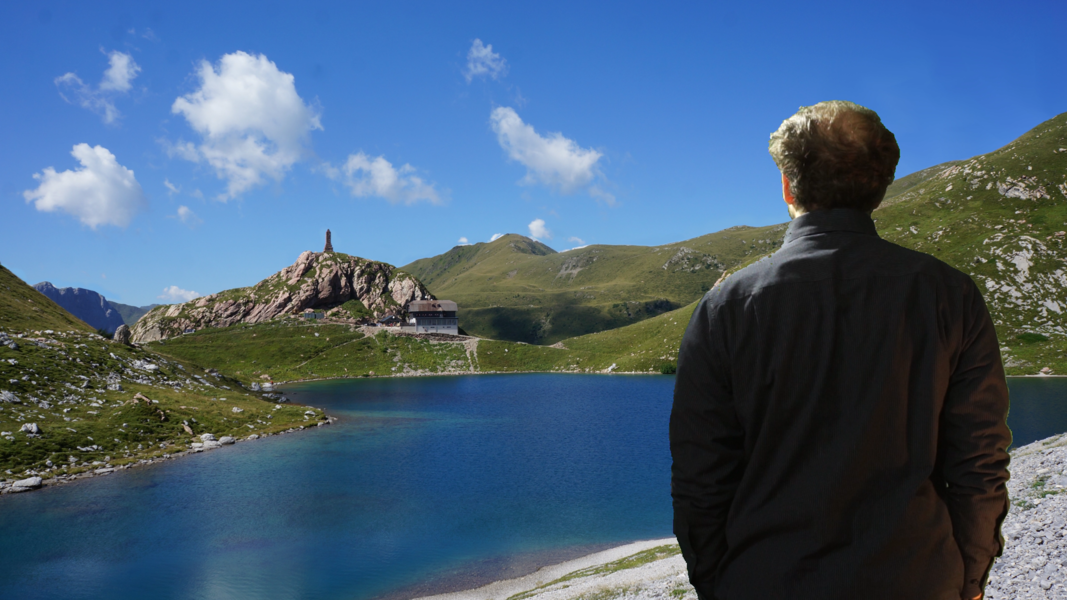
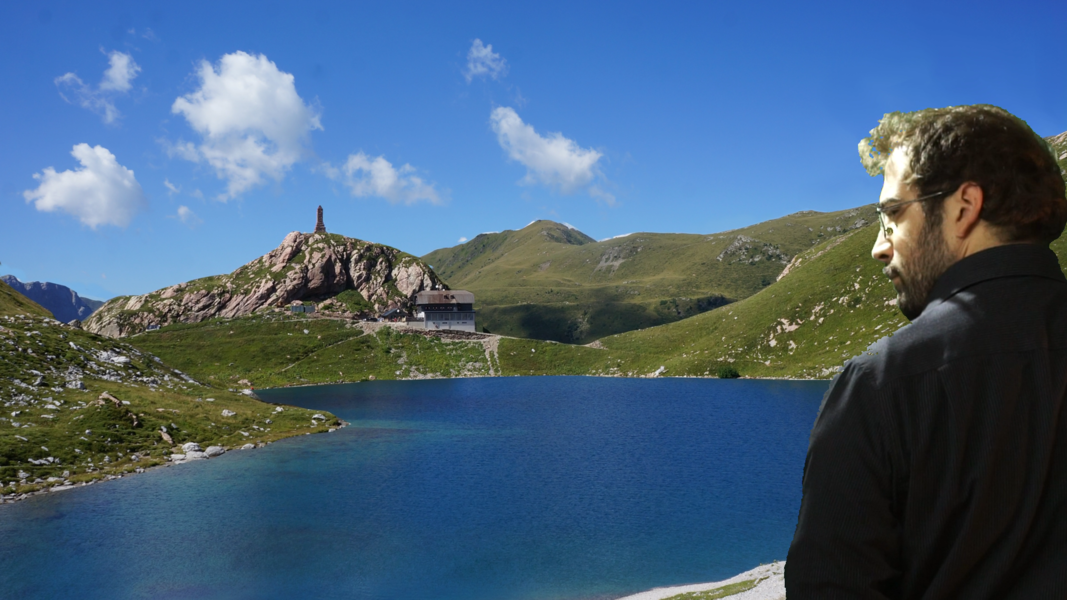
We know that with Kdenlive it is very easy to superimpose video clips on images replacing the background, with the chroma key effect. But, if we wanted to move the camera, would it be possible to make the background move too? Of course, proceeding manually.
With the chroma key technique, also called chromatic key or simply removing the backdrop, it is possible to film an actor on a monochromatic background and then ask the compositing software (such as Kdenlive) to make the background transparent so as to give the illusion that the actor is inside any photograph. It is a technique that we have often exploited in these tutorials once it was done using negative films sensitive to a certain color, which was then used for the background and which therefore was transparent in the negative. Today video editing programs have made it much easier. However, it must be said that the solutions we have always presented so far provide for a “firm” science: the camera does not move, because at that point the trick of the overlap would become clear. Yet there are some methods to recreate a more credible fake backdrop: the most valid method is camera mapping: just take a photo of the desired backdrop and divide the image into many components according to distance and position. For example, one image would represent the floor, another the sky, another the objects in the foreground, etc. By combining the various images, the original photograph should be obtained again. The camera mapping method then proceeds by building a simple 3D scene in an editor such as Blender by creating a surface (i.e. a rectangle) for each component of the photograph. The various images are then integrated into the 3D scene in the form of rectangle textures, and the 3D editor is responsible for calculating the correct perspective for each movement of the virtual camera. You can also choose to have the virtual camera follow the same movement as the one that the actor actually filmed, with the camera tracking function. The method has the considerable advantage of giving a good optical rendering without the need to build an entire detailed 3D model. However, this method is often excessively cumbersome for small productions. The simplest solution is to separate the various components of the original image into multiple files, just like for camera mapping, but directly compose the complete background in Kdenlive, placing each image in a different track, so that they can be moved separately. All that’s left to do is use the transition Composite with its key frames to give the various components of the backdrop the correct movement from the perspective of the camera. It is a trick that can be done in a few minutes, and you just need to do a couple of tests to understand how objects move. The trick does very well especially with panoramic views: for the objects in the foreground it is easy to see that the perspective is not correct. But it can also be a great way to insert your own actor in scenes that otherwise would not have been possible to shoot. Like difficult-to-reach landscapes, non-existent places created with photomontages, or even drawings: it is not uncommon, in fact, to want to insert a “real” actor into a hand-drawn world, but if we keep the scene completely static the result seems too strange. On the other hand, by exploiting this manual manipulation of perspective, greater realism is given even to blatantly absurd scenes. As always, you can see the example video at the following address: https://www.youtube.com/watch?v=282RqmNLYgQ
The chroma key light also helps
To make the fusion between the movie and the background well, it is necessary to take care of the chroma key. After all, the beauty of working “in the studio” with a monochromatic background is that we can easily manipulate the brightness to our liking. The idea, in this case, is to recreate a lighting as close as possible to that in which the actor would have found himself if he had really been in the place represented by the photograph we have chosen. In our example, the actor should have been near a lake, with the Sun in the upper left corner of the scene, and he would have been standing on very light rocks which therefore reflect at least some of the light. For this reason, we used a very strong white lamp in the upper left corner of the green sheet for chromakey, and another in the more or less opposite direction but with less power. The bright reflections on the actor make the merging of the images more credible.
Separate the components of the photo
We select separately each object that is at a different distance from the others
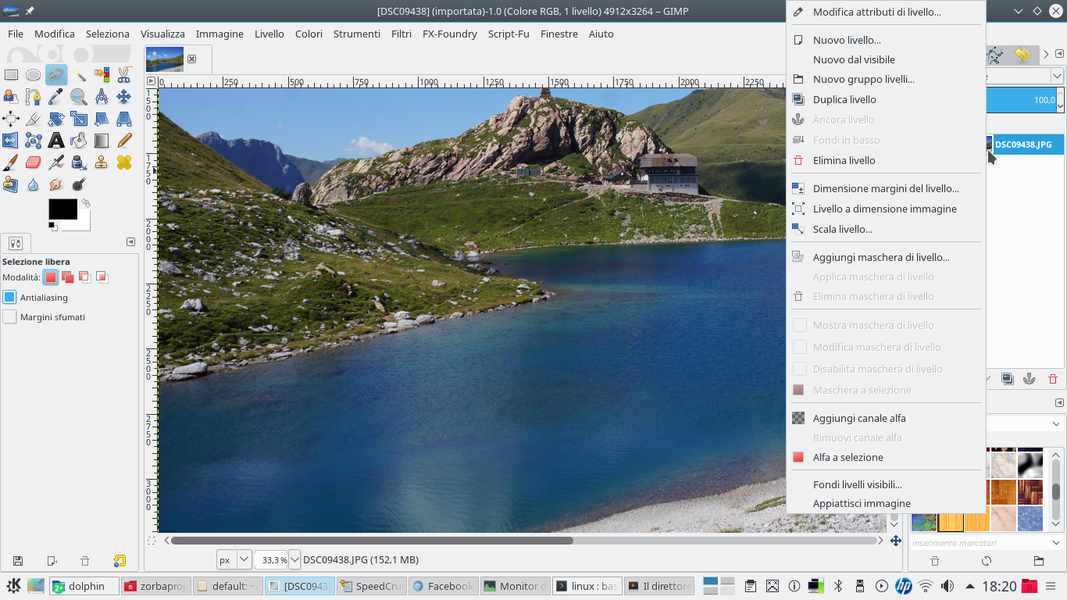 1 TRANSPARENCY – Let’s start by opening the image that we will use as a background with GIMP. The image must have the alpha channel (transparency) so we add it by clicking on its level with the right button and choosing Add alpha channel .
 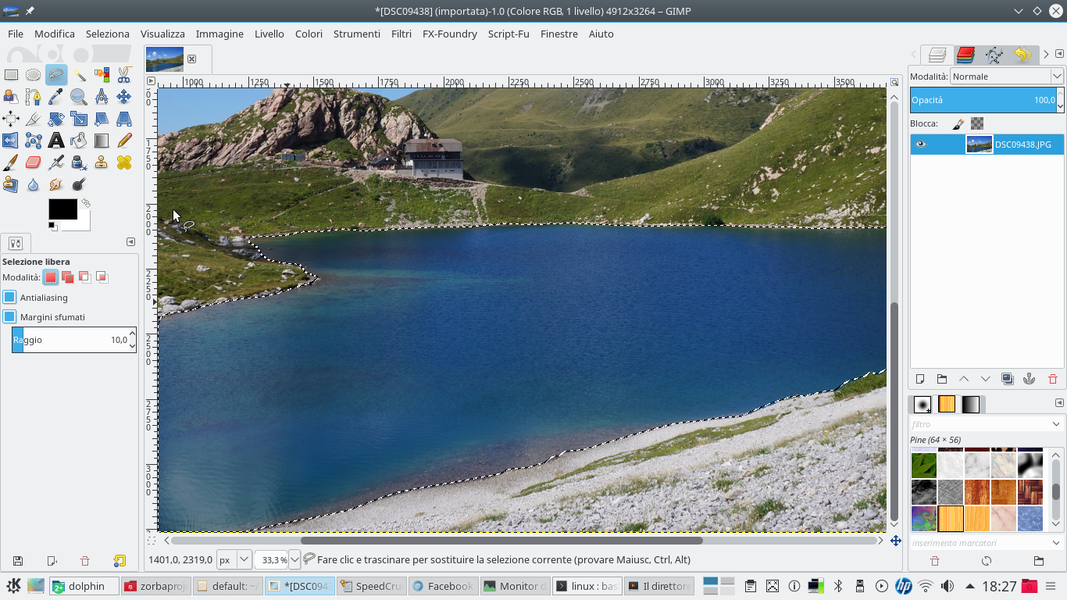 2 LAZO SELECTION – Now we begin to select the individual parts of the image, such as the land (in the example it is the lake), the mountains or the buildings. Each part must be selected in order to separate it from the others using the tool Lazo .
 One image file for each element
We produce a PNG file for each area of the original photograph
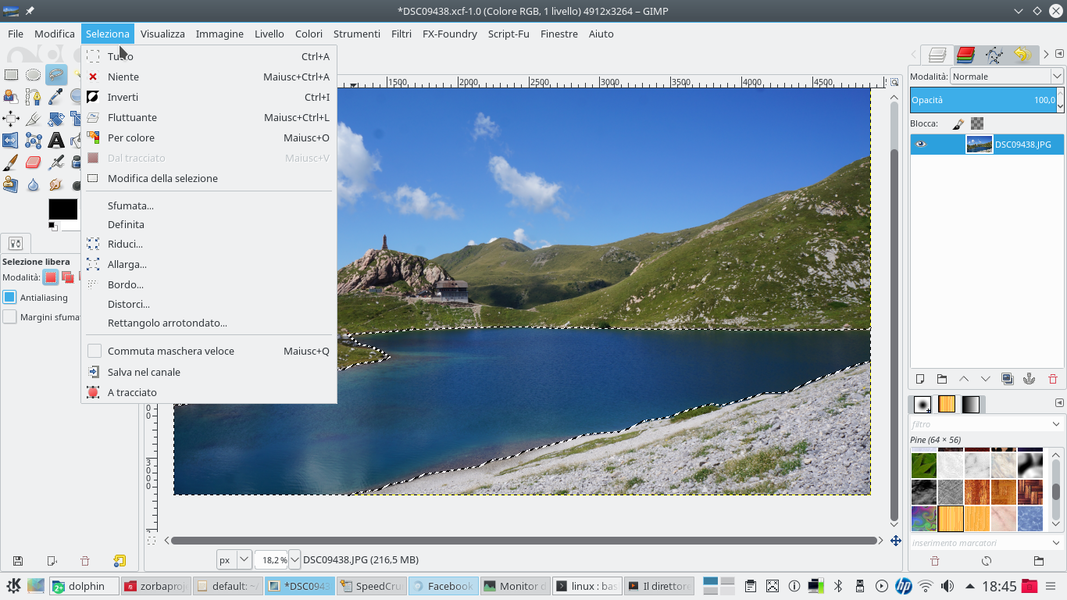 1 FLOATING AREA – To separate the selection from the rest of the image, just click on the menu Select / Floating . Alternatively, you can press Shift + Ctrl + L . The selected portion of the image is positioned in a floating area.
 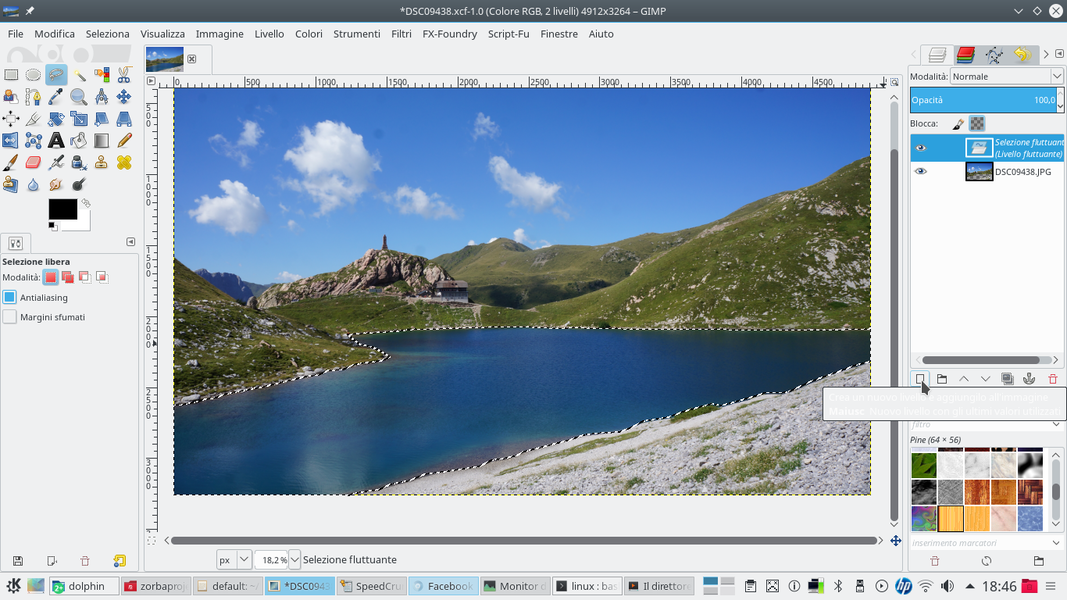 2 A NEW LEVEL– However, this floating area is not yet a level. To make it so you have to click on the button New level present in the level panel. At this point you can manipulate it independently.
 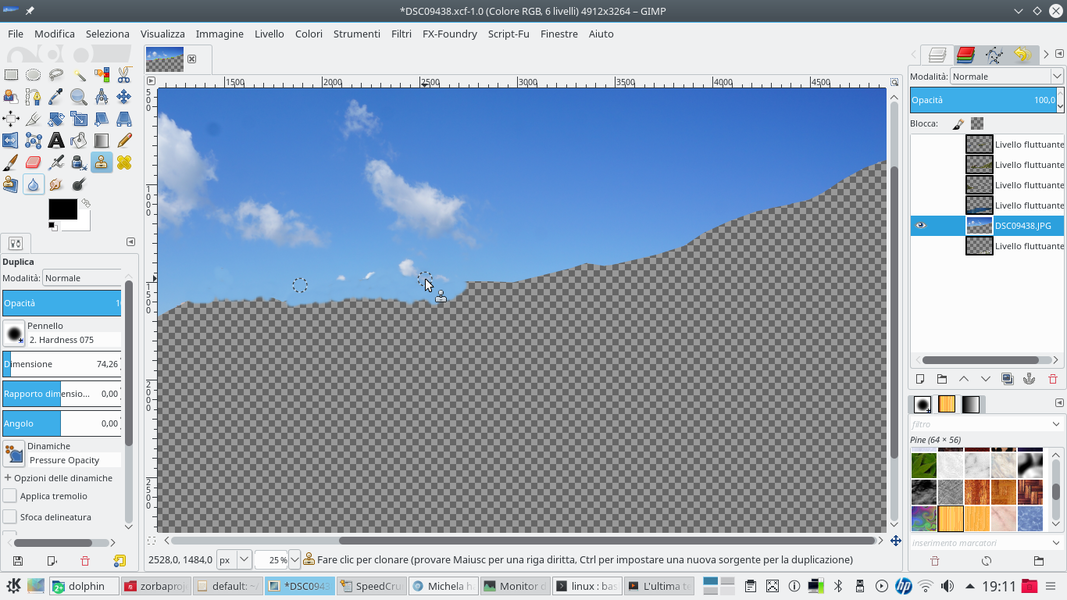 3 A CLONATION – We repeat the same procedure to separate each component of the image on a different level. Then with the tool Clone we extend each background element (sky, terrain, and mountains) a little beyond its original limits.
 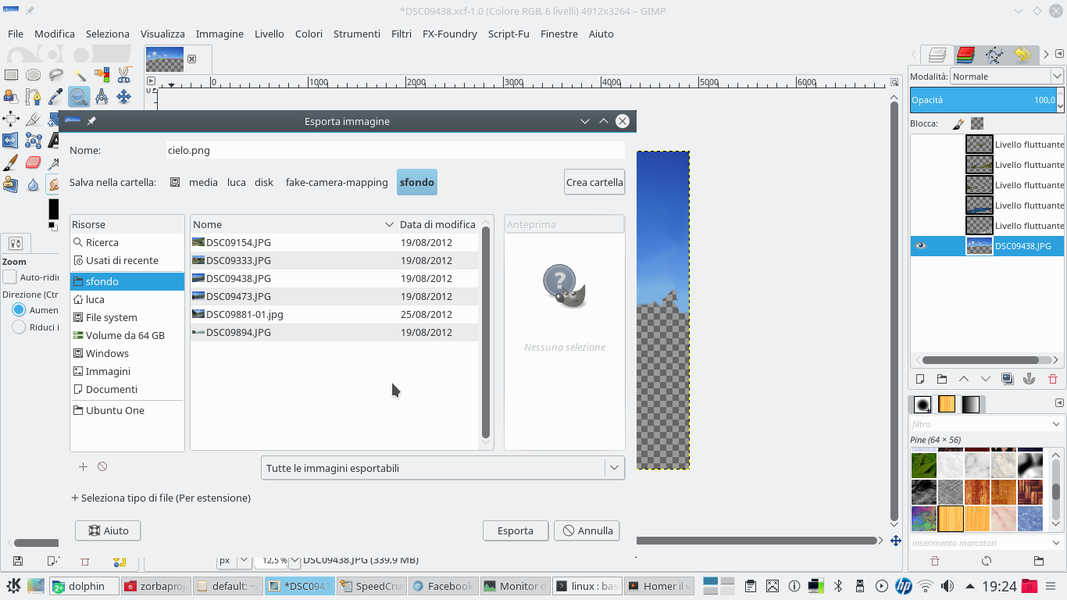 4 EXPORT LEVELS– After extending the background elements a bit, to prevent holes from appearing if we move the foreground elements, we can export each layer to a different PNG file with File / Export making only one layer visible at a time.
 So many tracks for Kdenlive
We have many elements, and everyone will need their own video track in Kdenlive
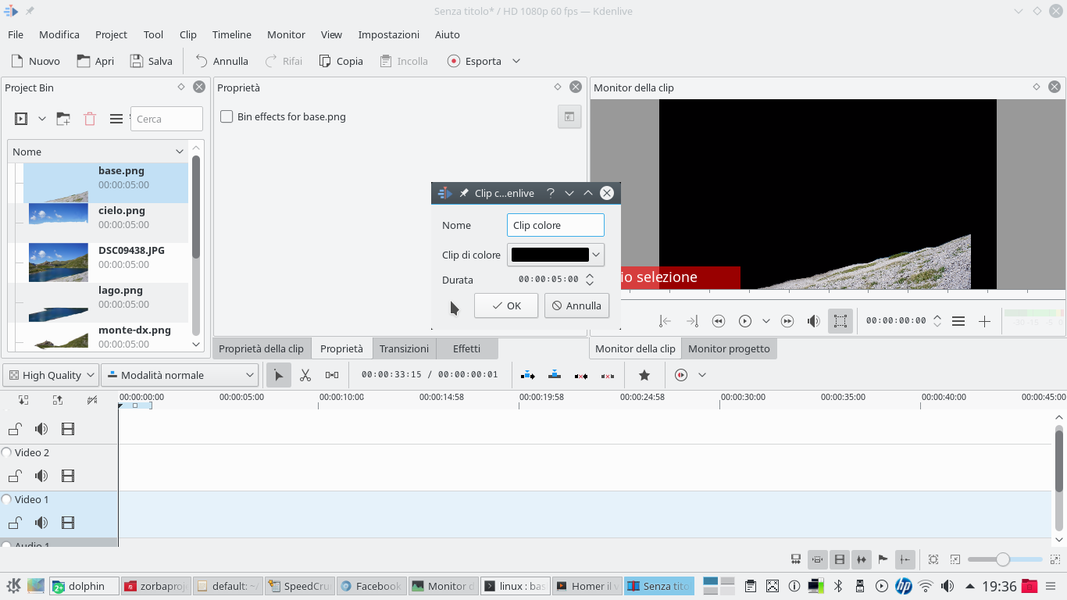 1 IMAGES AND VIDEOS – Open Kdenlive, we upload in it all the images we have made, in addition to the original photograph, and the clip that contains the actor. In addition, we add a black clip with the menu Project / Add color clip .
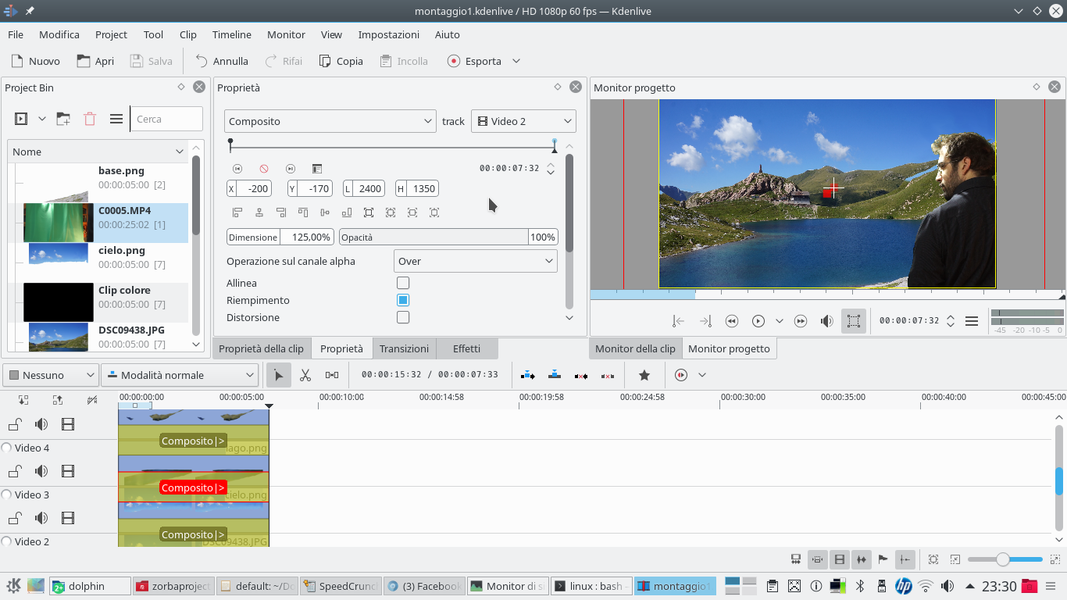
 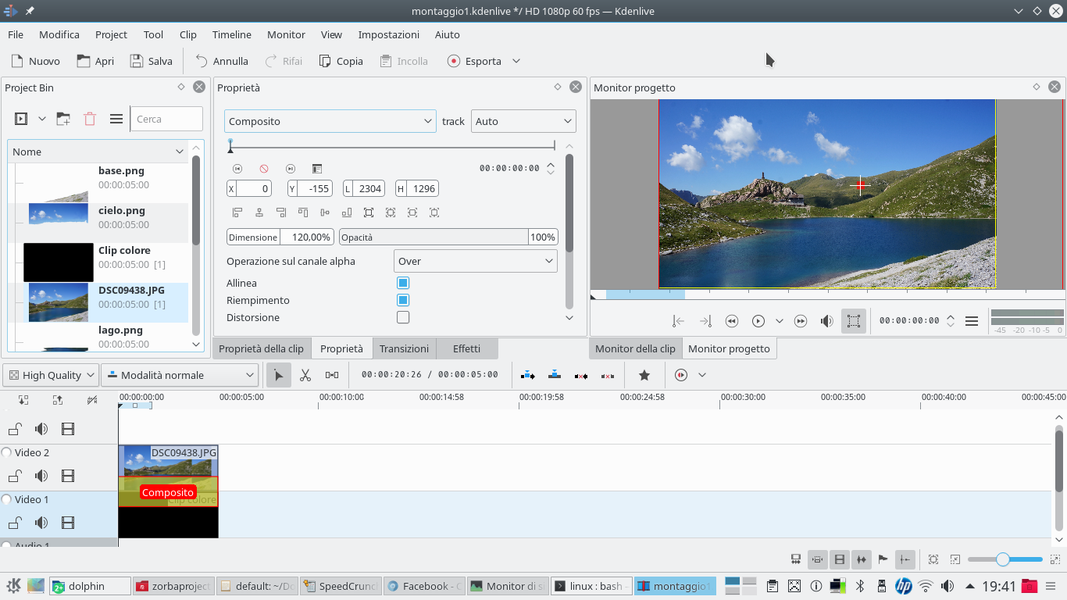 2 ORIGINAL PHOTO – We place the color clip in the track Video1 and the one with the full original image in the Video2 . Now we can apply a transition of type between the two clips Composite and adjust the size and position of the photograph to fill the frame.
 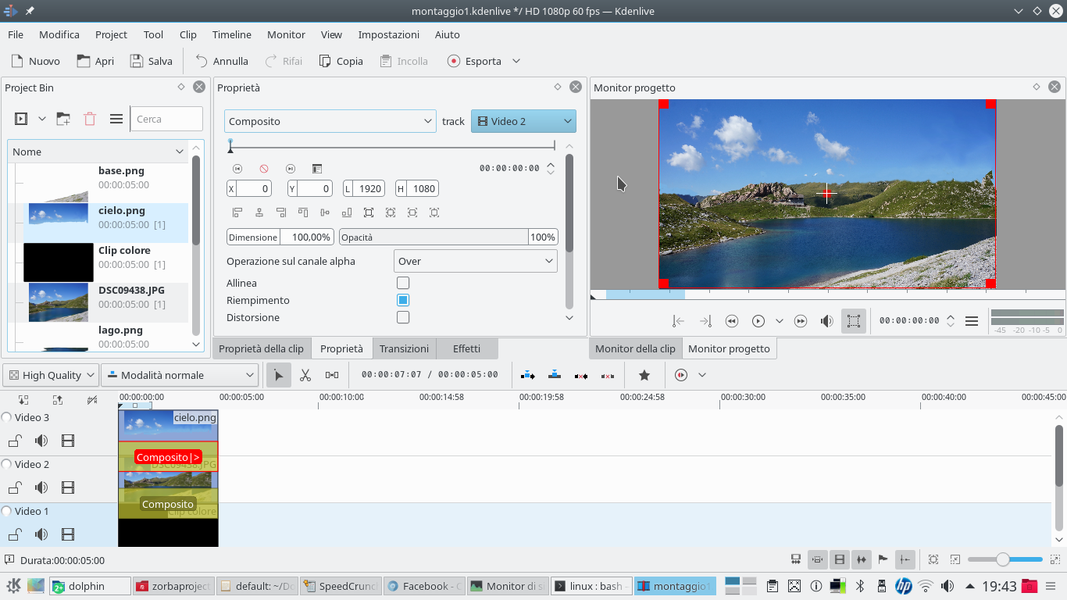 3 BEFORE THE SKY… – Now you can add it to the track Movie3 one of the background elements, such as the sky. This too must have a composite transition, but referring to the track Video2 . The other settings should be left as they are.
 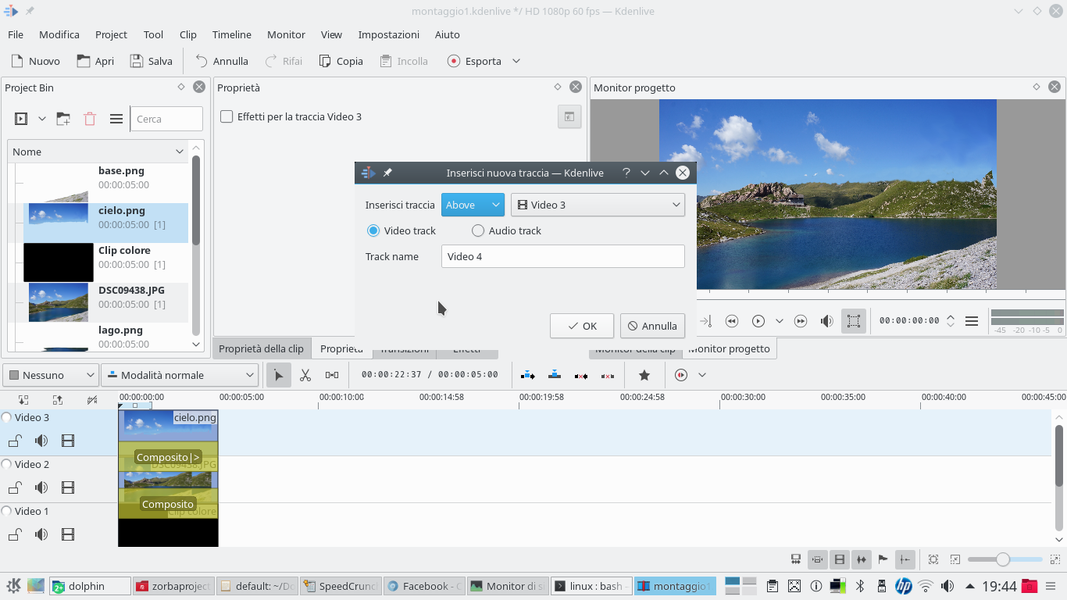 4… AND THEN THE REST – We must do the same procedure for all the other components of the image, including the actor’s clip, always using the Composite referred to the track Video2 . It will be necessary to add new tracks by clicking on the last one with the right mouse button.
 The correct overlap
We correctly position the various elements following the rules of perspective
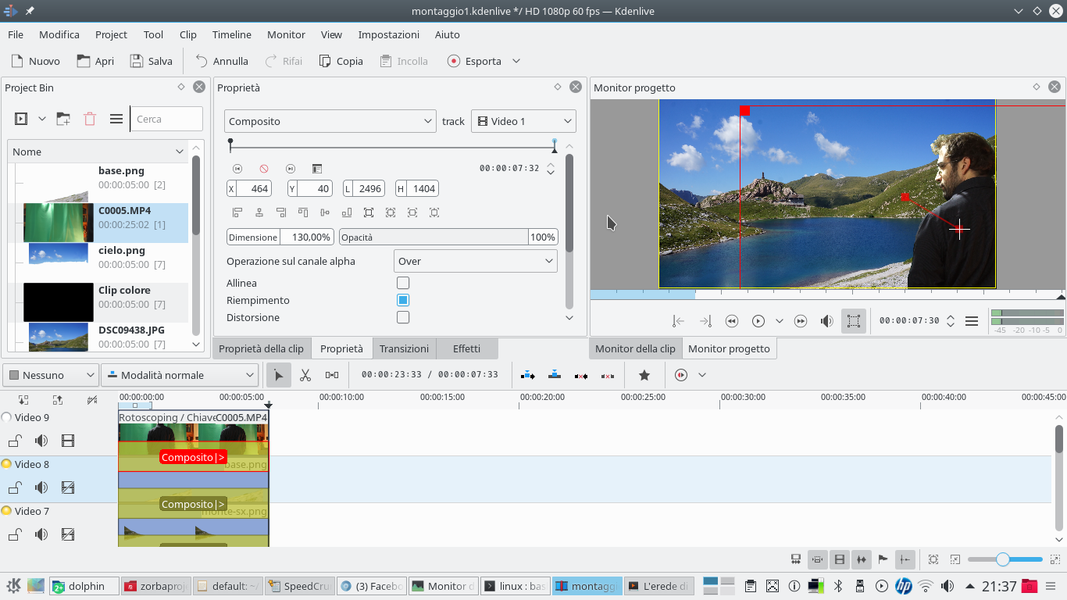
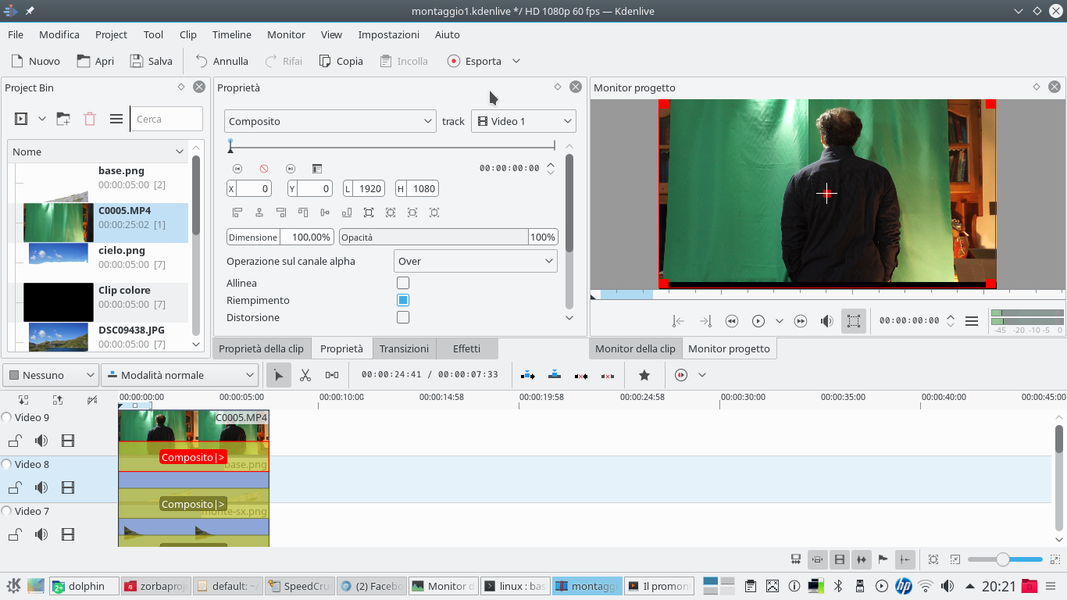 1 THE RIGHT ORDER – The elements of the image must be positioned in the tracks so that those closest to the camera are in the upper tracks. For convenience, report the transition Composite of the actor’s video clip to the track Video1 instead of the Video2 .
 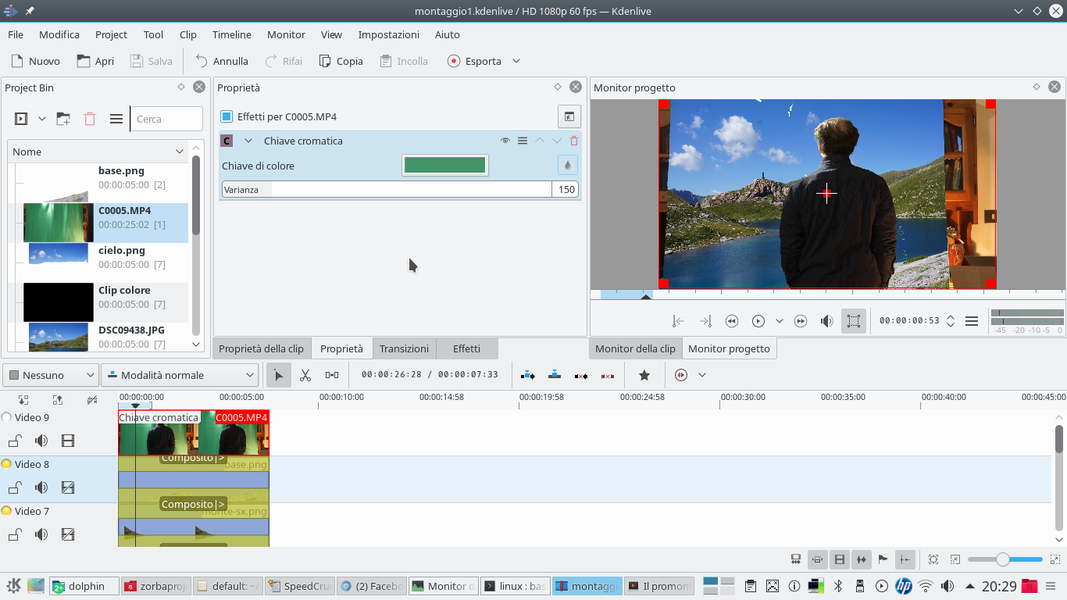 2 CHROMATIC KEY – We apply the effect Chromatic key to the clip with the actor, to eliminate his background. If necessary we can apply more than one effect, so as to cancel all the nuances of the background and any unnecessary play of light.
 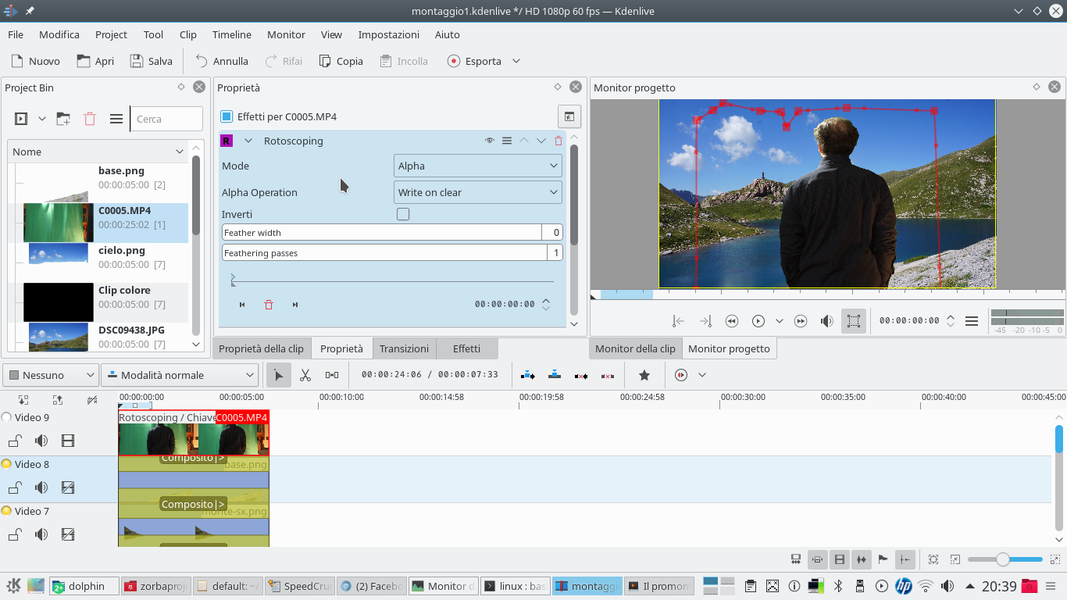 3 THE ROTOSCOPING – We also apply an effect rotoscoping to the actor’s clip, placing it above the effects Chromatic key . With the rotoscoping we draw the outline of the actor to eliminate any unnecessary edges.
 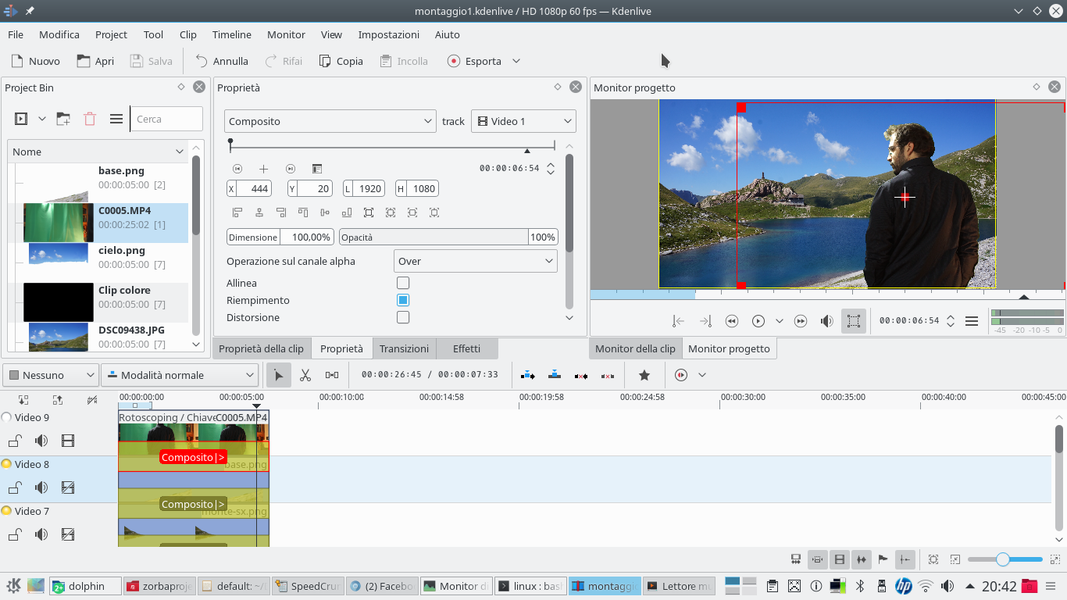 4 THE FIRST FRAME – Going back to work on the transition Composite of the actor’s clip, we choose the size and starting position, evaluating how credible the scene appears. The actor should always be on the sides of the frame, never central.