One of the most famous realistic effects is the feather dance that comes to rest at the feet of Forrest Gump: with Kdenlive we can simulate this type of effect, using a green screen and a couple of tools for manipulating transparency
The best special effects are not lightning, explosions, or the disappearance of an actor like in a magic trick. They are always the ones who look perfectly realistic and don’t even appear as special effects. Let’s not forget, in fact, that special and visual effects are not the purpose of cinematography, they are the means by which we can better tell our stories. The added effects must therefore be useful to transmit a message, or in any case to continue the plot. If you are shooting a realistic film, you may still need visual effects to facilitate some shots that would otherwise be possible but very difficult. There are now many examples of this use in cinema, practically any film uses visual effects to simulate realistic scenes without relying too much on chance. But the most common example in the collective imagination is the famous Forrest Gump feather. The feather, which flies in front of the camera in the opening and closing sequence, is not real. It seems perfectly real because it could have been, everyone has seen feathers fly, and it is obvious that a feather can rest on the ground near an actor, allowing him to collect it. The problem is that shooting the scene relying on chance, hoping that the feather will settle in the right place by itself, is absurd, would take too long. The solution adopted for Forrest Gump is to film the feather in the studio with a green screen (in reality, a blue screen was used at the time). The image is then superimposed on the shot taken, replacing the “fake” feather (the one filmed in the studio) with the real one (filmed outdoors, with the actor) at the exact moment when the feather is expected to touch the ground. We too, with Kdenlive, can achieve a similar result: we simply need the two videos. To make the example simpler, we will make the video outdoors, the one with the actor, with the fixed camera, so as not to have to follow its movement while we delete the feather, but obviously you can also move the camera, looking for then follow the feather with the keyframes. The idea is in fact to make the film outdoors with the feather always framed on the floor, even when in theory it should float in the air. Using Kdenlive we can copy another area of the floor and superimpose it on the feather to make it disappear, removing this cover only when we want the feather to appear. Then, we just have to film the feather in the studio, in front of a green screen. In this case, it is good to shoot the film in reverse, therefore starting from the position where the feather must be at the end. In other words: while preparing the green screen, we take the feather tied to a transparent thread and position it exactly in the position where it should be when it touches the ground, that is, the same position in which we filmed it during the shooting outside. Then we can resume it while we swing it by moving the wire: just use Kdenlive to make the clip go backwards, starting from the end, so that we can superimpose it perfectly on the feather present in the film taken externally. As always, you can see the example video at the following address: https://www.youtube.com/watch?v=MduP5eS_m-M
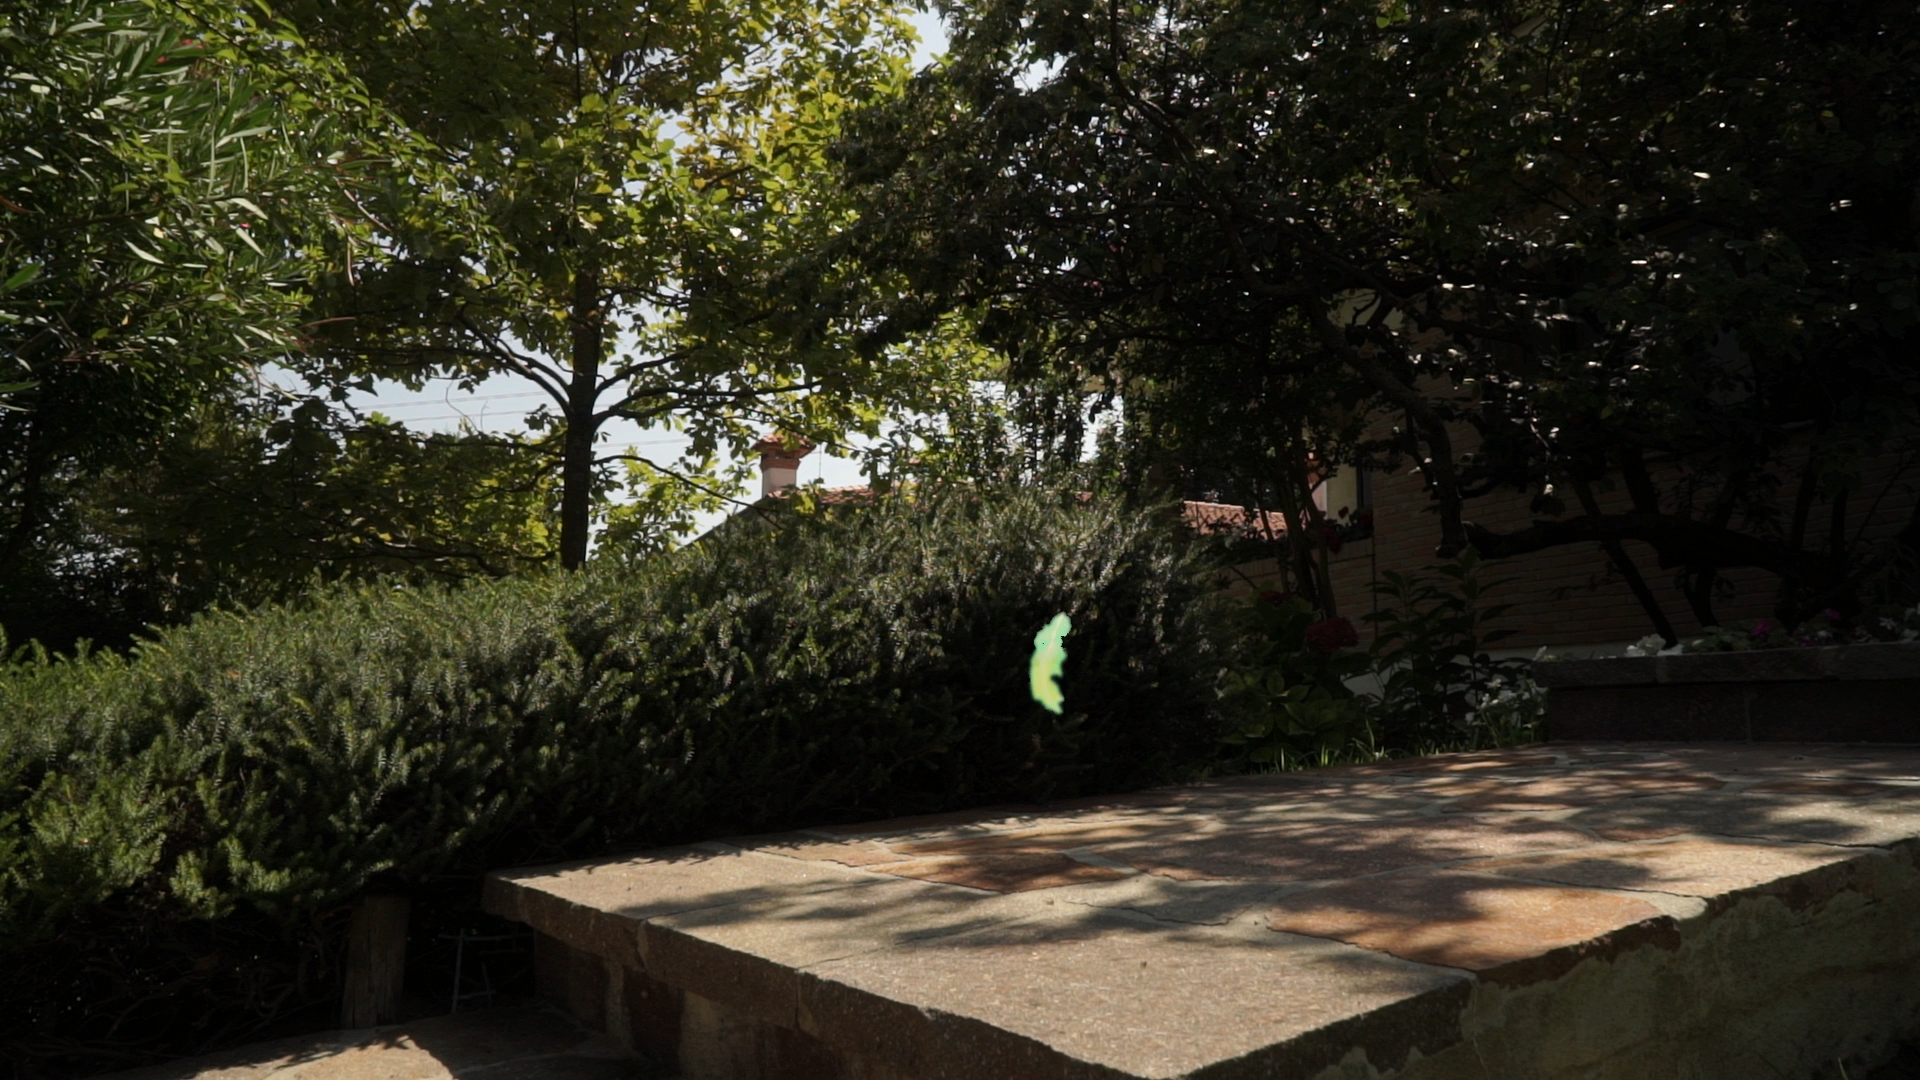 The green screen feather superimposed on the video shot outdoors
  The feather in the video shot outdoors
 How to film the feather on the green screen?
To film the feather on the green screen it is advisable to use a uniform green sheet, which must also be placed on the ground, since at the start the feather must be placed on the floor. It is important to use the same focal length that was used for shooting outside, so as not to have different optical distortions and to facilitate the superimposition of the two images of the feather. As lighting, it is also a good idea to use two lights, to cancel the shadows and give the feather a lighting more similar to that of a very diffused light, such as that of the Sun. Alternatively, you can use a very strong light projected on the white ceiling, in order to have a fill light without strong shadows. It is a good idea to make sure that there are no light sources from the back, because they would risk making the transparent thread to which the feather is tied visible.
Duplicate the original clip
We insert the clip filmed outdoors in two different tracks
 1 THE FIRST CLIP – The first thing to do is to position the clip shot outdoors in the track Video1 . You have to cut the clip where you want to go from the feather on the green screen to the one in the outdoor video.
  2 DUPLICATION – Let’s move the second part of the clip to the track Video2 keeping the alignment. We drag the left handle of the clip, to stretch it until it gets back to its original size. Cutting is performed again, in the same place.
 Hide the feather
By using rotoscoping and a transition we can make the feather disappear
 1 THE TRANSITION – The second part of the clip is put back on the track Video1 , so as to have in the track Video2 only the first part of the clip, perfectly superimposed on that of the Video1 , with a type transition Composite and transform .
  2 ROTOSCOPING– We add to the track clip Video2 a type effect rotoscoping , drawing an outline large enough to cover the feather, but at a nearby point, in fact selecting the background on which the feather is resting.
 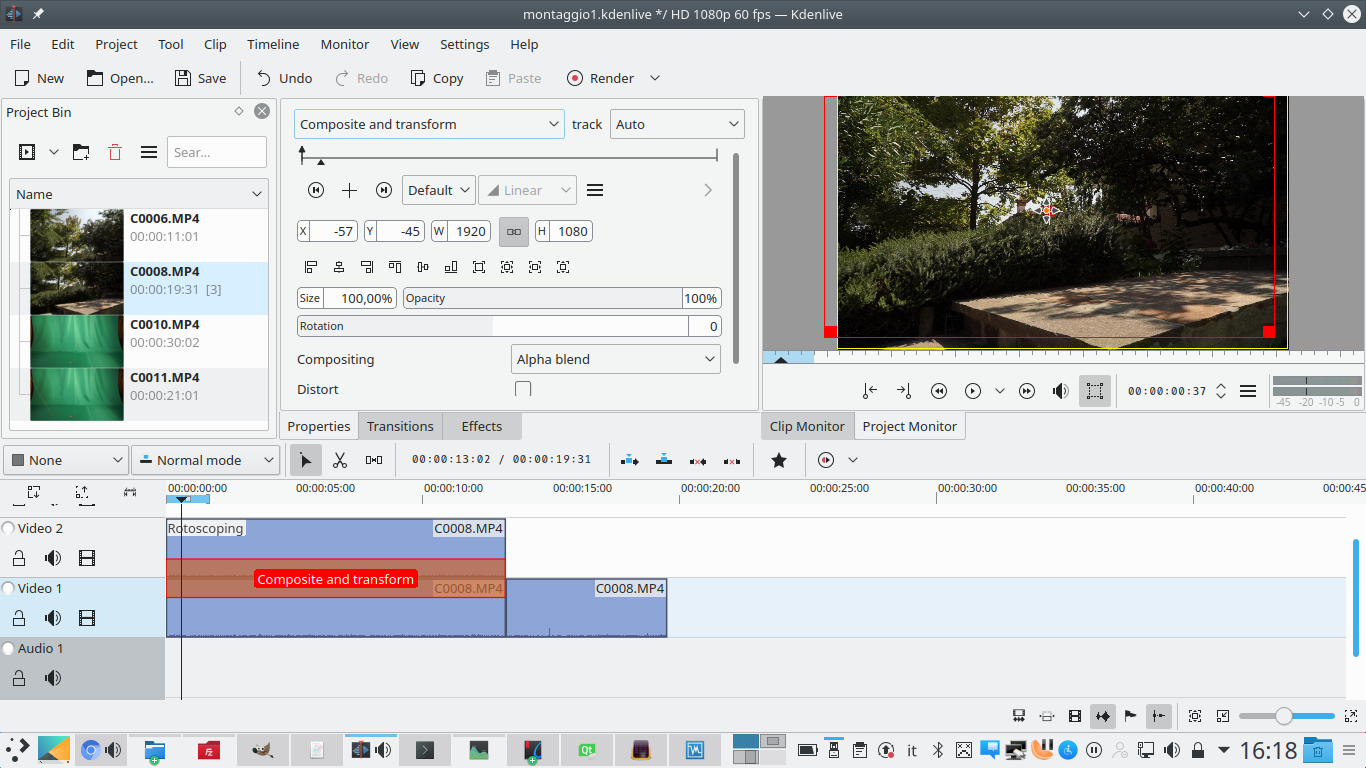 3 LET’S COVER IT – Working on the transition, we can move the cropped image with rotoscoping in order to perfectly cover the feather. If the camera is stopped, there is no need to follow the movement.
 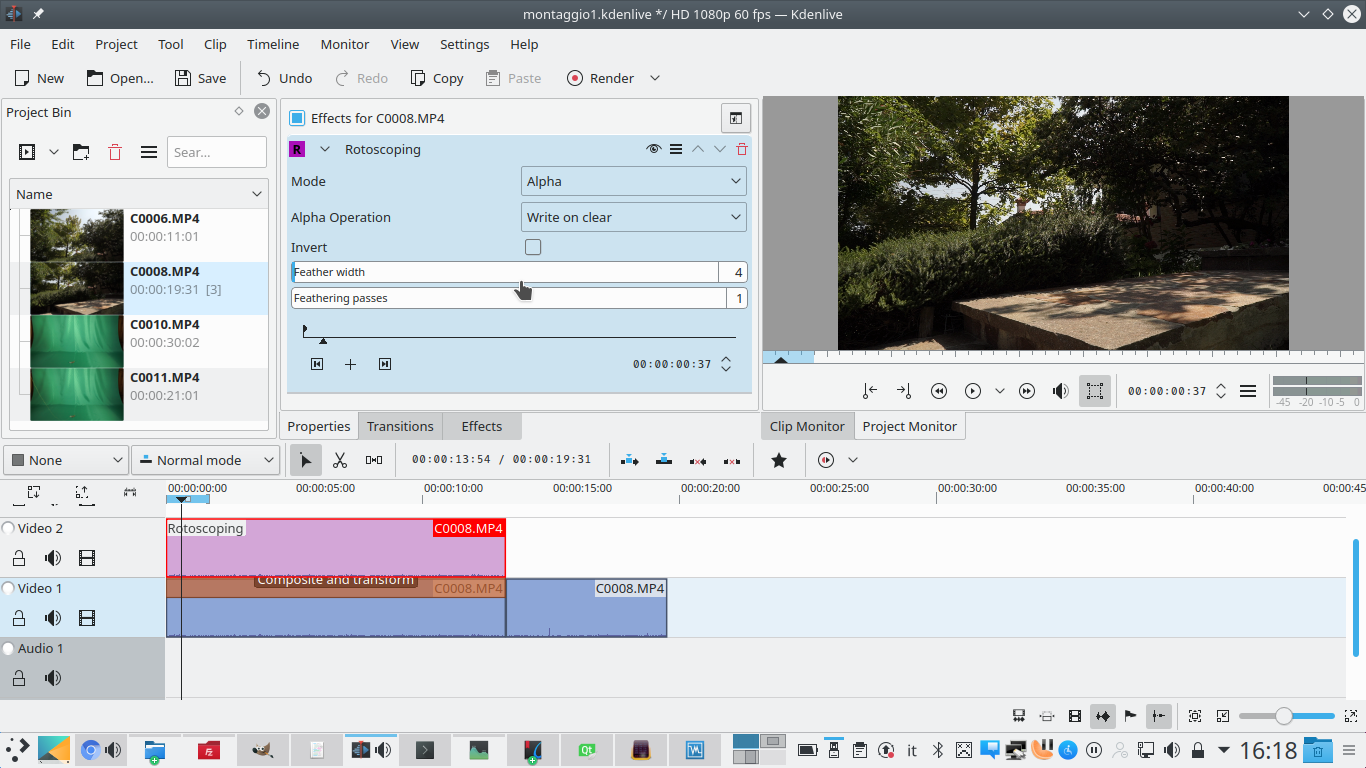 4 THE SHADING – To make the edges more blurred, you can go back to the Rotoscoping effect and set the feather width to 4, keeping i feather passes a 1. This should allow the cropped area to melt well and thus make the feather disappear.
 We rewind the clip
The green screen movie must go backwards
 1 NEW JOB CLIP – By right-clicking on the clip on the green screen, in the Project bin , you can manipulate the clip with the menu Clip job . Here you have to choose the item Duplicate clip with speed change .
  2 VIDEO IN REVERSE – The goal is to get a clip backwards, so you have to click on the menu with the three horizontal lines, choosing the item Reverse clip . The speed of the new clip will be set to -100% .
 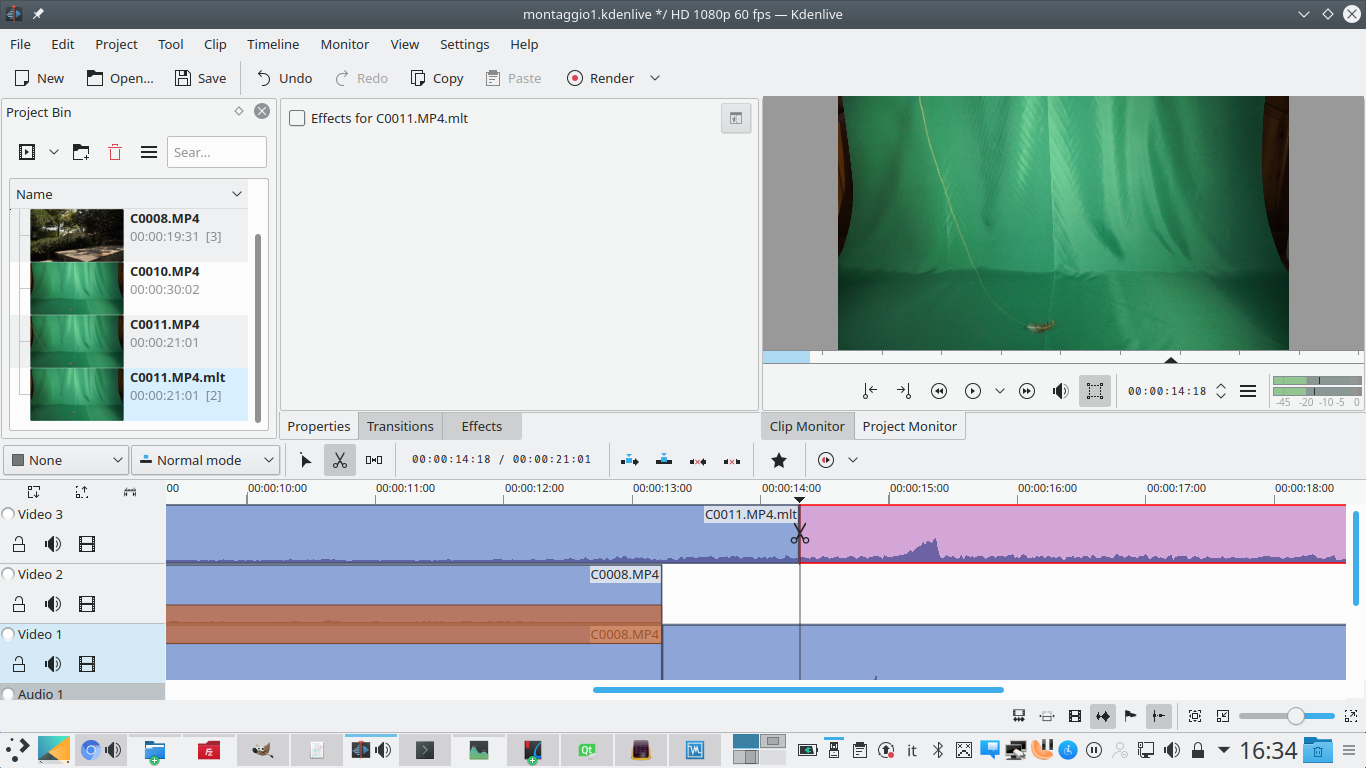 3 PRECISE CUT – We insert the new clip, the one that comes up with .MLT in the name, in the track Movie3 . We cut the clip at the point where the feather appears to rest on the ground: the cut must be made precisely in the exact frame where the feather stops.
  4 SAME LENGTH – You must also cut the clip at the beginning, to make sure it has the same length as the clips to which it is superimposed. Then you need to assign the track clip Movie3 a transition of type Composite and transform , which must refer to the track Video1 .
 The fake feather overlaps the original
Using transitions, the feather in chroma key is replaced with that of the video outside
 1 THE CHROMA KEY – We add to the track clip Movie3 a type effect Chroma key . The color to be selected is obviously that of the background, so as to make it disappear and leave only the feather.
 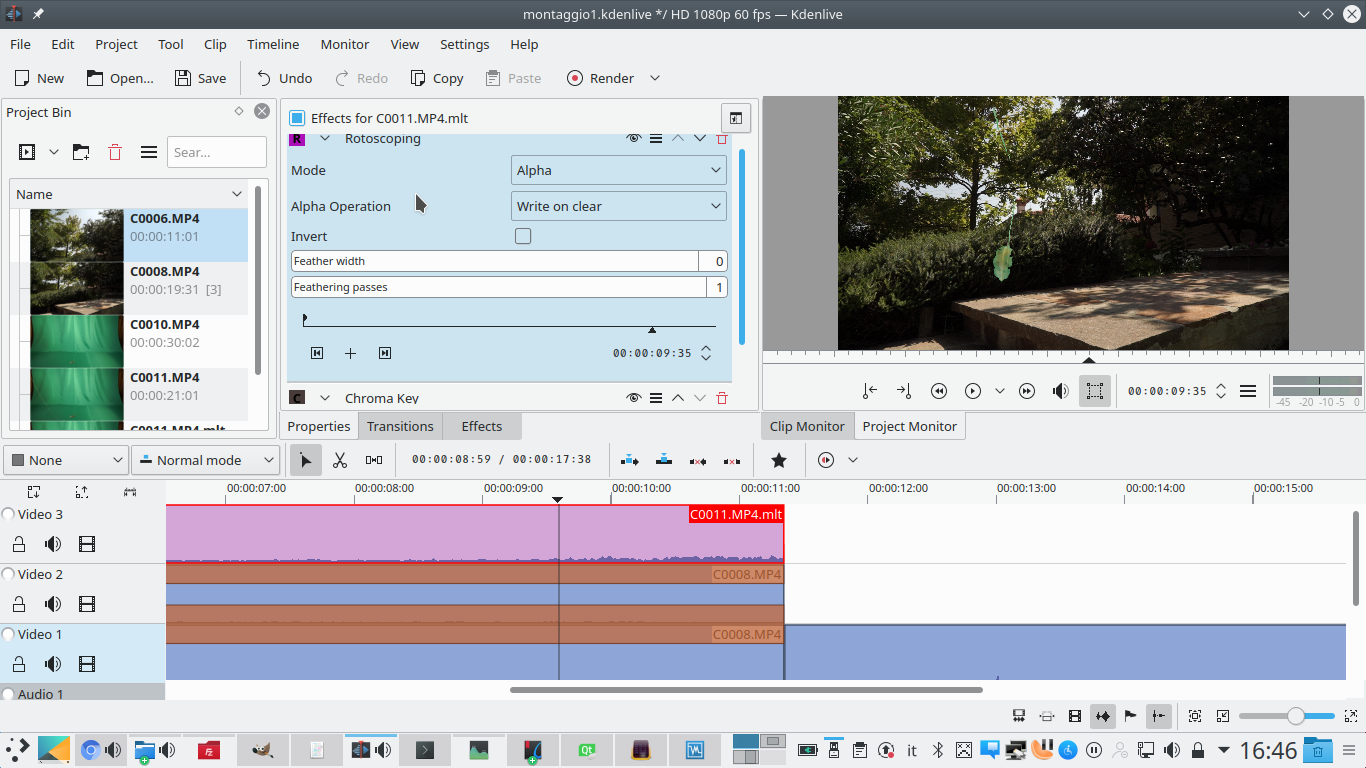 2 WITH THE ROTOSCOPE – If necessary, we add an effect rotoscoping , to cut out unnecessary parts of the image (where there is no feather). It is important that this effect is placed above the chroma key.
 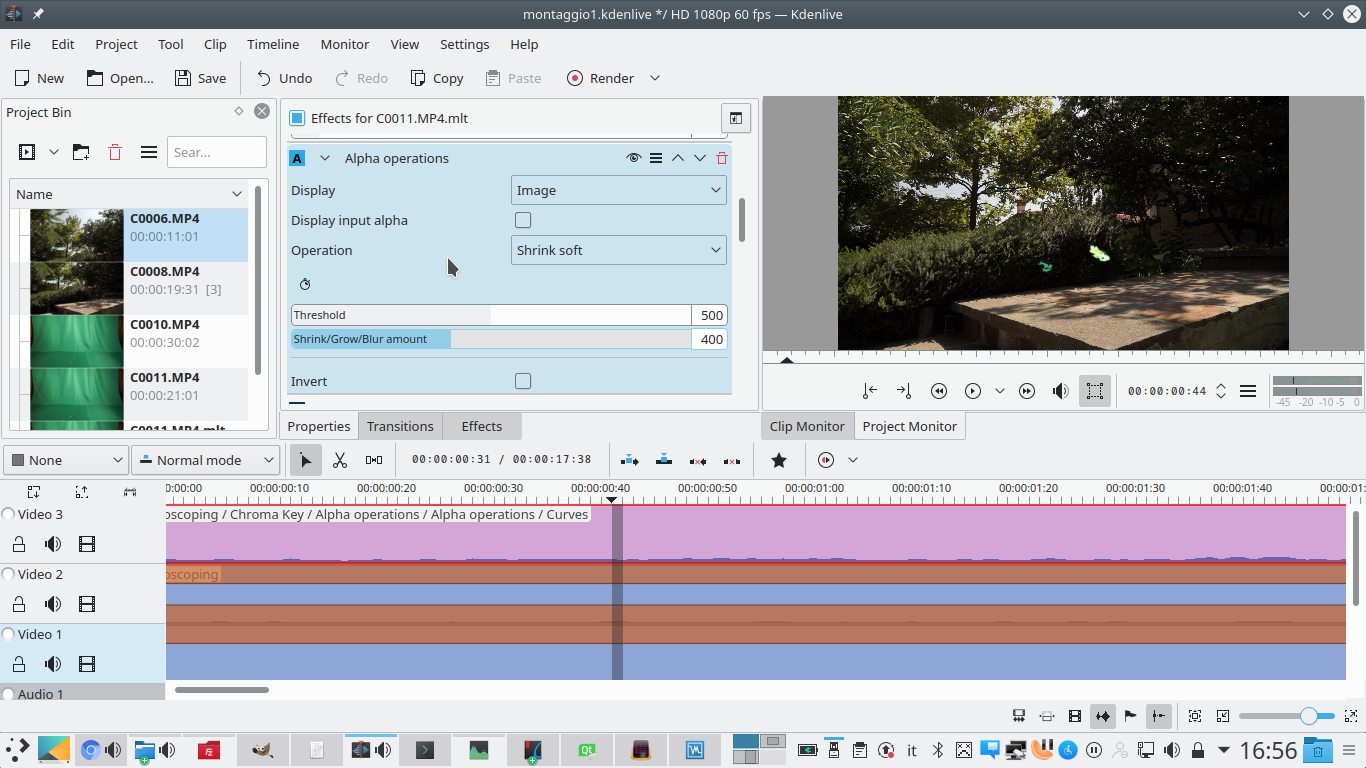 3 SLIGHT REDUCTION – Then insert an effect Alpha operation , choosing the operation Shrink soft . Let’s set a amount that allows us to remove a little contour from the feather without deleting it too much.
 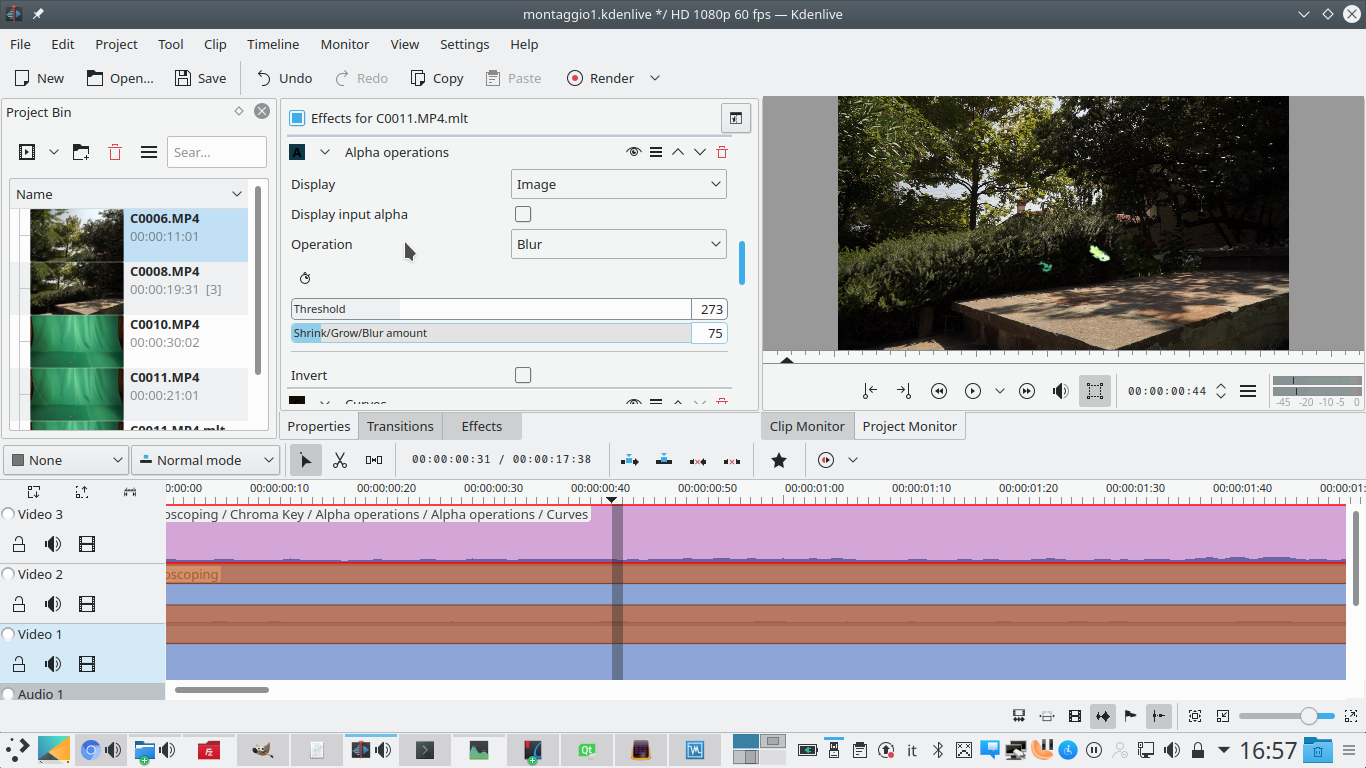 4 BLURRED EDGE – Now we need another effect Alpha operation . In this case, however, the operation must be chosen Blur , setting a amount minimum. As long as the edge is slightly shaded
  5 OVERLAP – Working on the transition, we can resize and move the image of the feather so that in the last frame it perfectly overlaps the feather in the clip of the track Video1 .
 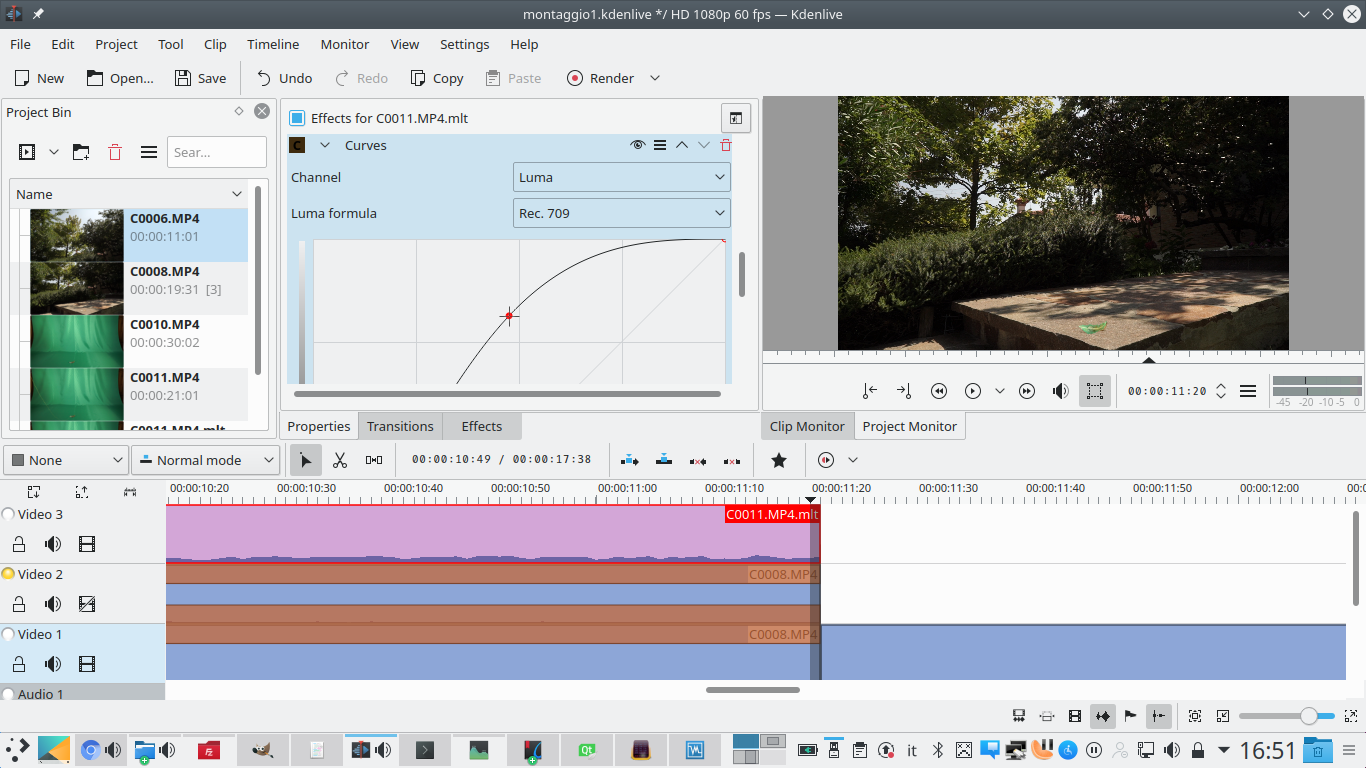 6 THE CURVES OF LIGHT– To help you overlap, simply hide the track temporarily Video2 . It is good to also adjust the brightness to make it coincide, using a type effect Curves , lowering the highlights and raising the midtones.


Pingback: Nueva página web con tutoriales para Kdenlive - KDE Blog